Last Updated on 2 years by Amelia Johansson
Are you tired of searching for a way to install Netflix addons on Kodi? If yes then this is the perfect place in today’s article I am going to share with you the whole guide to getting Netflix for Kodi. Make sure to keep reading this article until the end or you won’t be able to download it.
Also, no matter if you are using a Windows PC, Mac, Android or iOS device, Linux or any other supported device. You can simply read all the steps provided here and you will be able to stream all of your favourite TV Shows and Movies on various platforms.
Please keep in mind that Kodi is also available for Firestick 4K, FireTV Cube and FireTV Lite. You need to first jailbreak it and then install it by following this guide: How to Install Kodi on Firestick Step-By-Step
How To Install Netflix On Kodi
There is no need to know about Netflix as we already know this is a huge streaming platform to watch many Web-Series, TV Shows and Movies as well. You can install the official application of this streaming platform on different OS including FireTV OS, Android OS, iOS, Roku OS and so on.
Although there is no app available for Linux, Windows or Mac that’s why they require to use the web browser instead. But now Netflix is available in the form of an Addon for Kodi users who don’t want to use a web browser.
Before we move to the installation section we first need to enable the installation of an Unknown source on Kodi. It is because by default you cannot install any 3rd-party Add-on and Netflix isn’t officially available on the Kodi repository yet.
So, to enable installation of Unknown Source just follow given below steps:
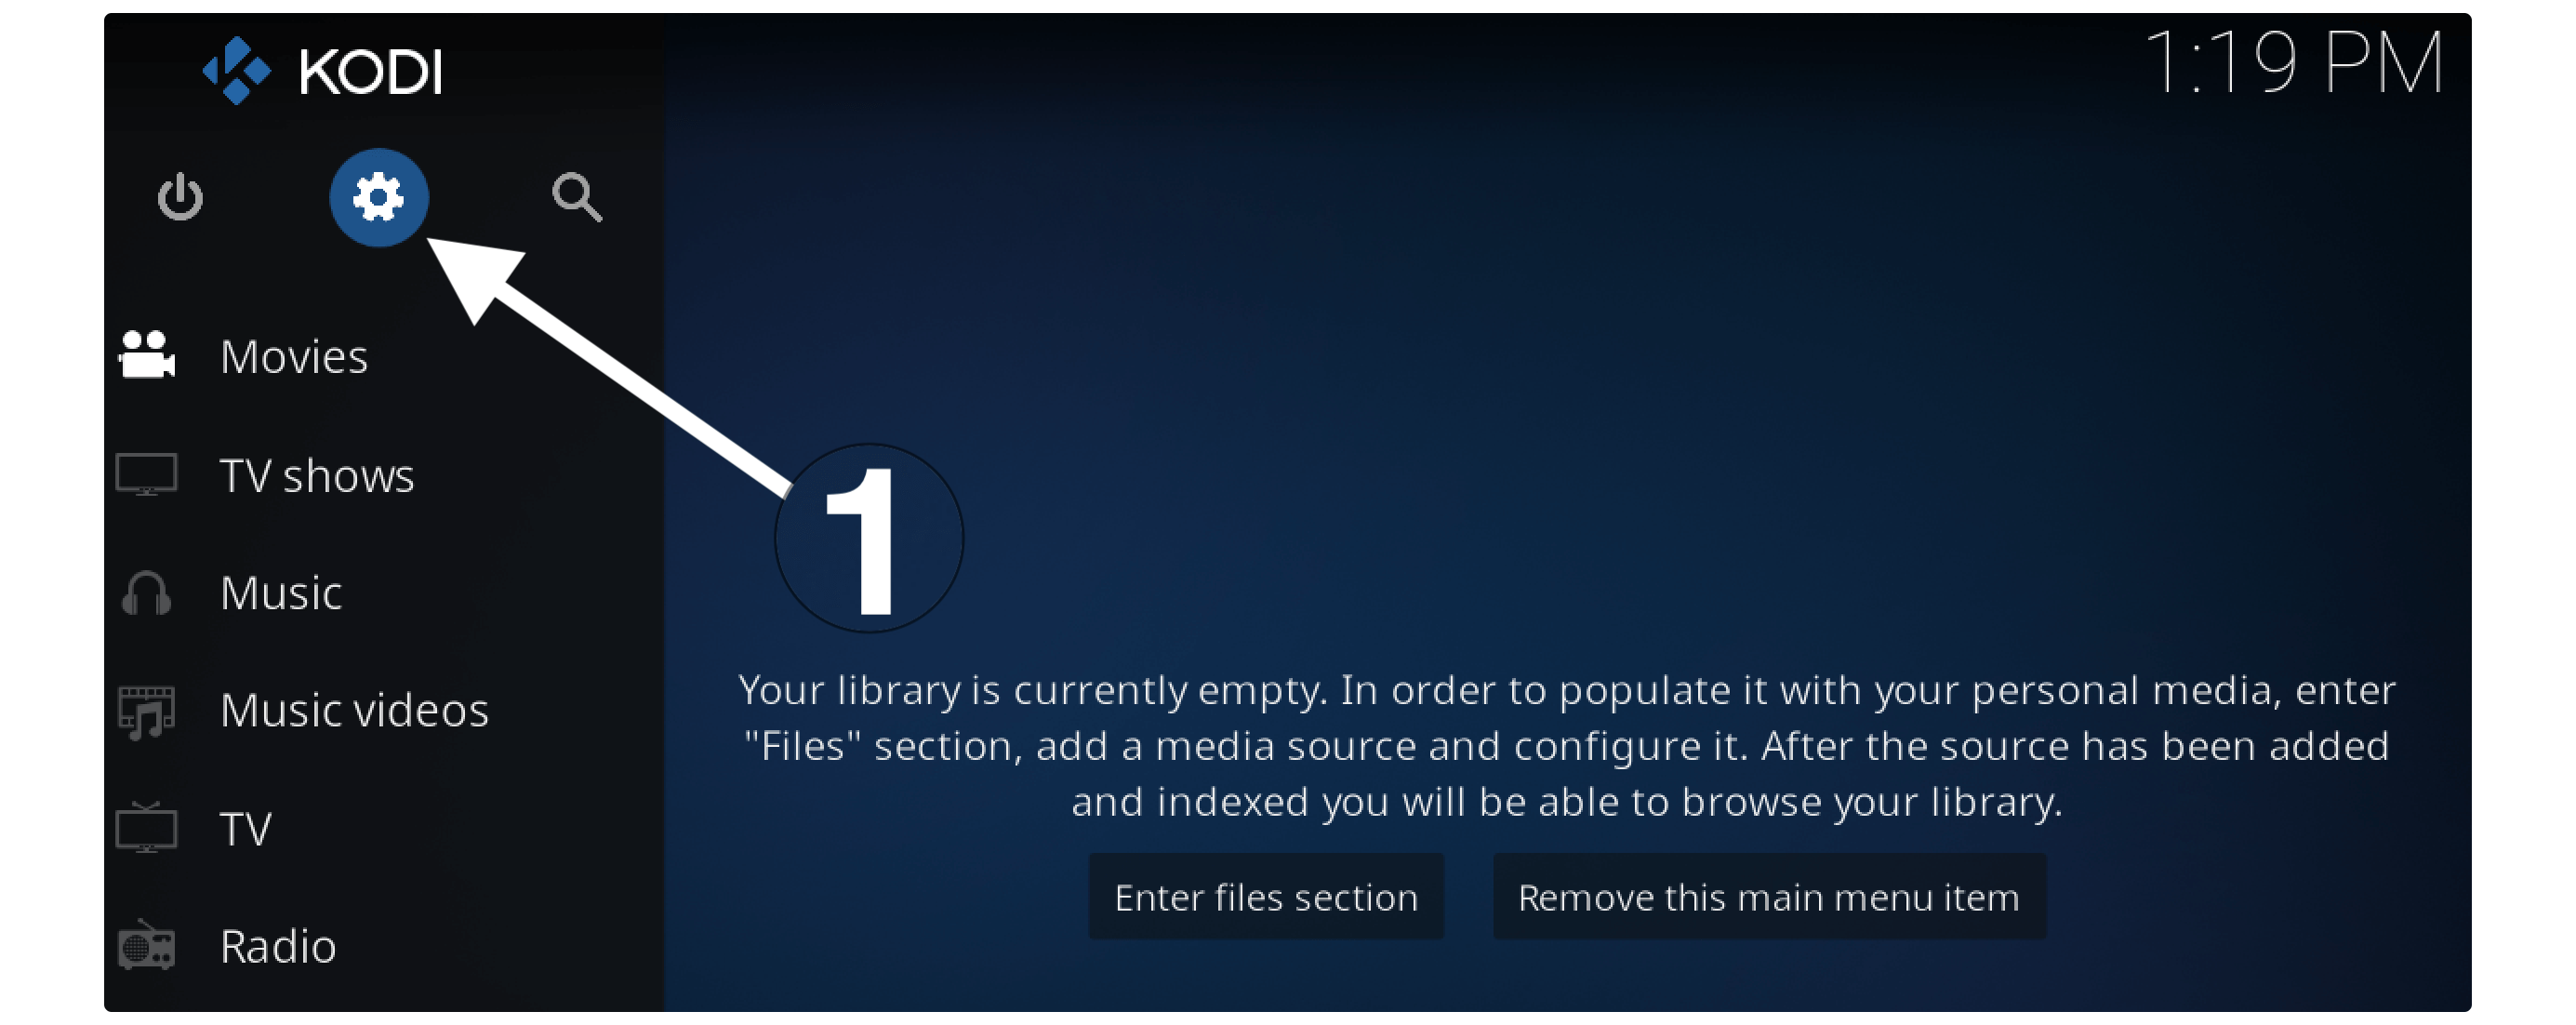
Launch Kodi on the device you are using and from the Home, Screen clicks on the Gear icon next to the Power button.
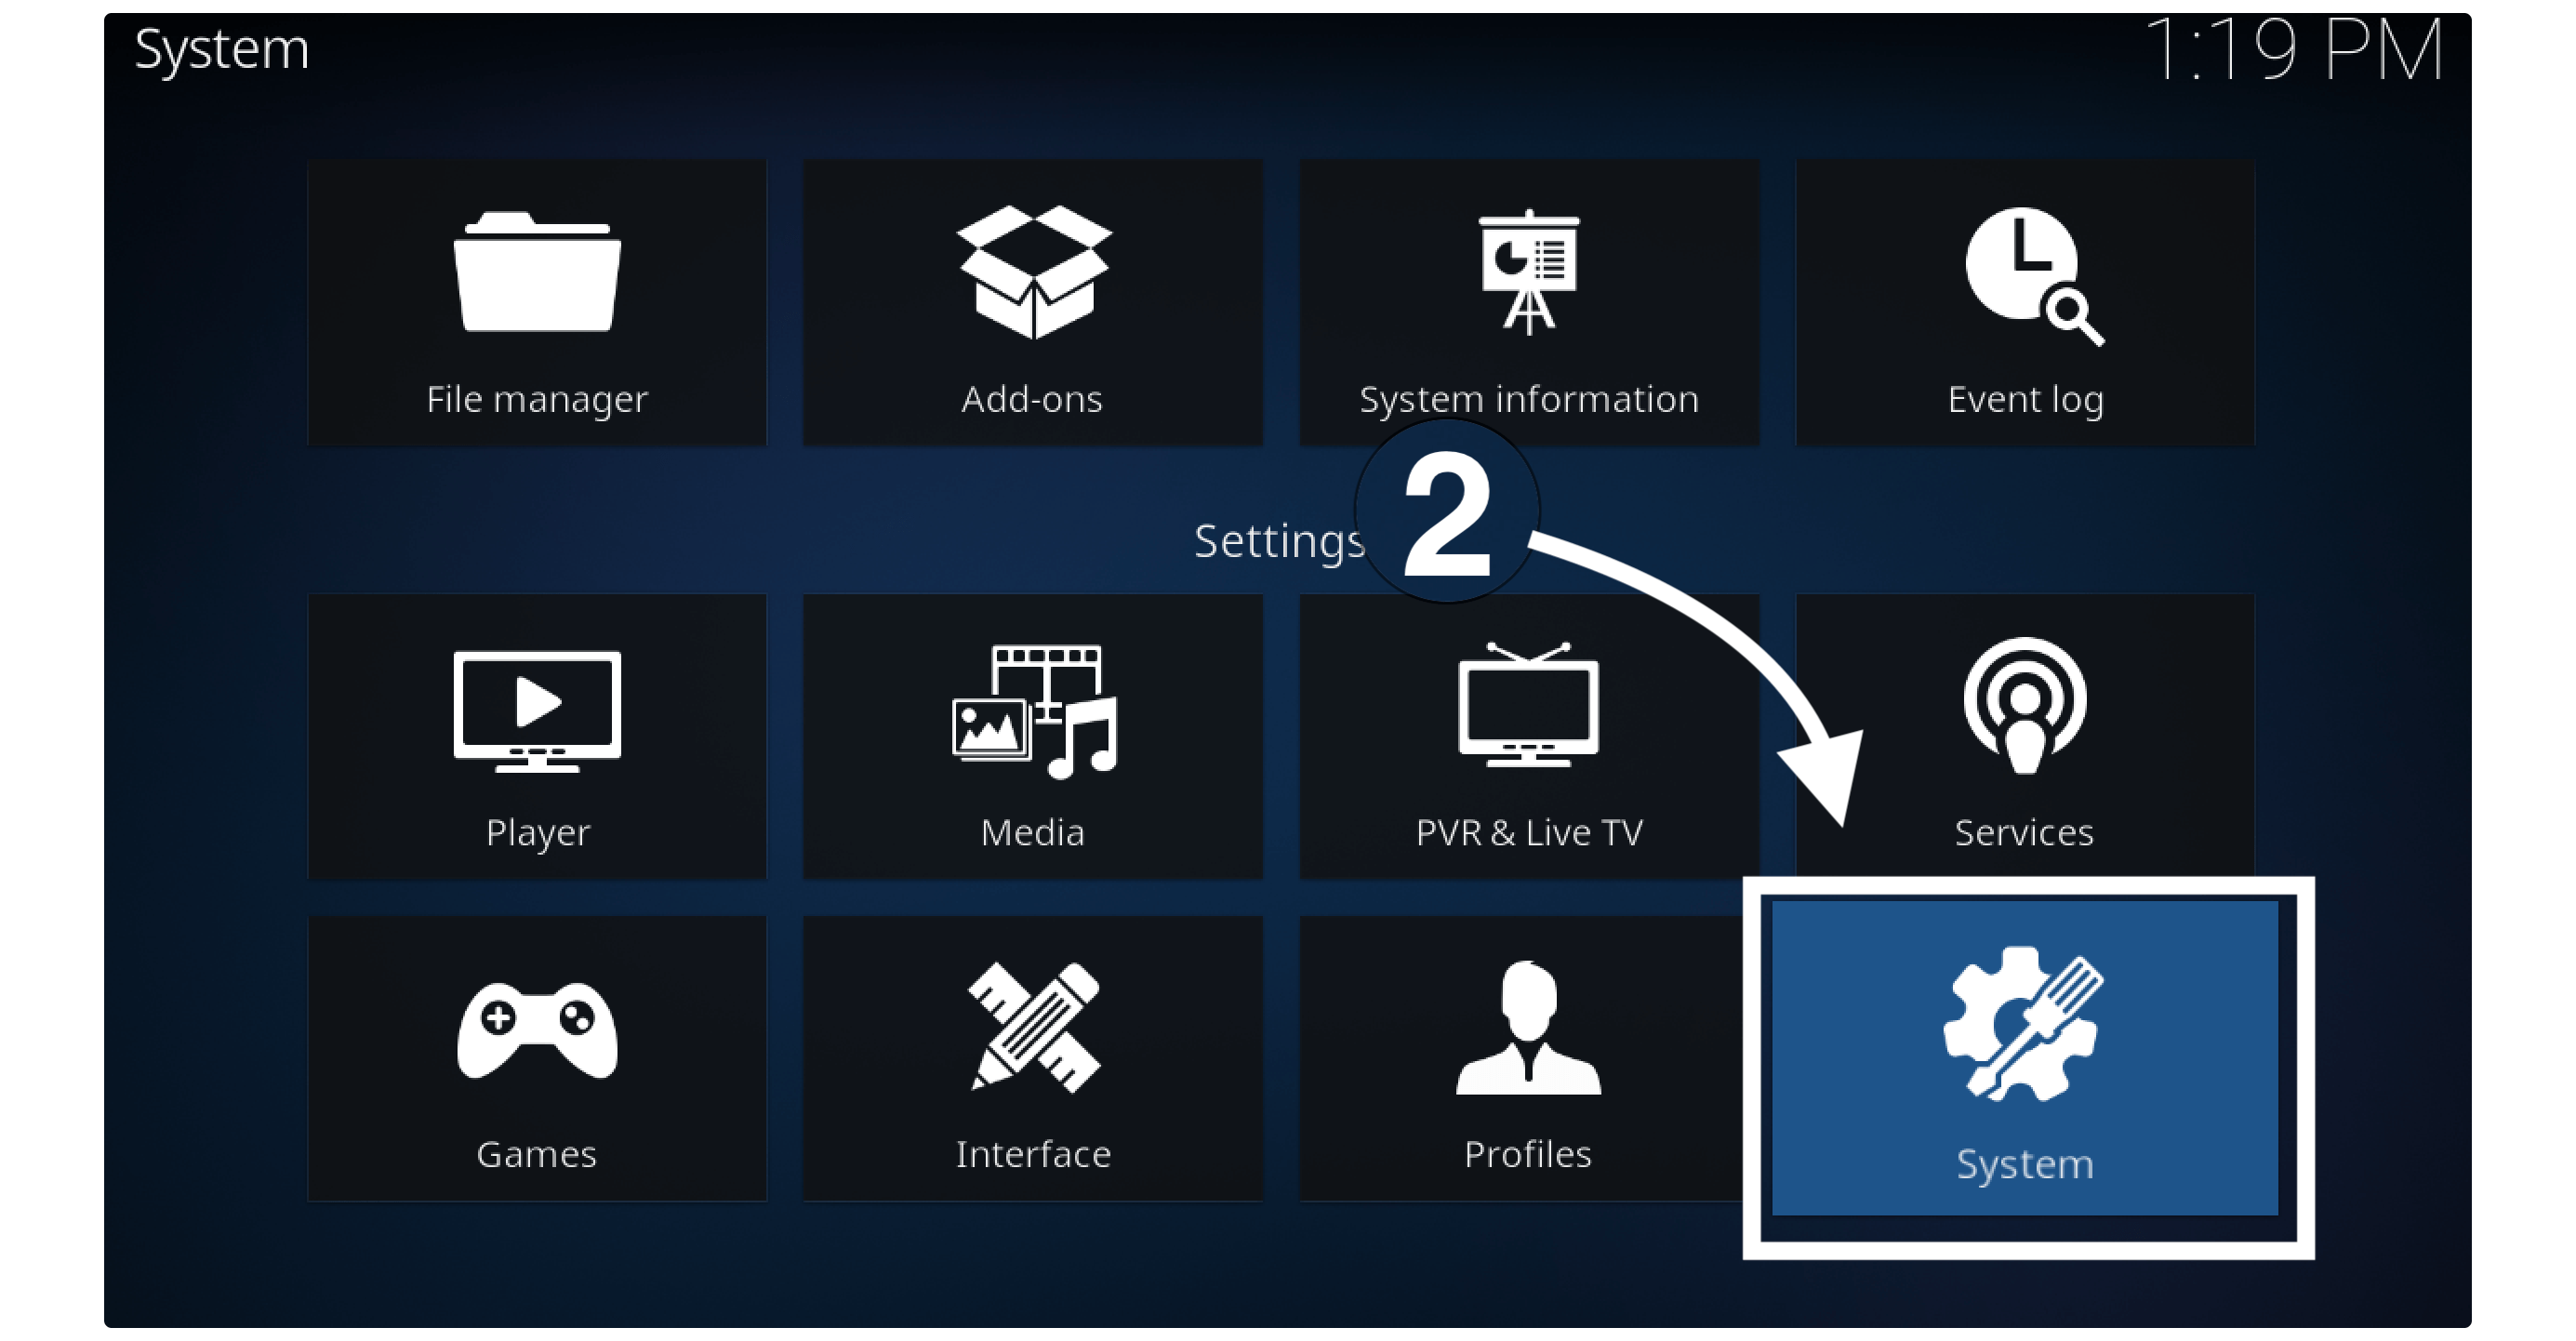
After this click on the System Settings located at the bottom.
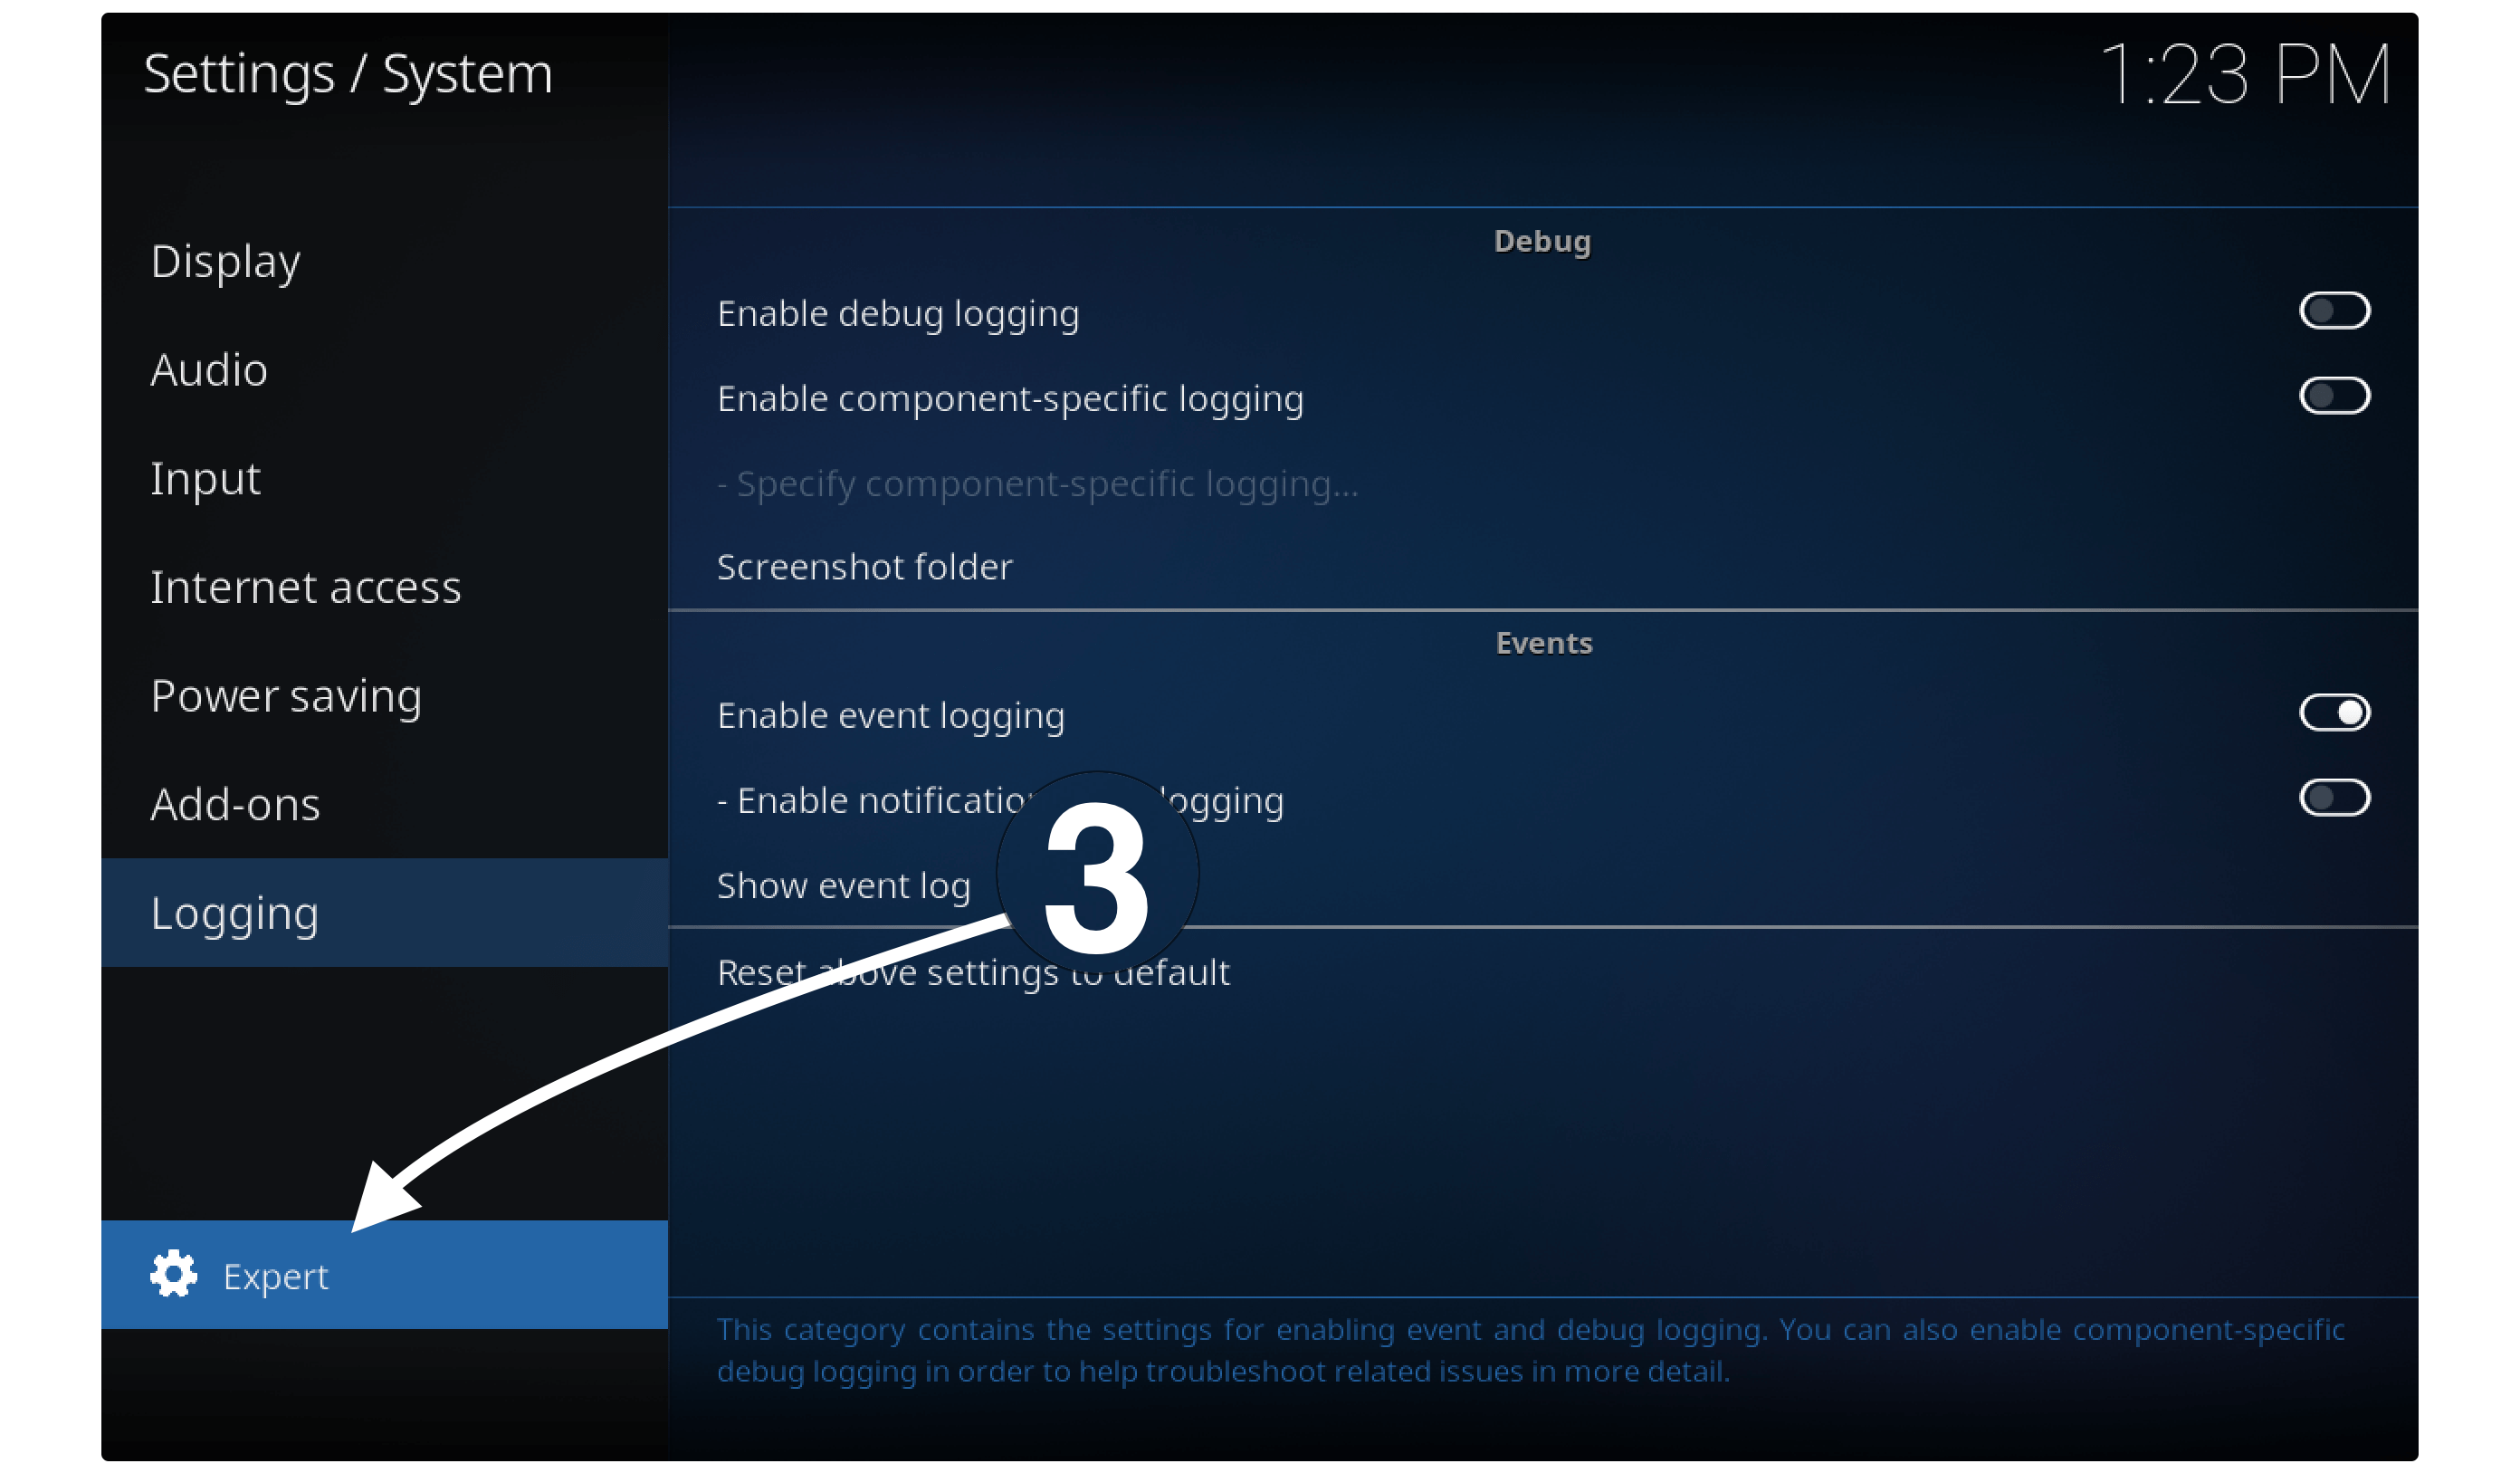
Now from the left panel click on Basic and change it to Advanced or Expert.
At this time choose Add-ons from the left-hand side and then from the right side enable Unknown Sources.
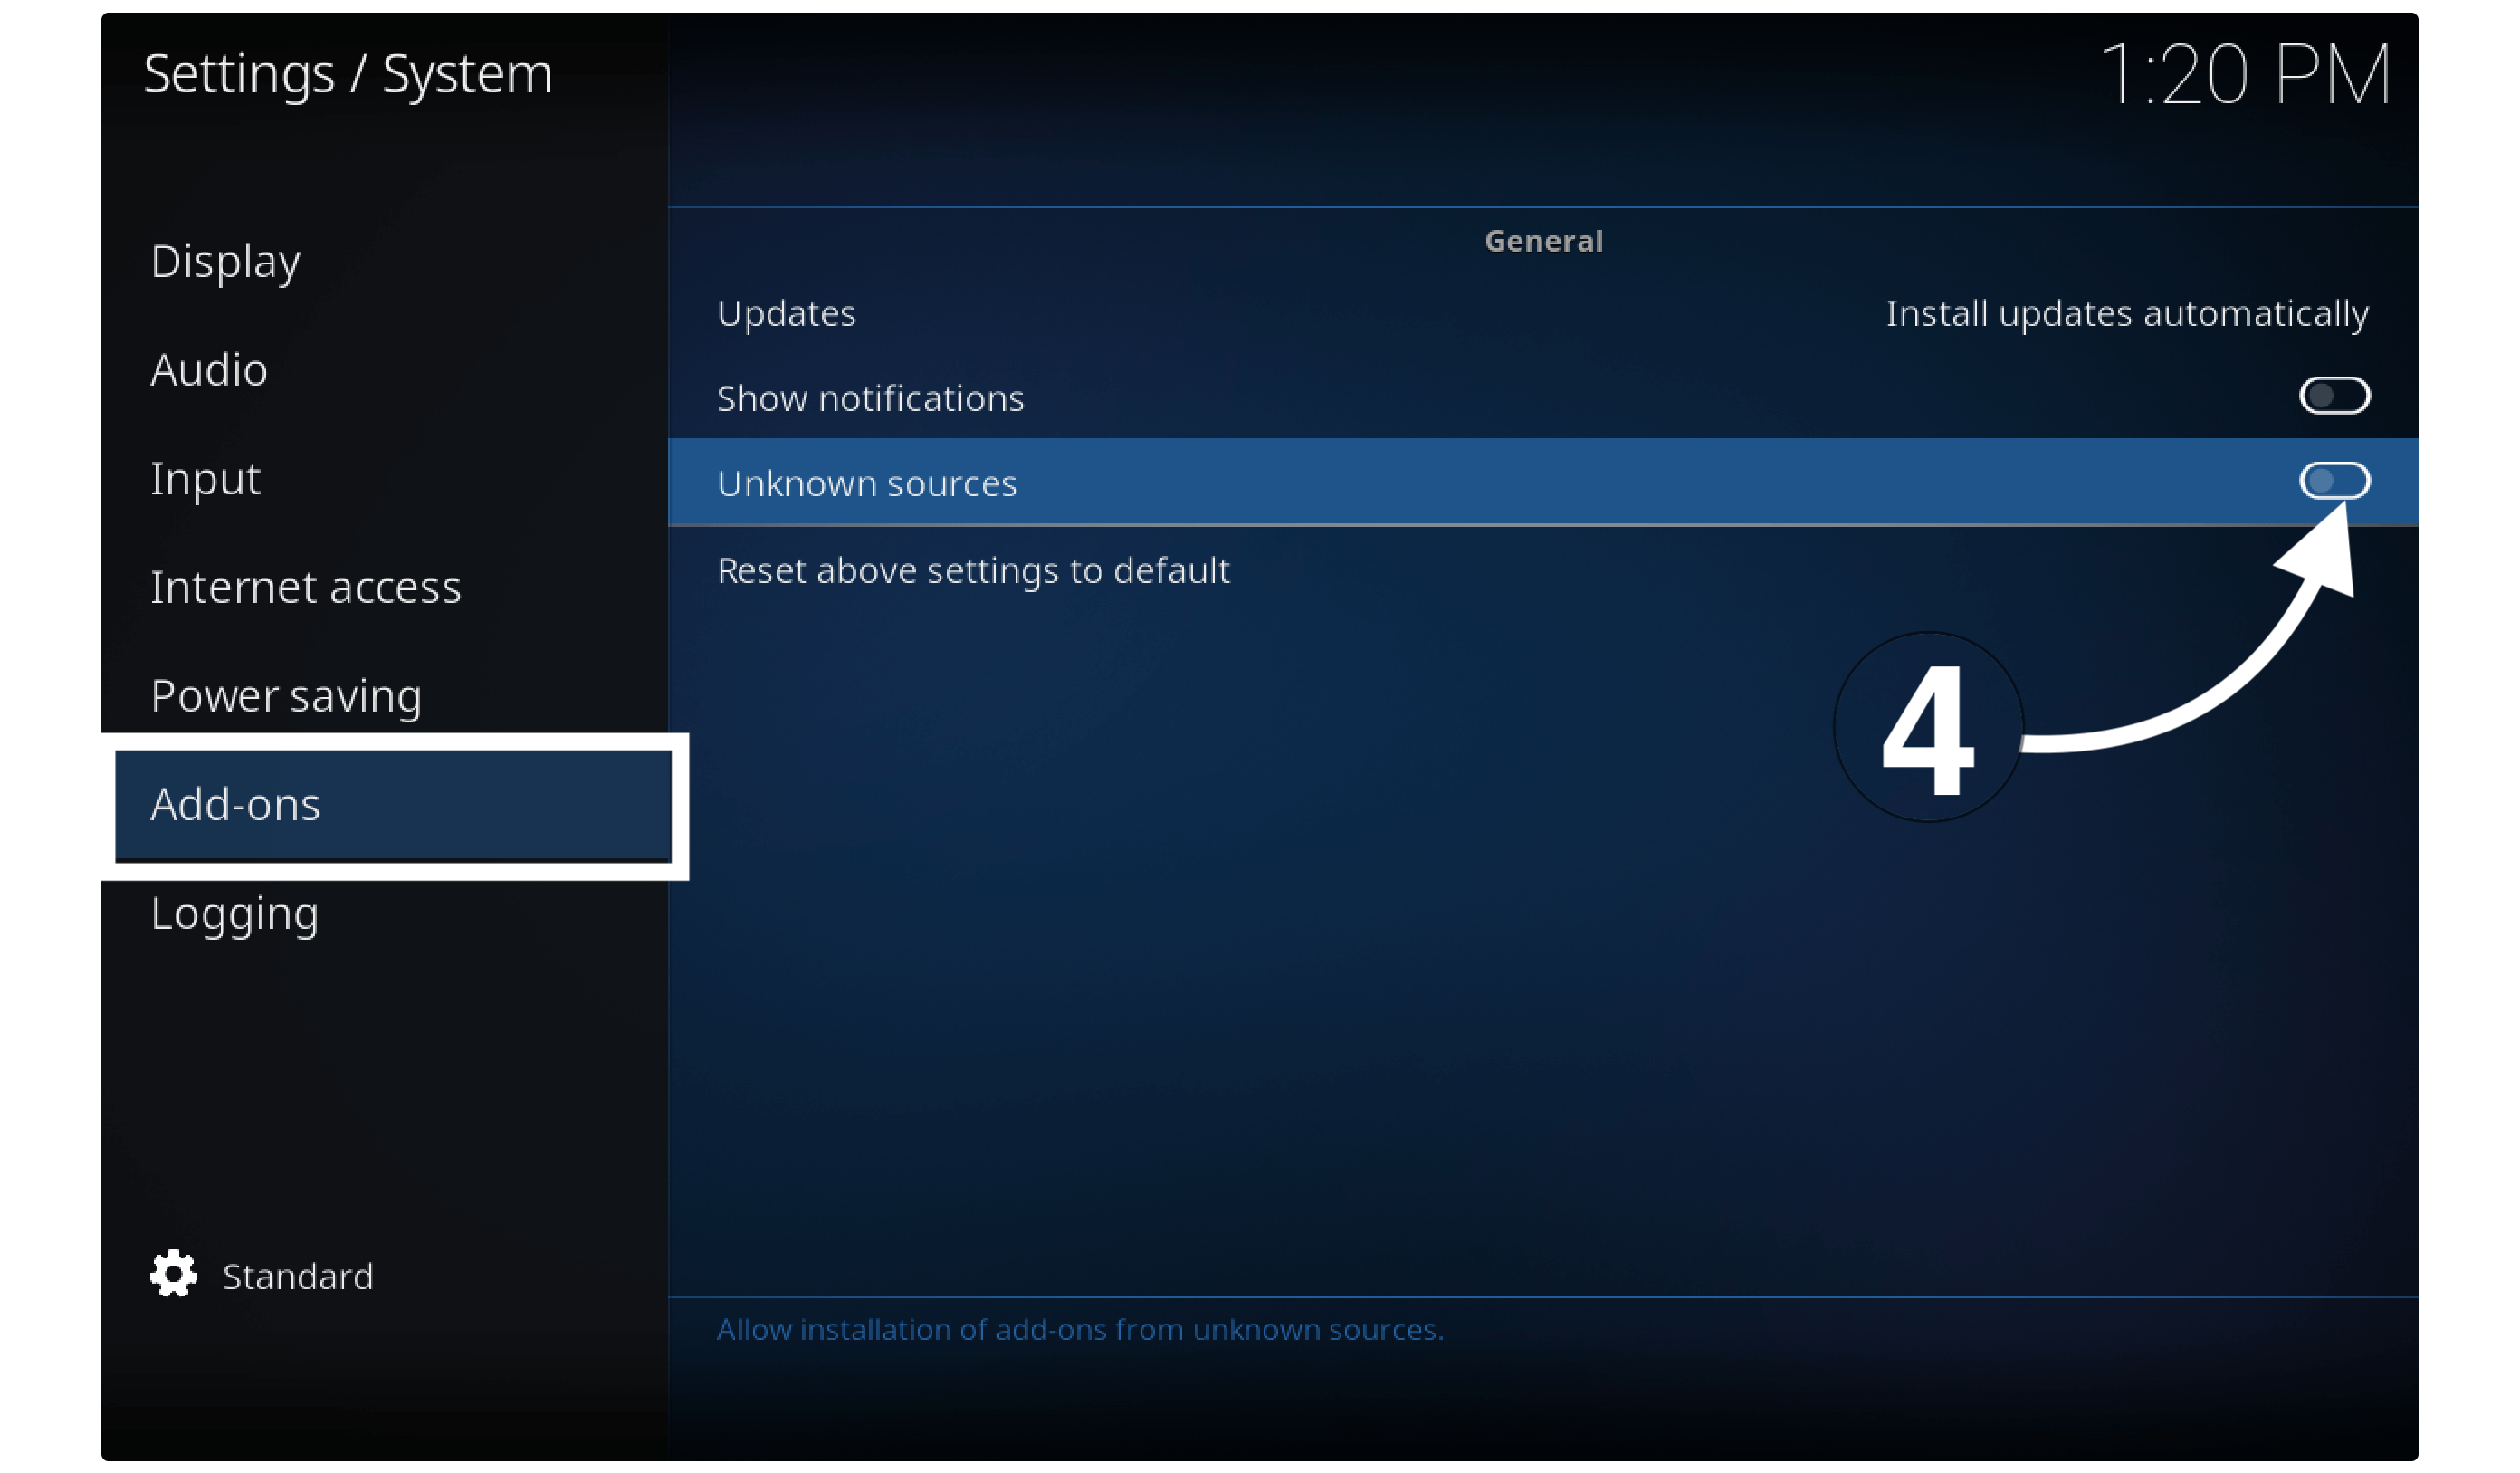
Once you click on it a warning message will appear so just ignore it and select Yes.

Now the Unknown Source has been enabled on Kodi and now we can move towards the installation section. So, please make sure to check all the steps carefully although you may end up having some sort of problems.
Once you are ready you can simply follow the given below steps to install Netflix Addon on Kodi:
From Home Screen on Kodi again open the Settings by clicking on the Gear icon.

At this time open the File Manager.
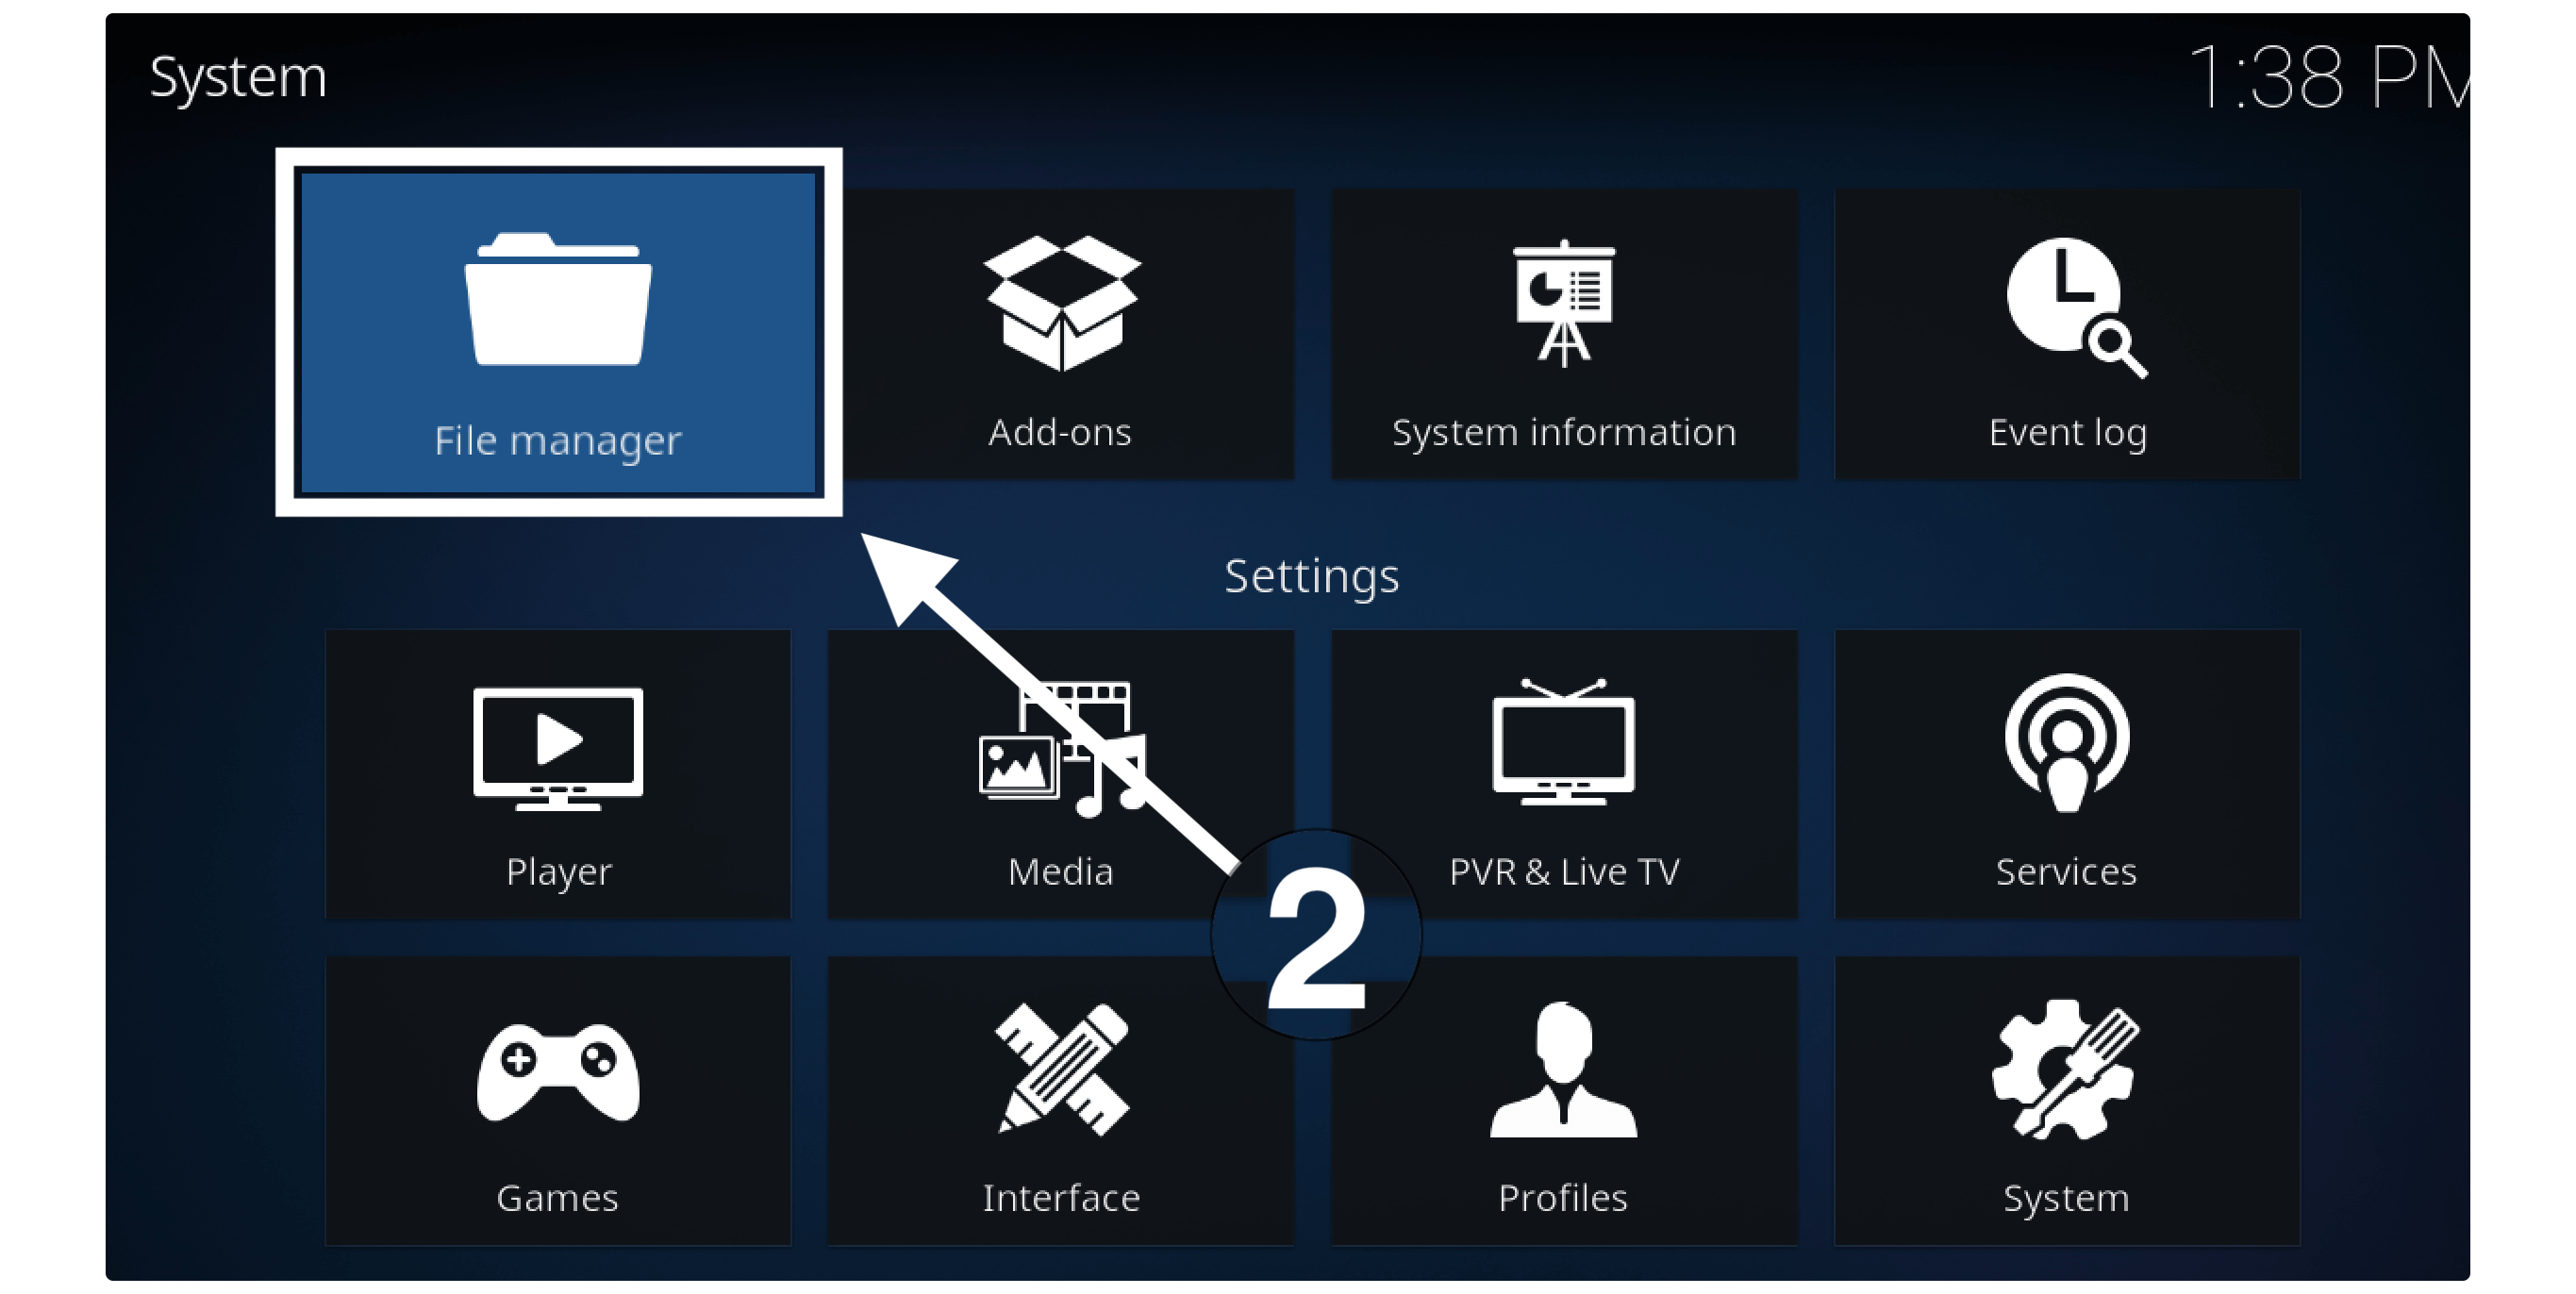
After this just click on the Add Source option from left or right.

Now a box will appear so click on the None-.

On the next screen, you need to type http://fusion.tvaddons.co and click Ok.
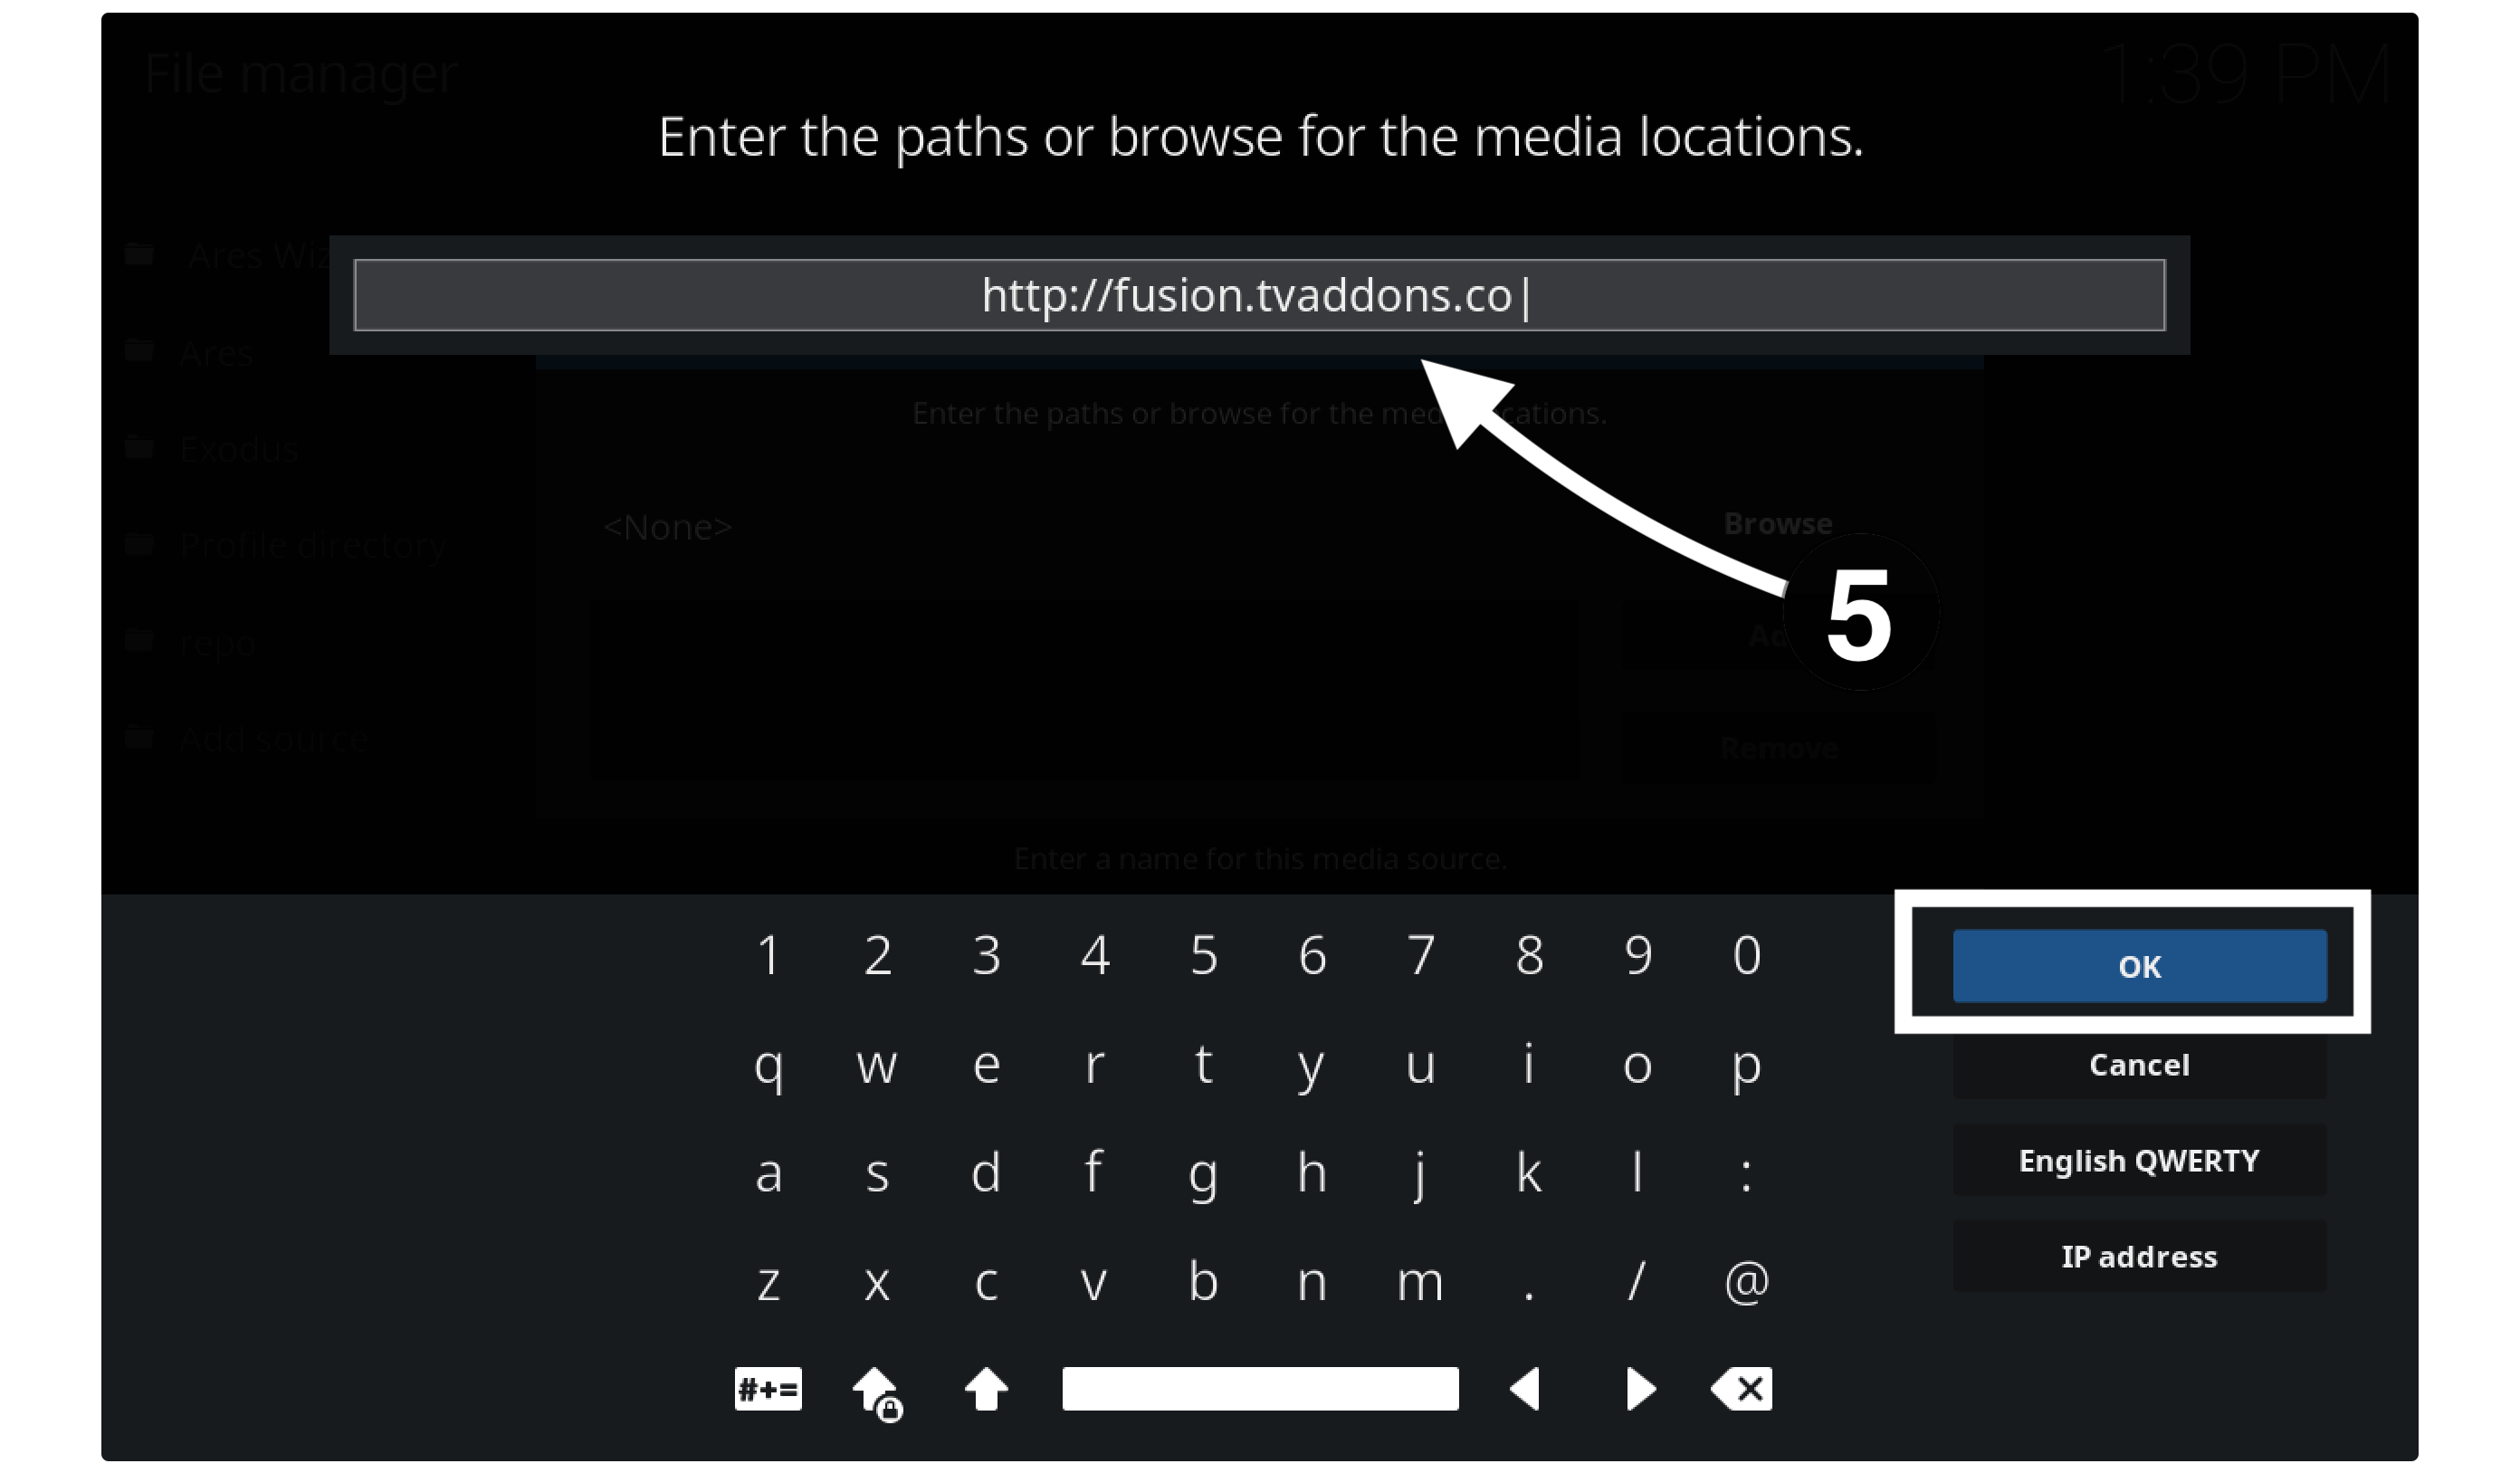
After this type the name of that source as Netflix so we can remember it later and again click Ok to save it.

Go back to the setting there and select the Package installer or the Box icon located near the Gear icon.
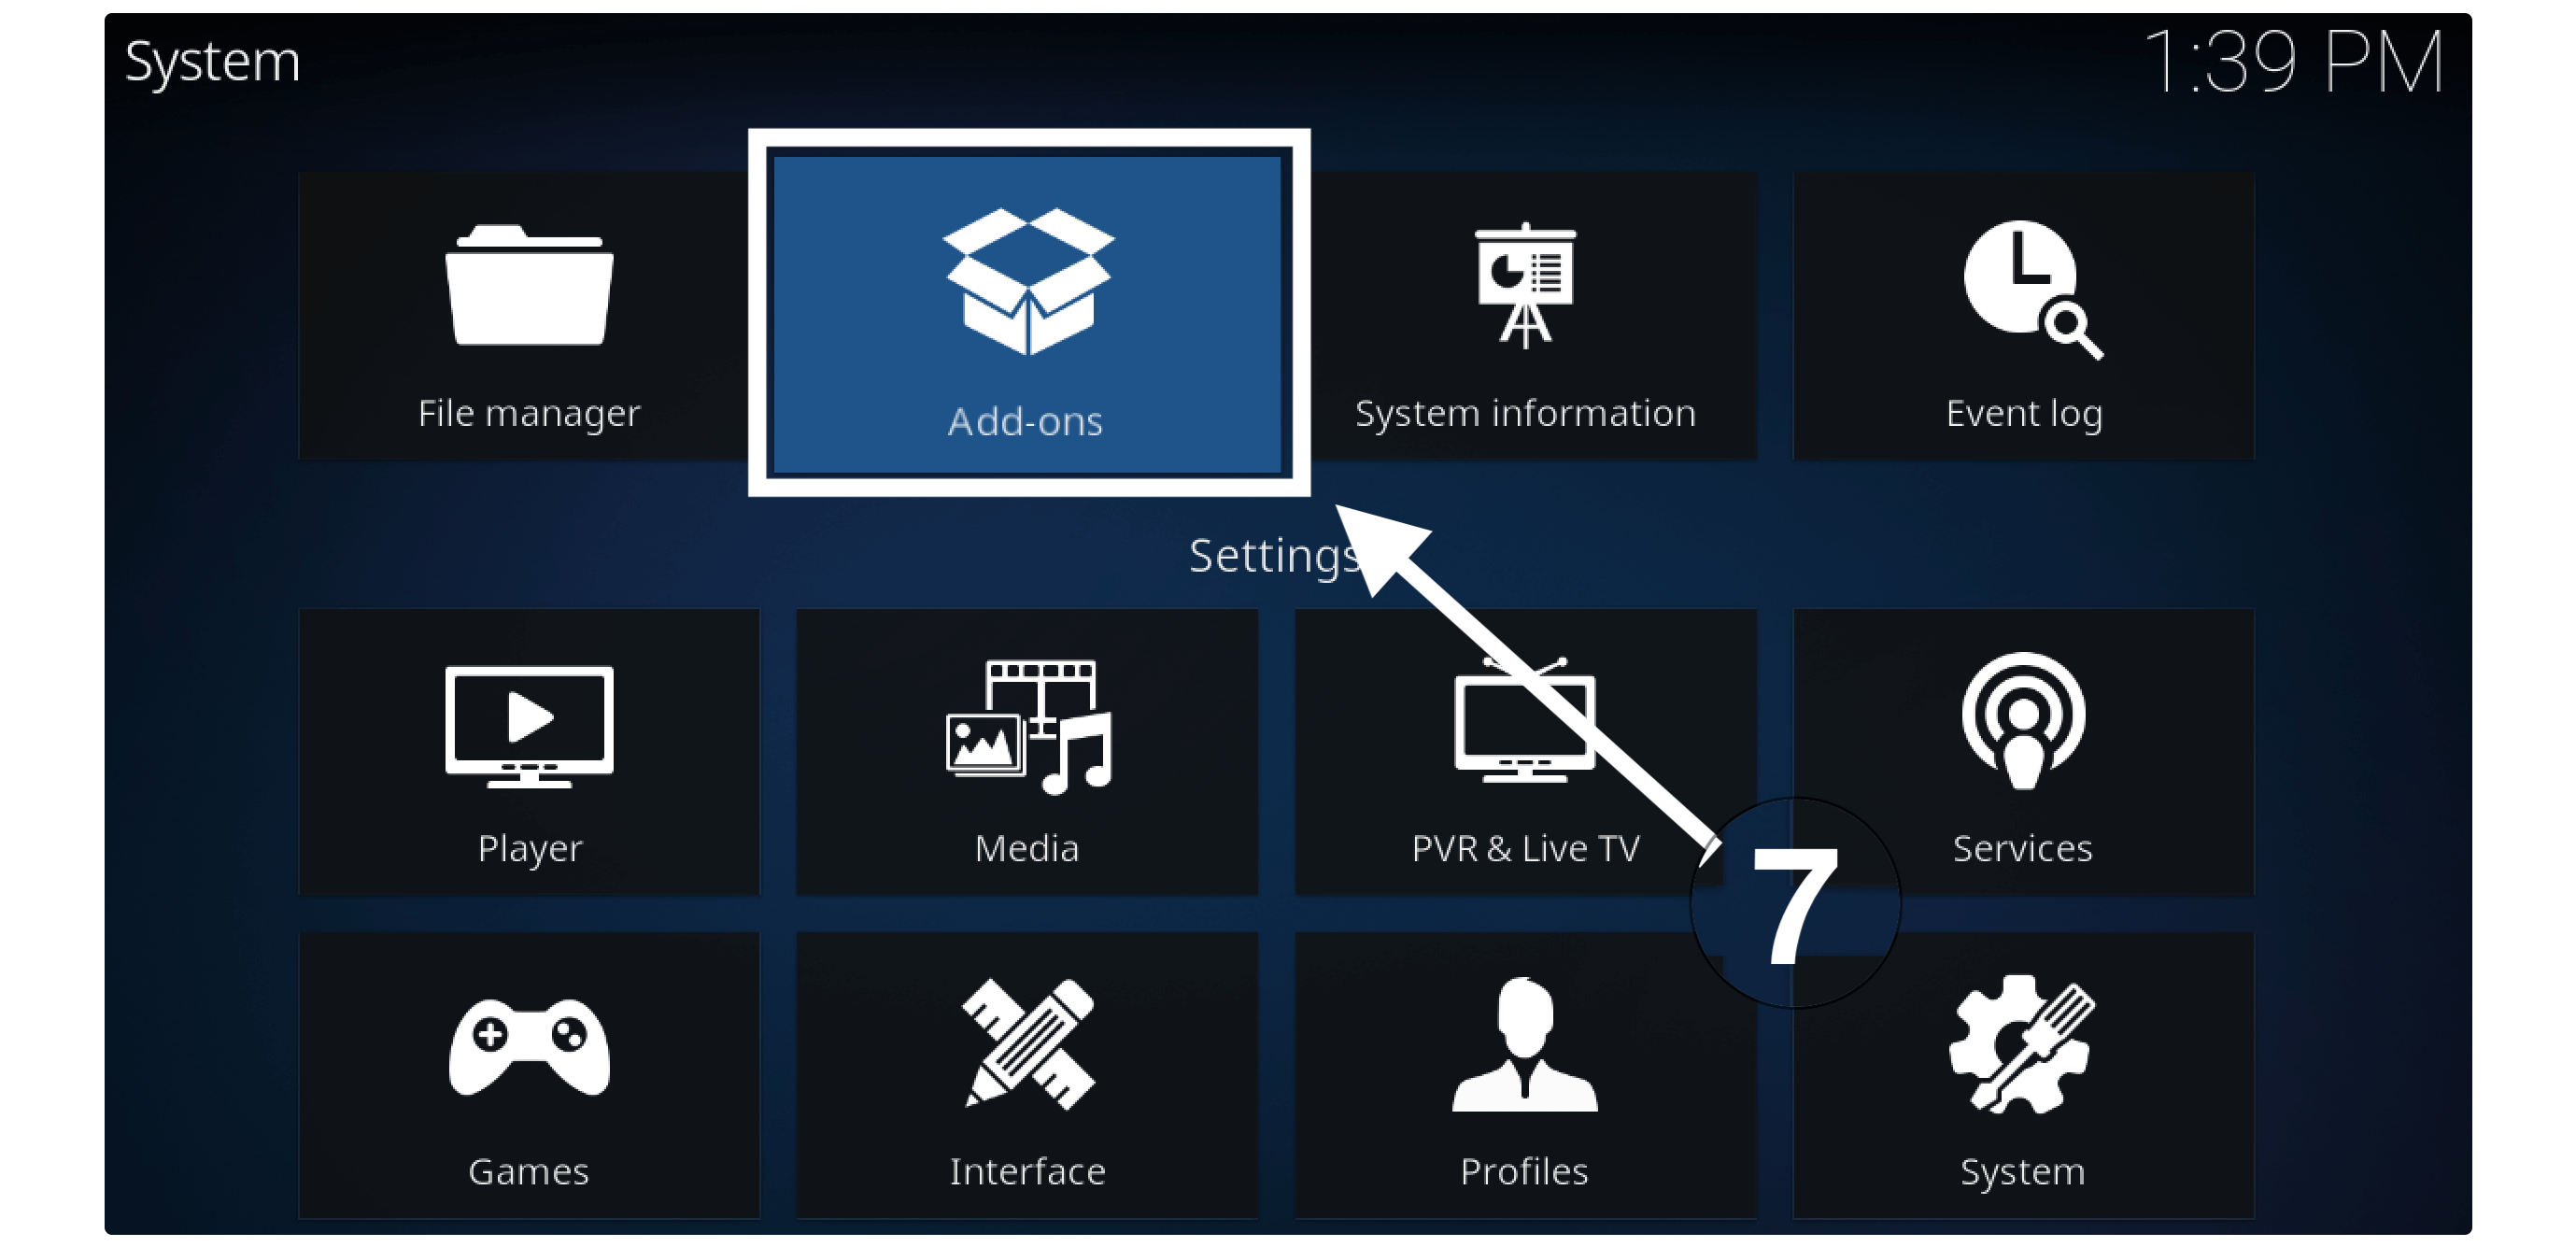
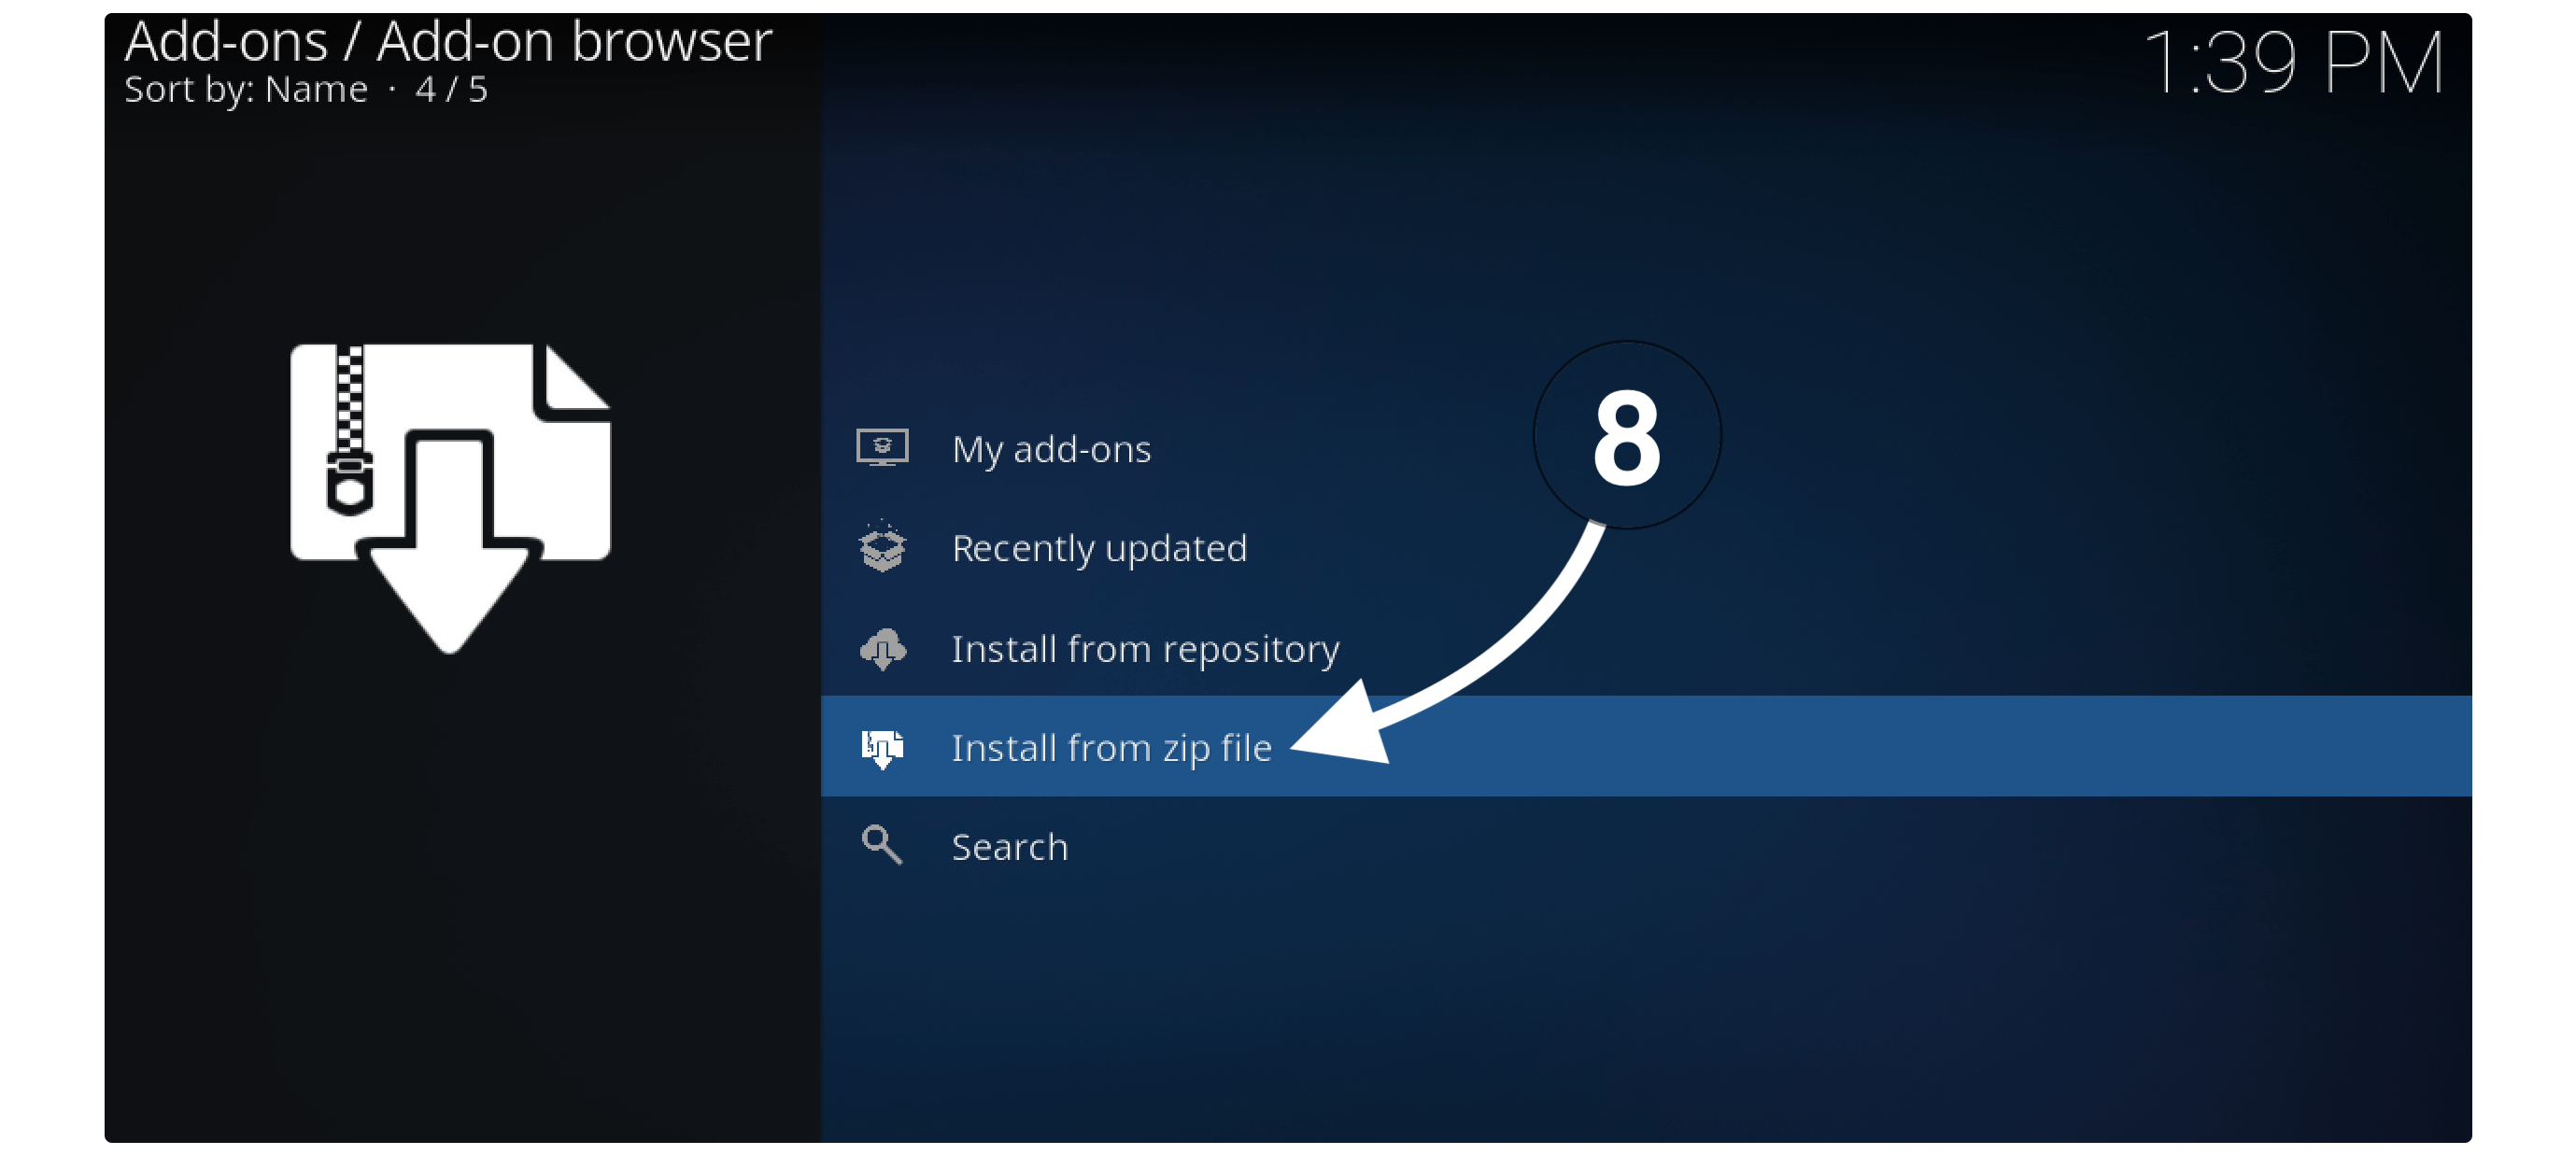
From here you need to click on the Install from Zip File.
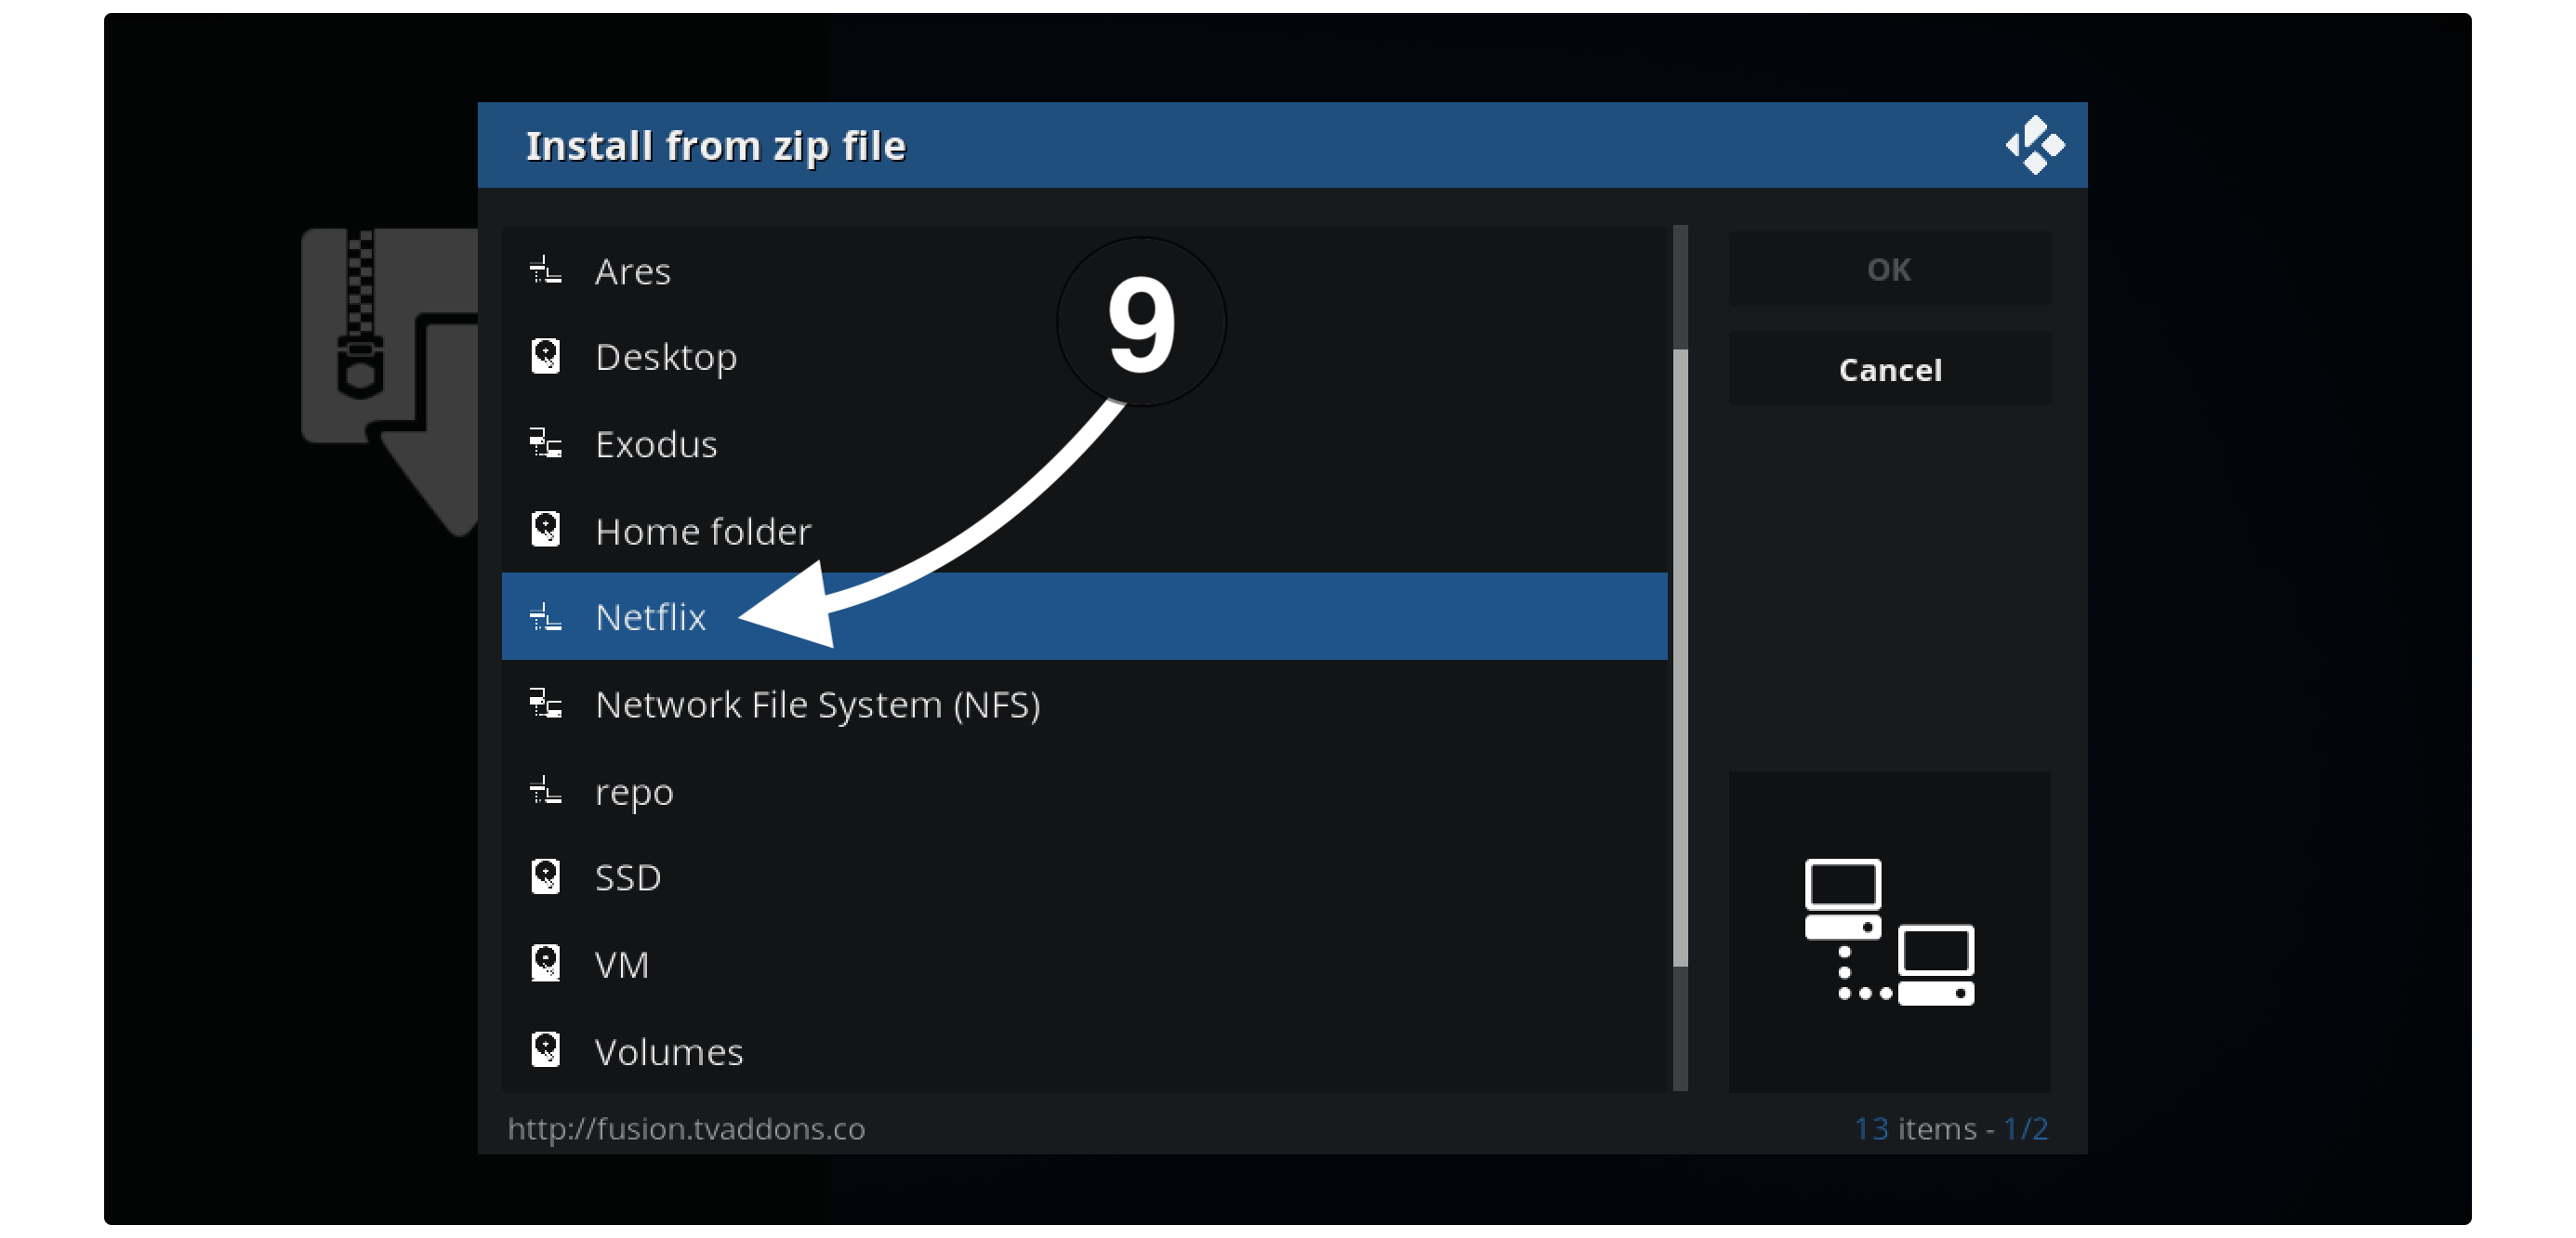
It will open a pop-up window and from here just select the name that you typed in Step 6 in my case it is Netflix.
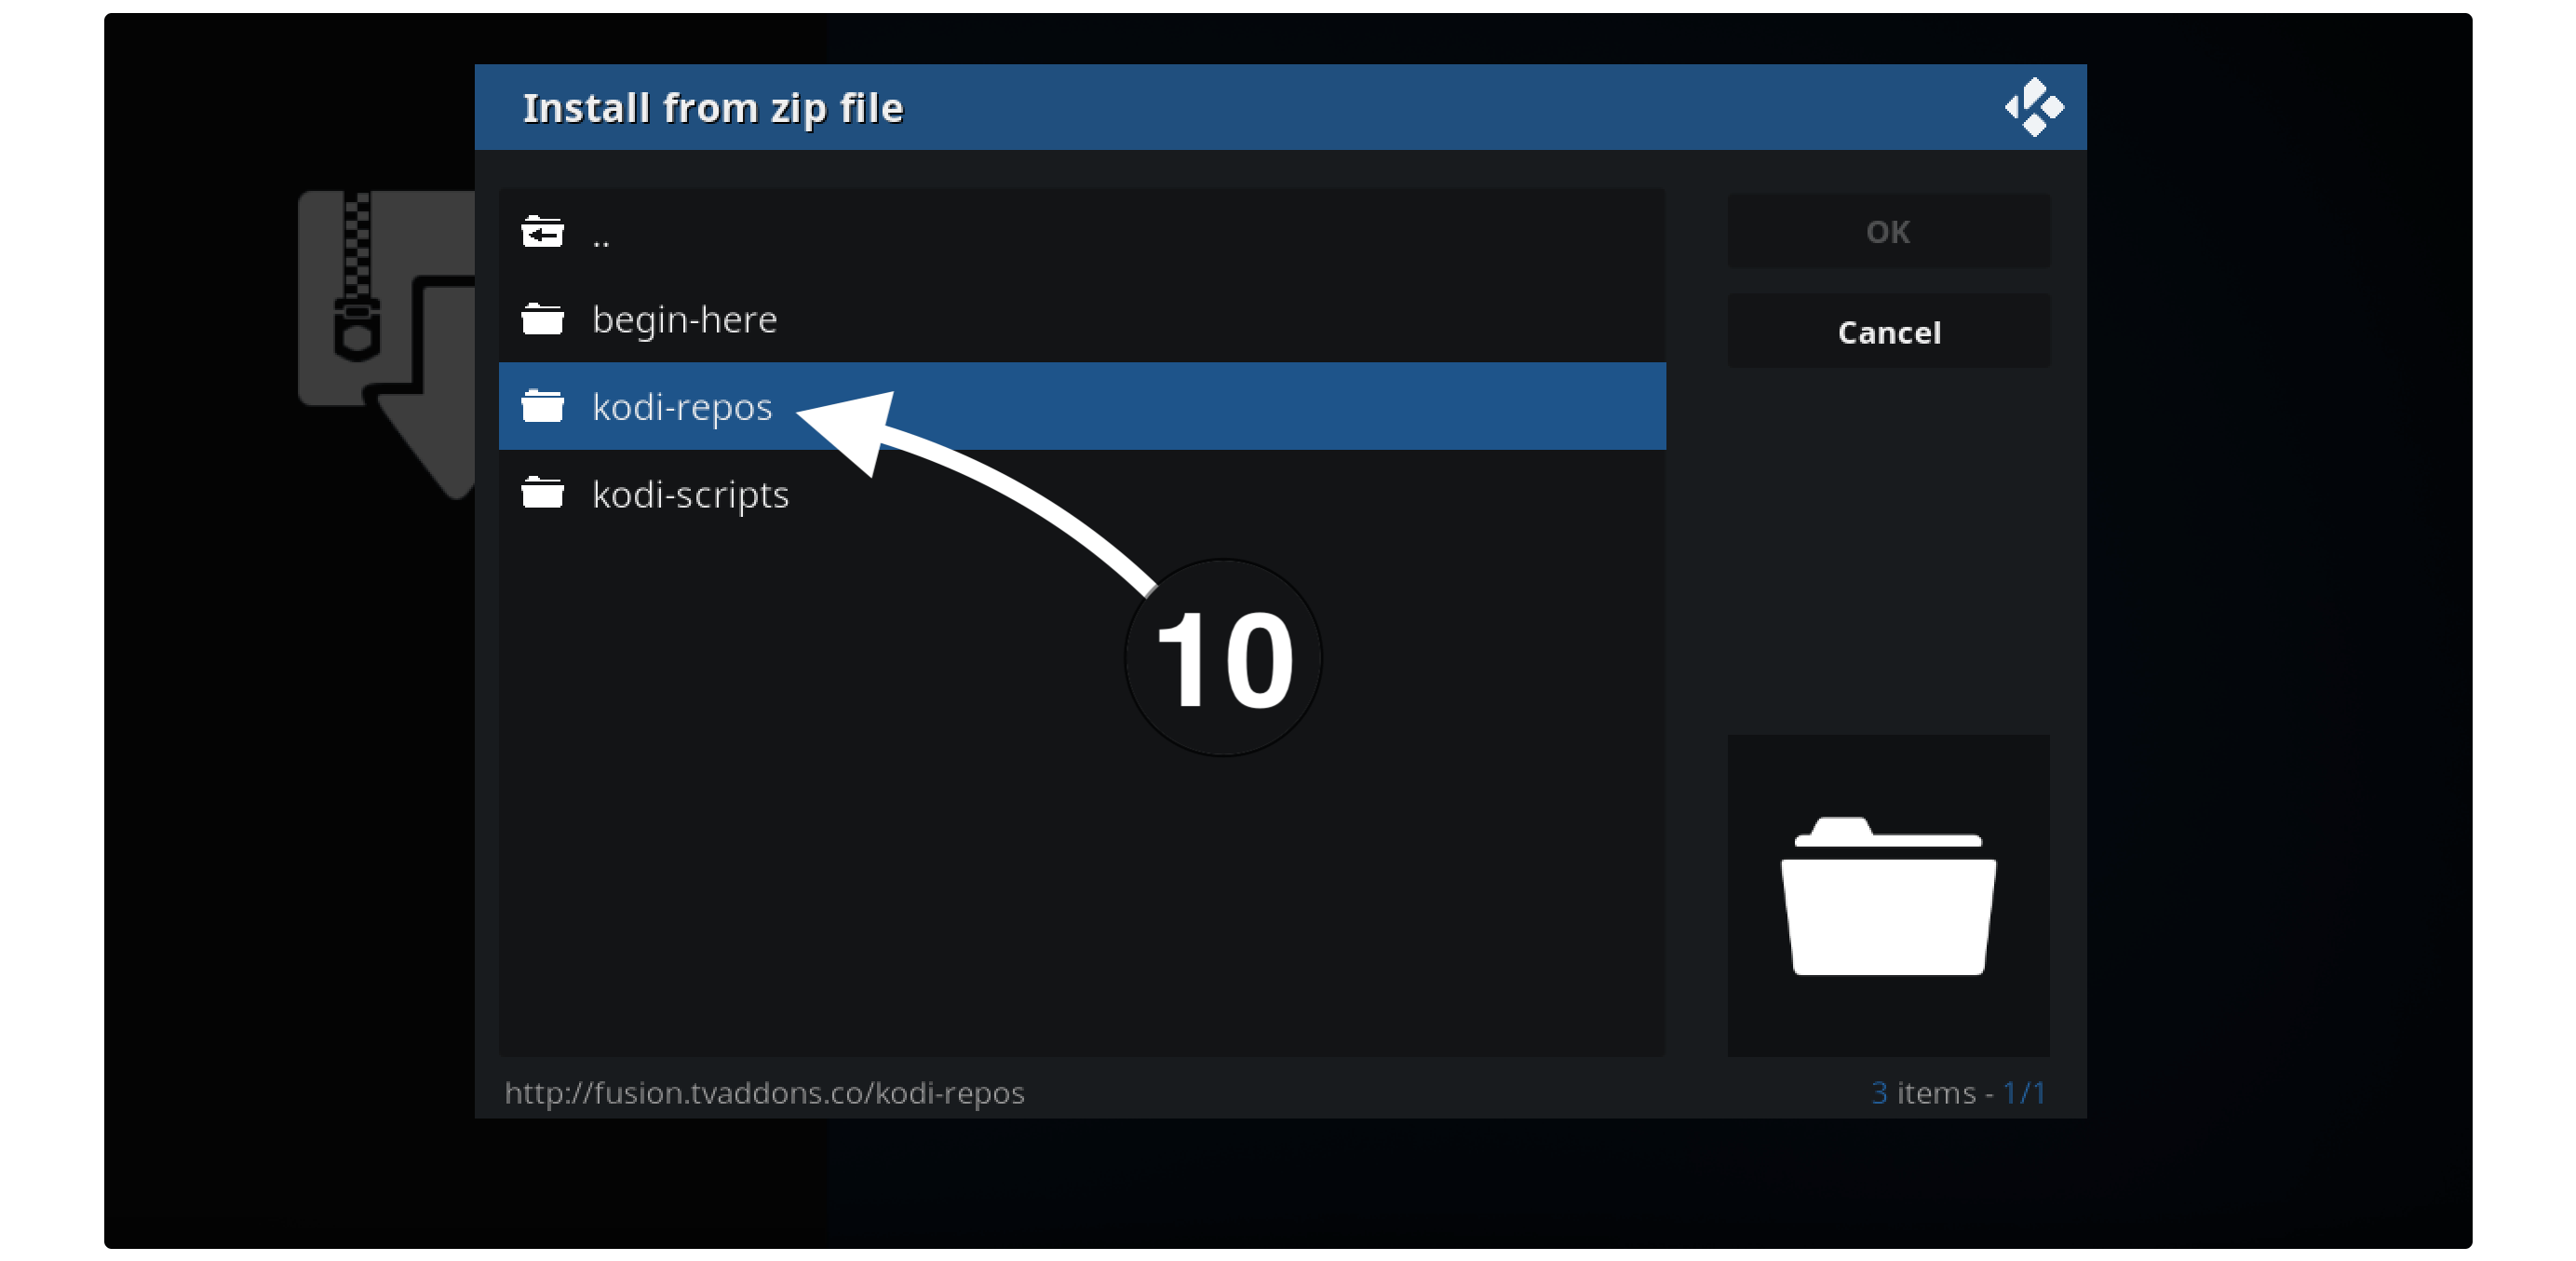
Once opening it you will see several other folders so now open the Kodi–repo folder.
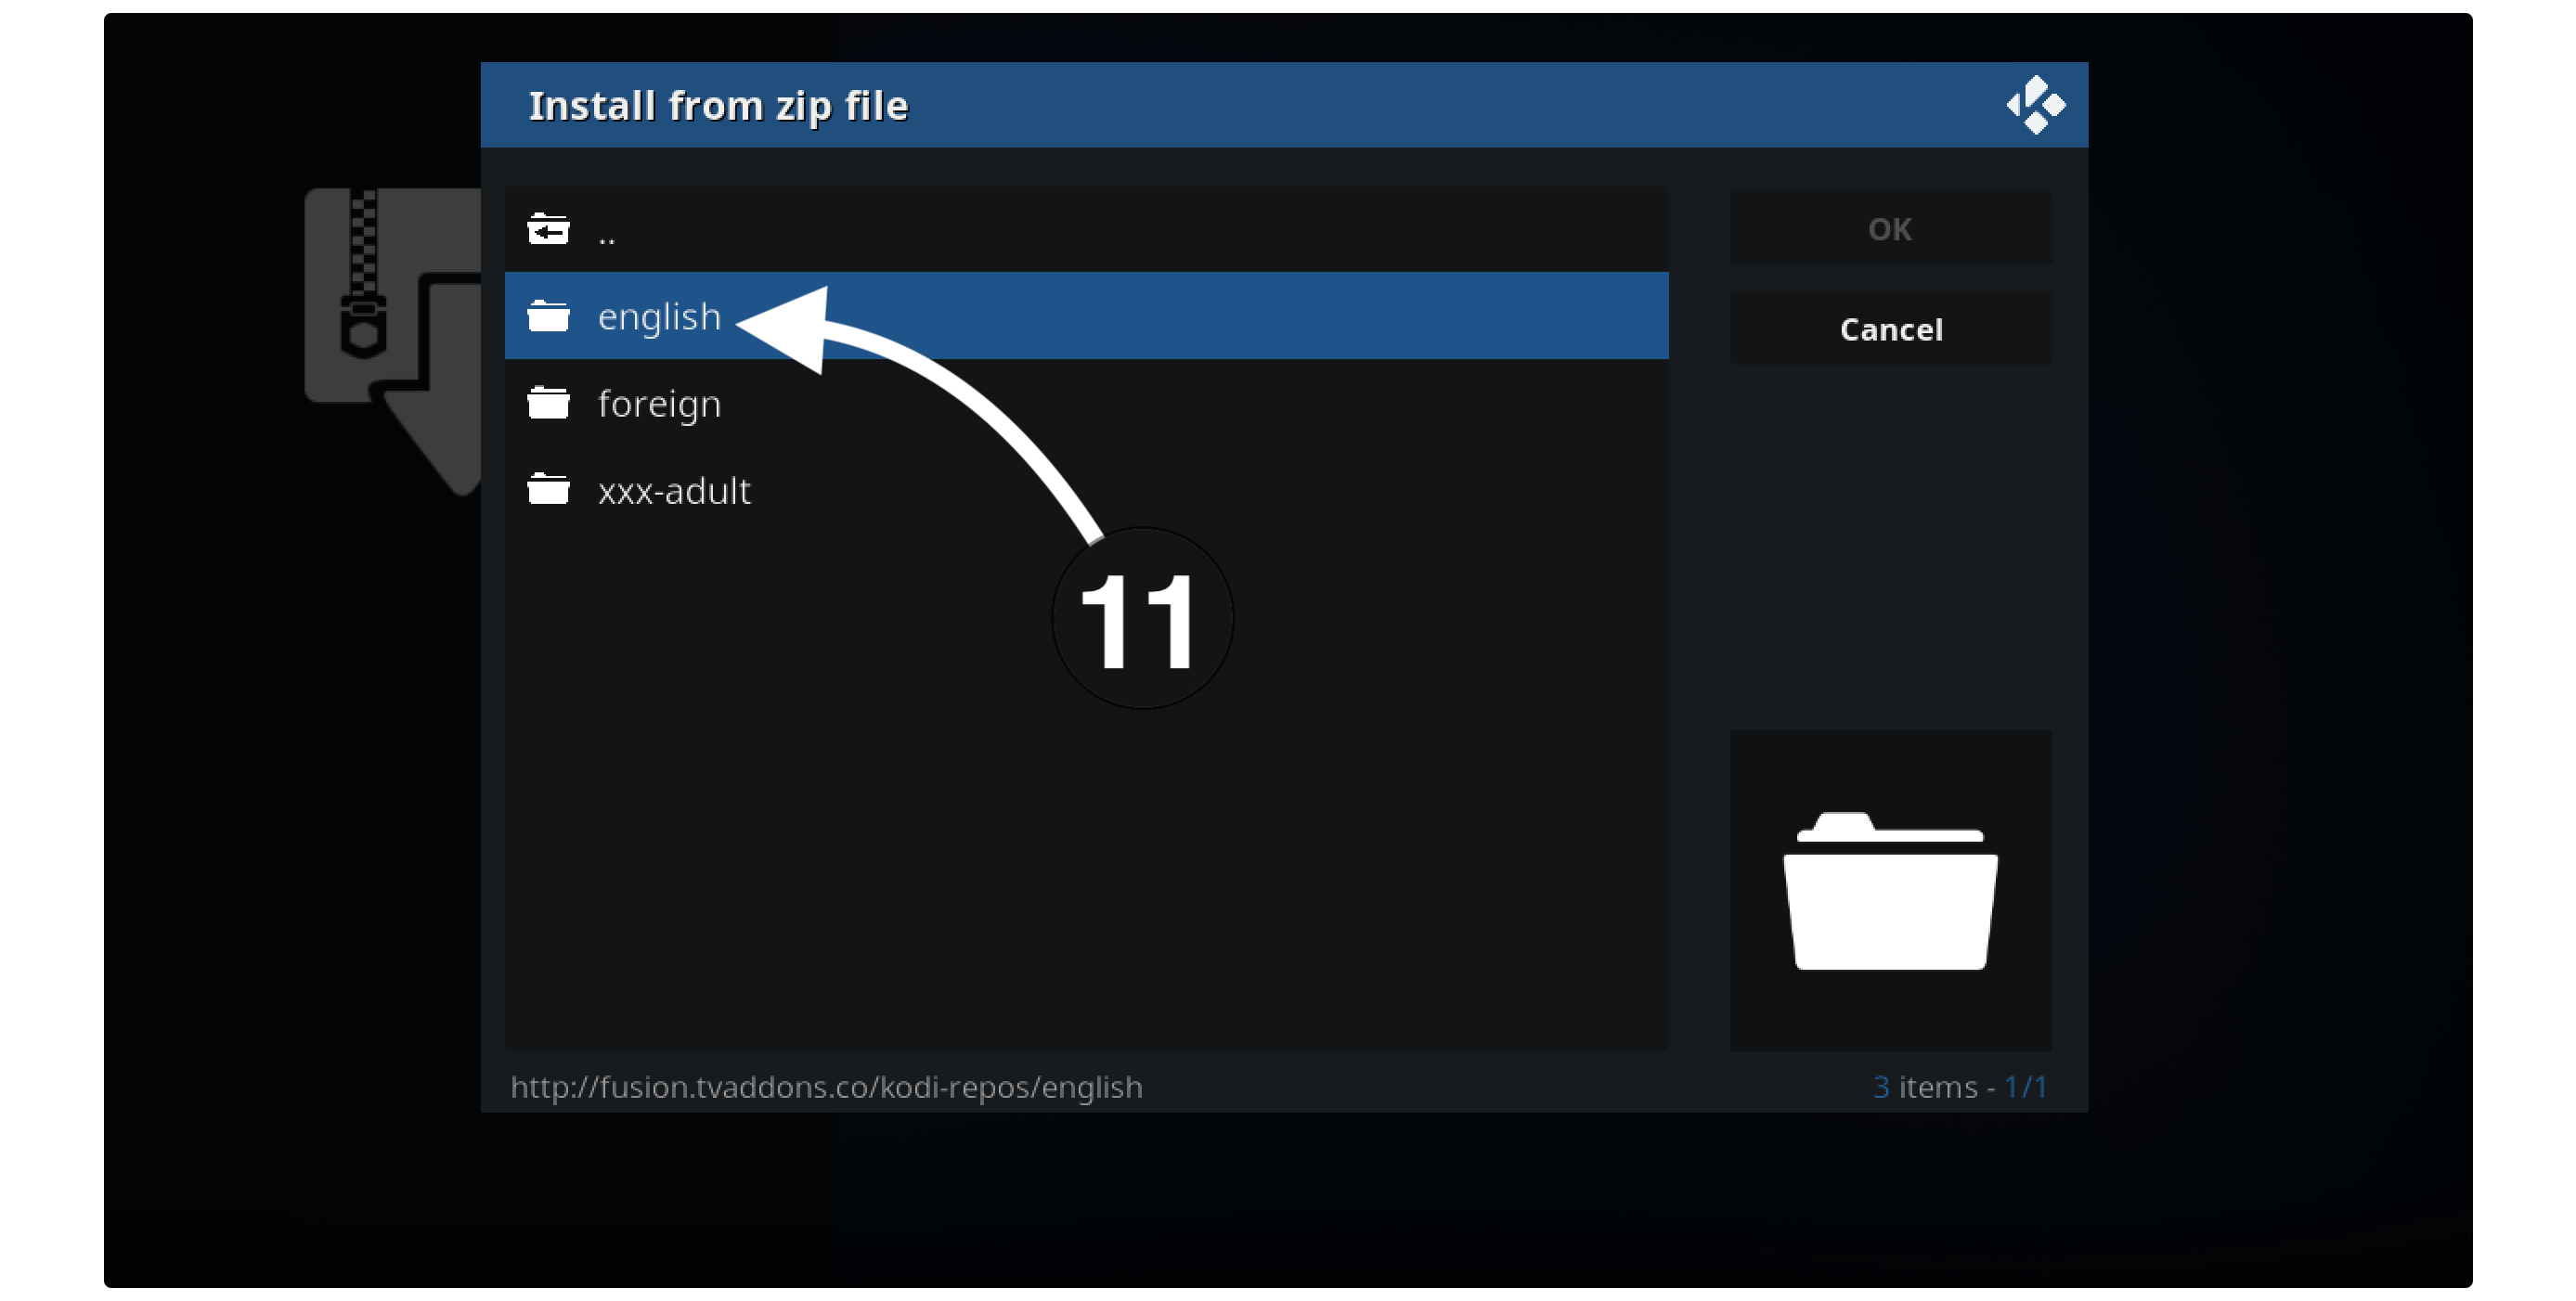
You will again see some folders there so just open the English folder from the list.
From the next screen, you will see the list of various repositories and now select repository.castagnait-x.x.x.zip (x.x.x is the version number).
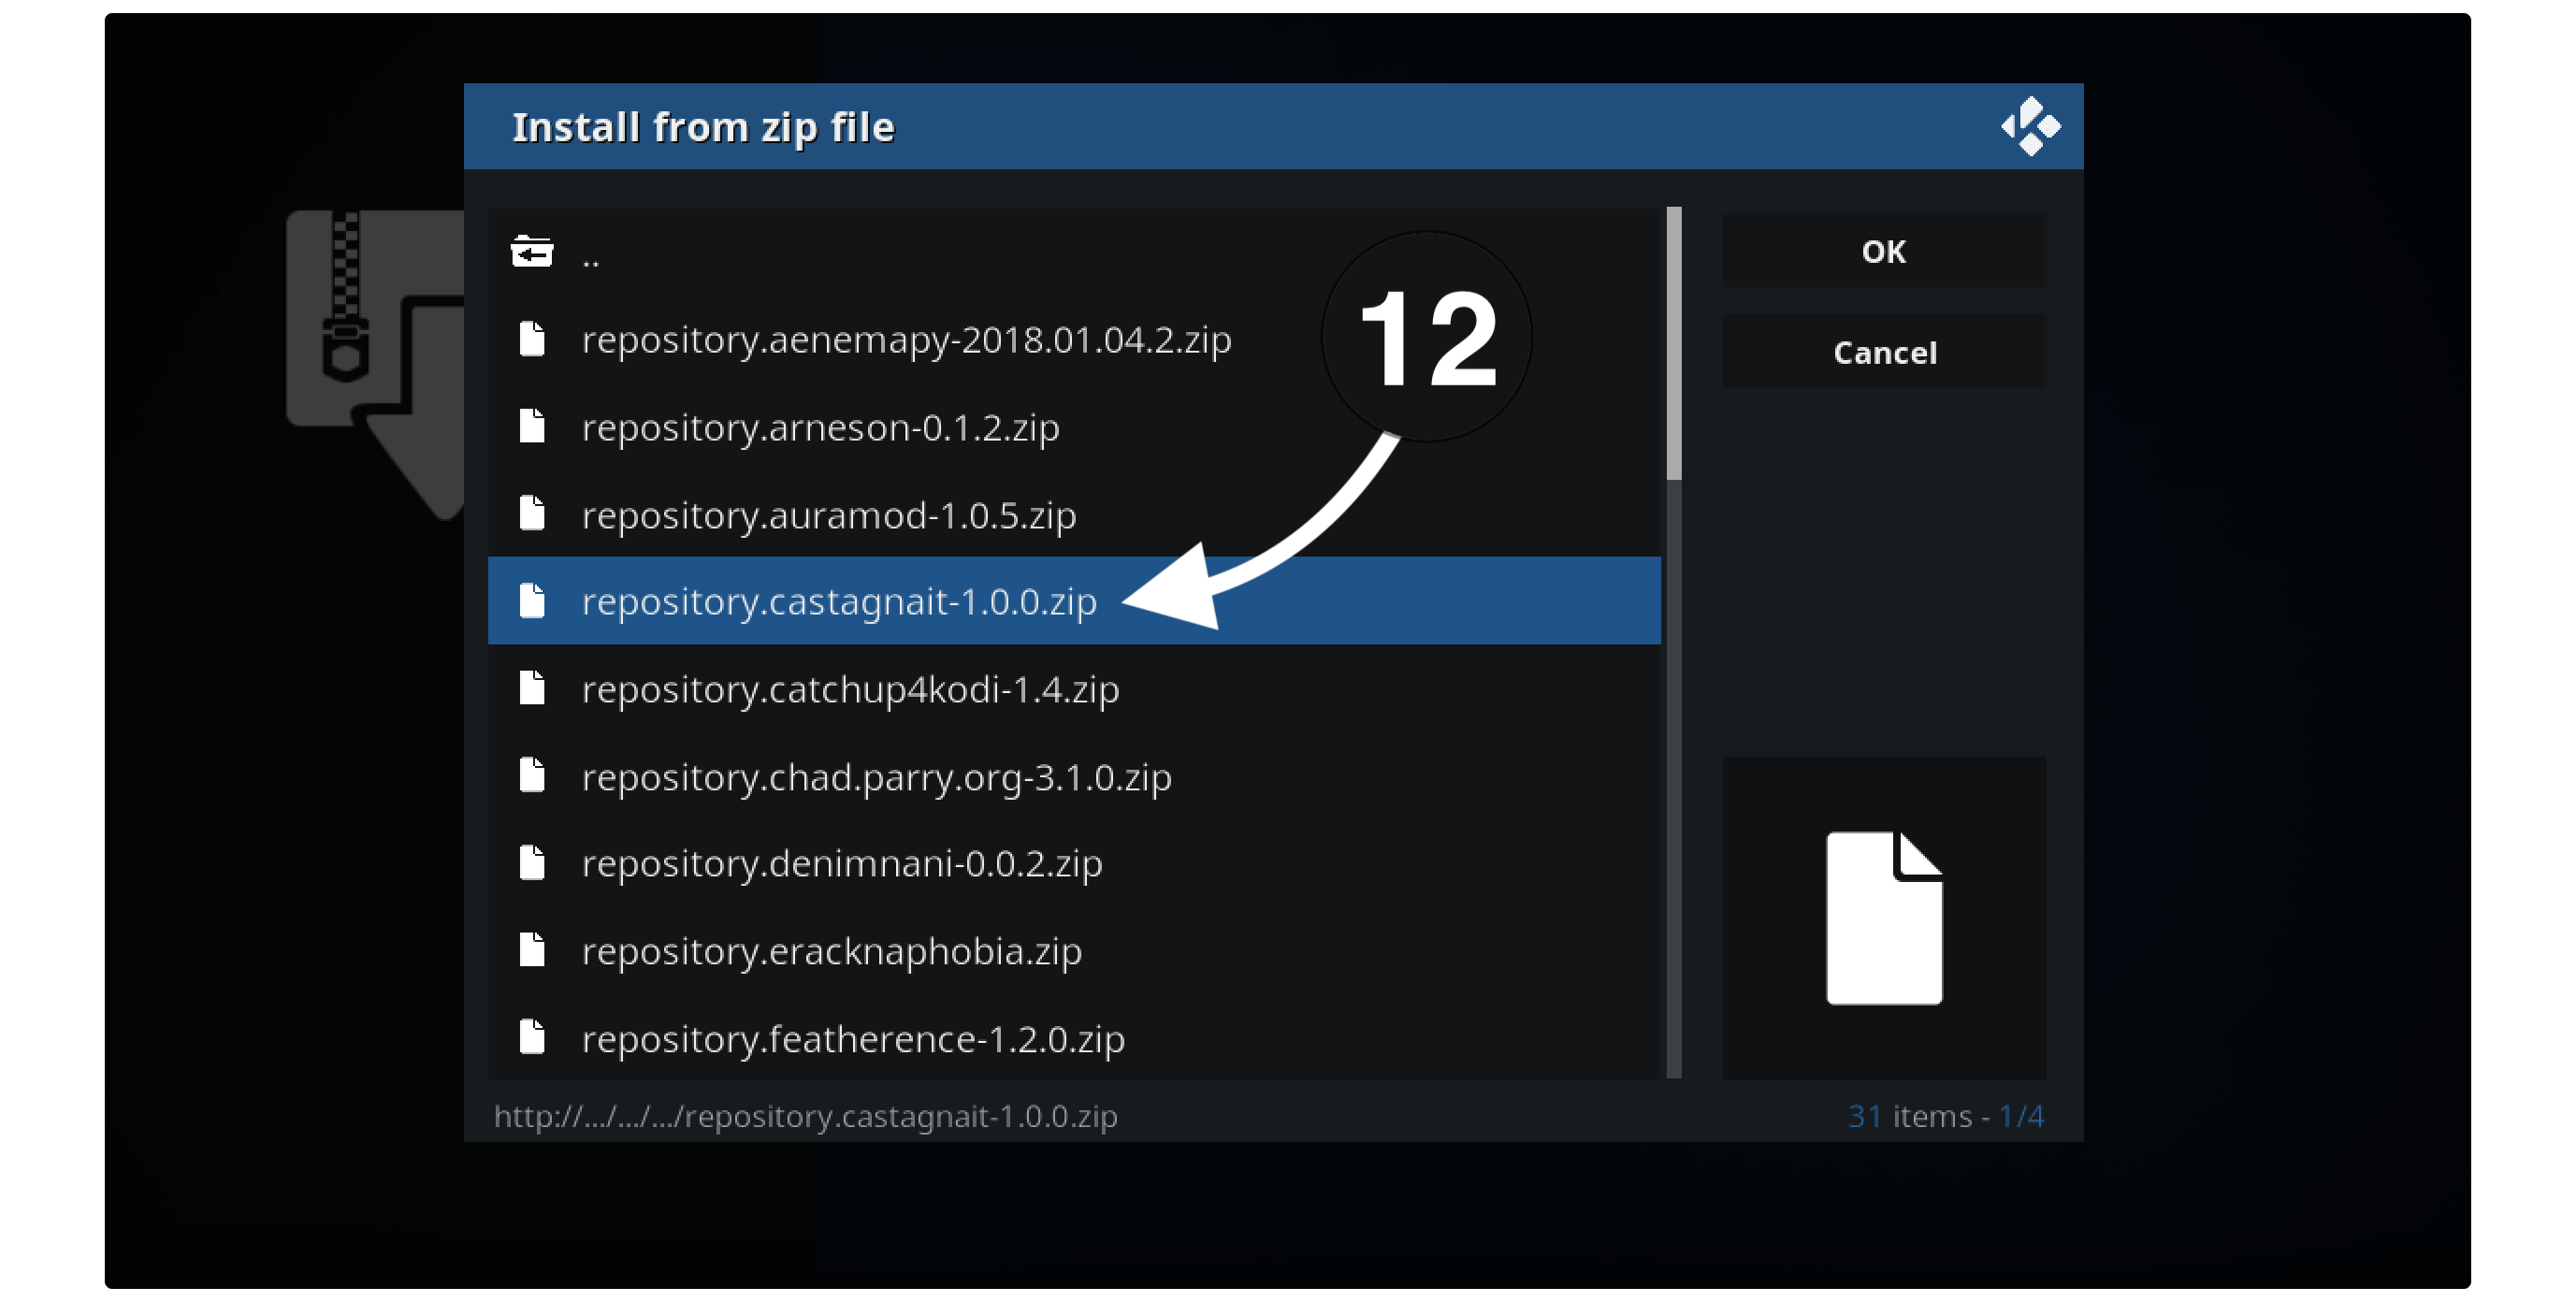
Just wait for a while until you see the “CastagnaIT Repository Add-on installed” notification appears on the top right-hand side.
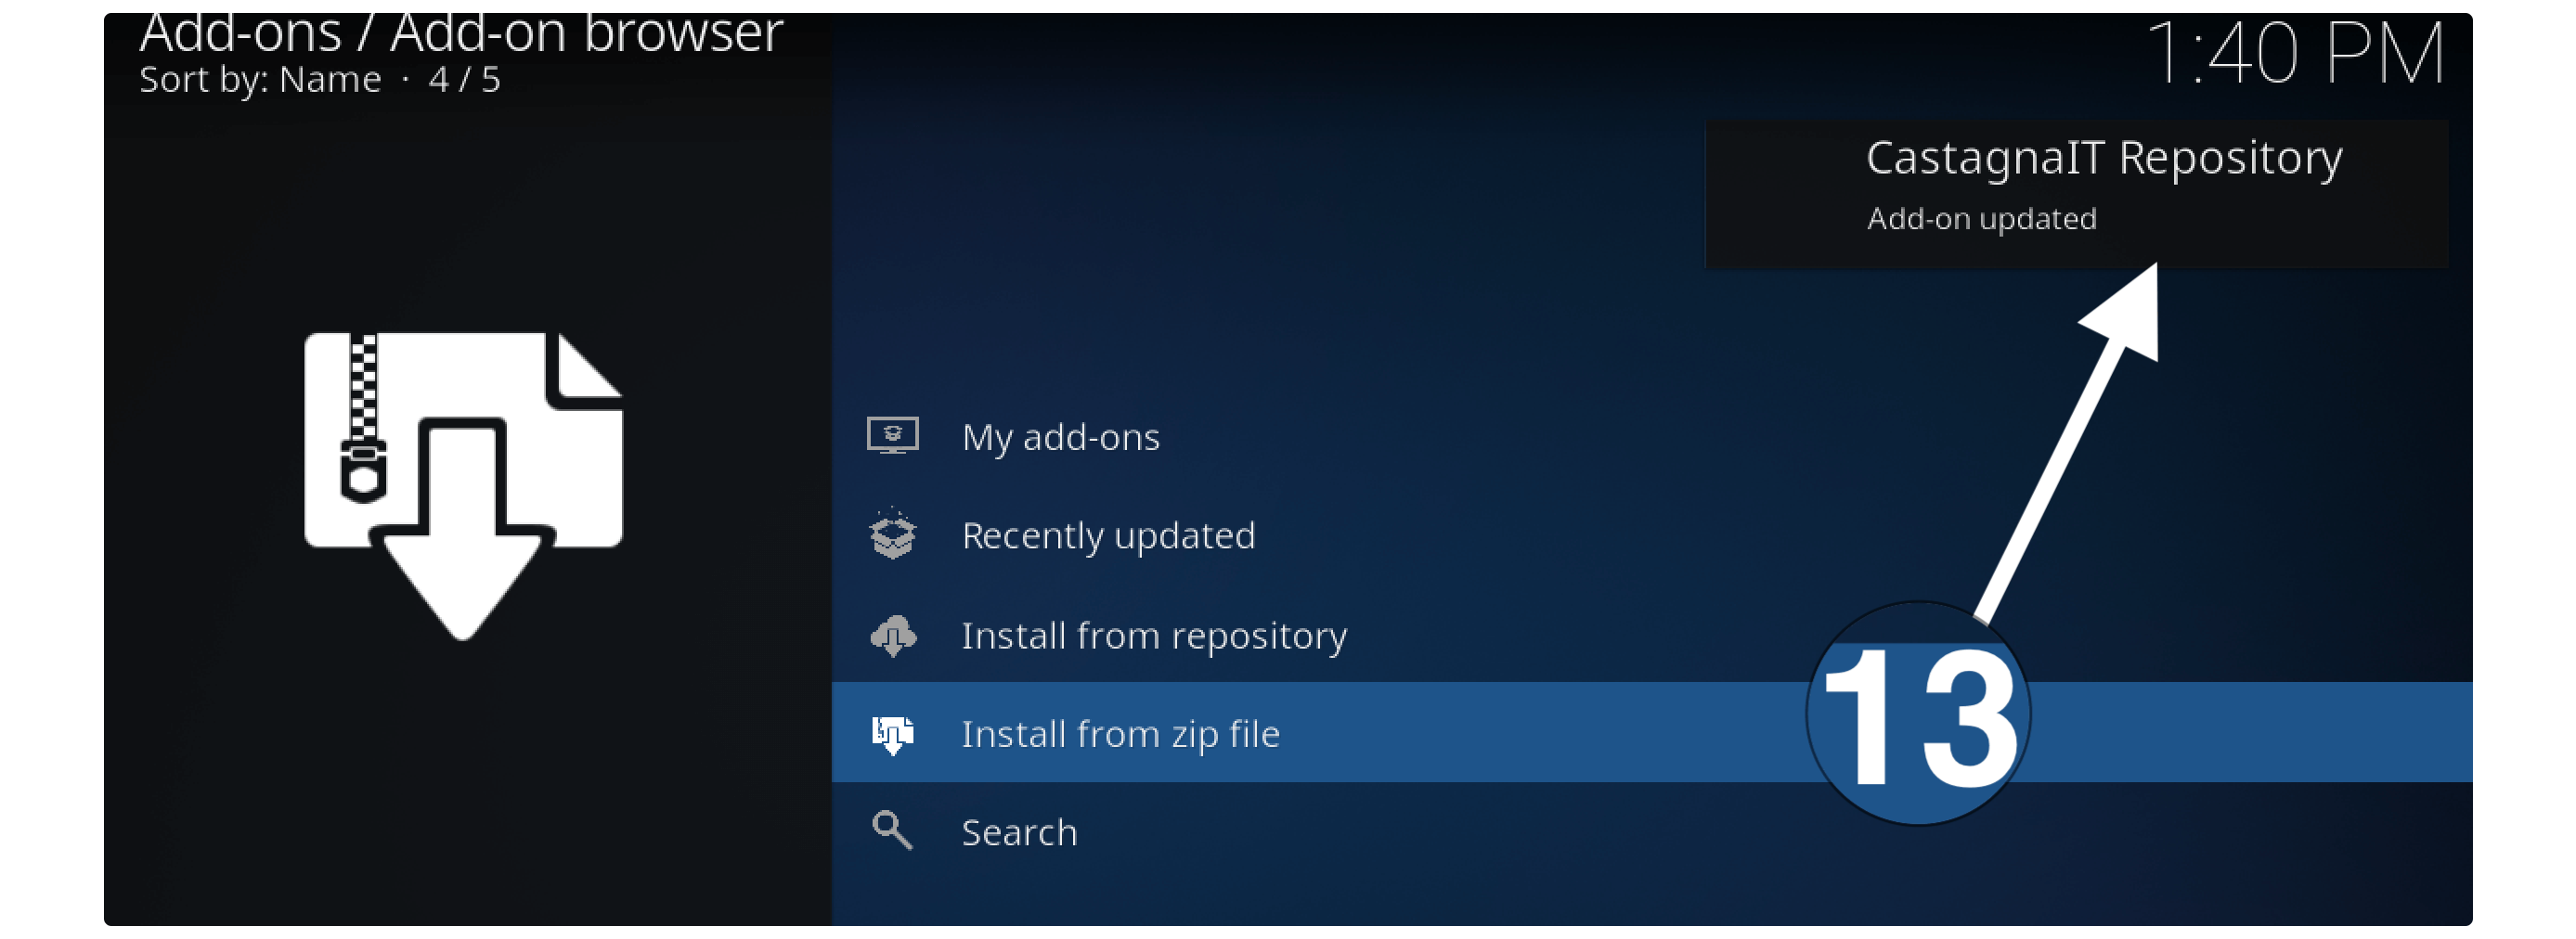
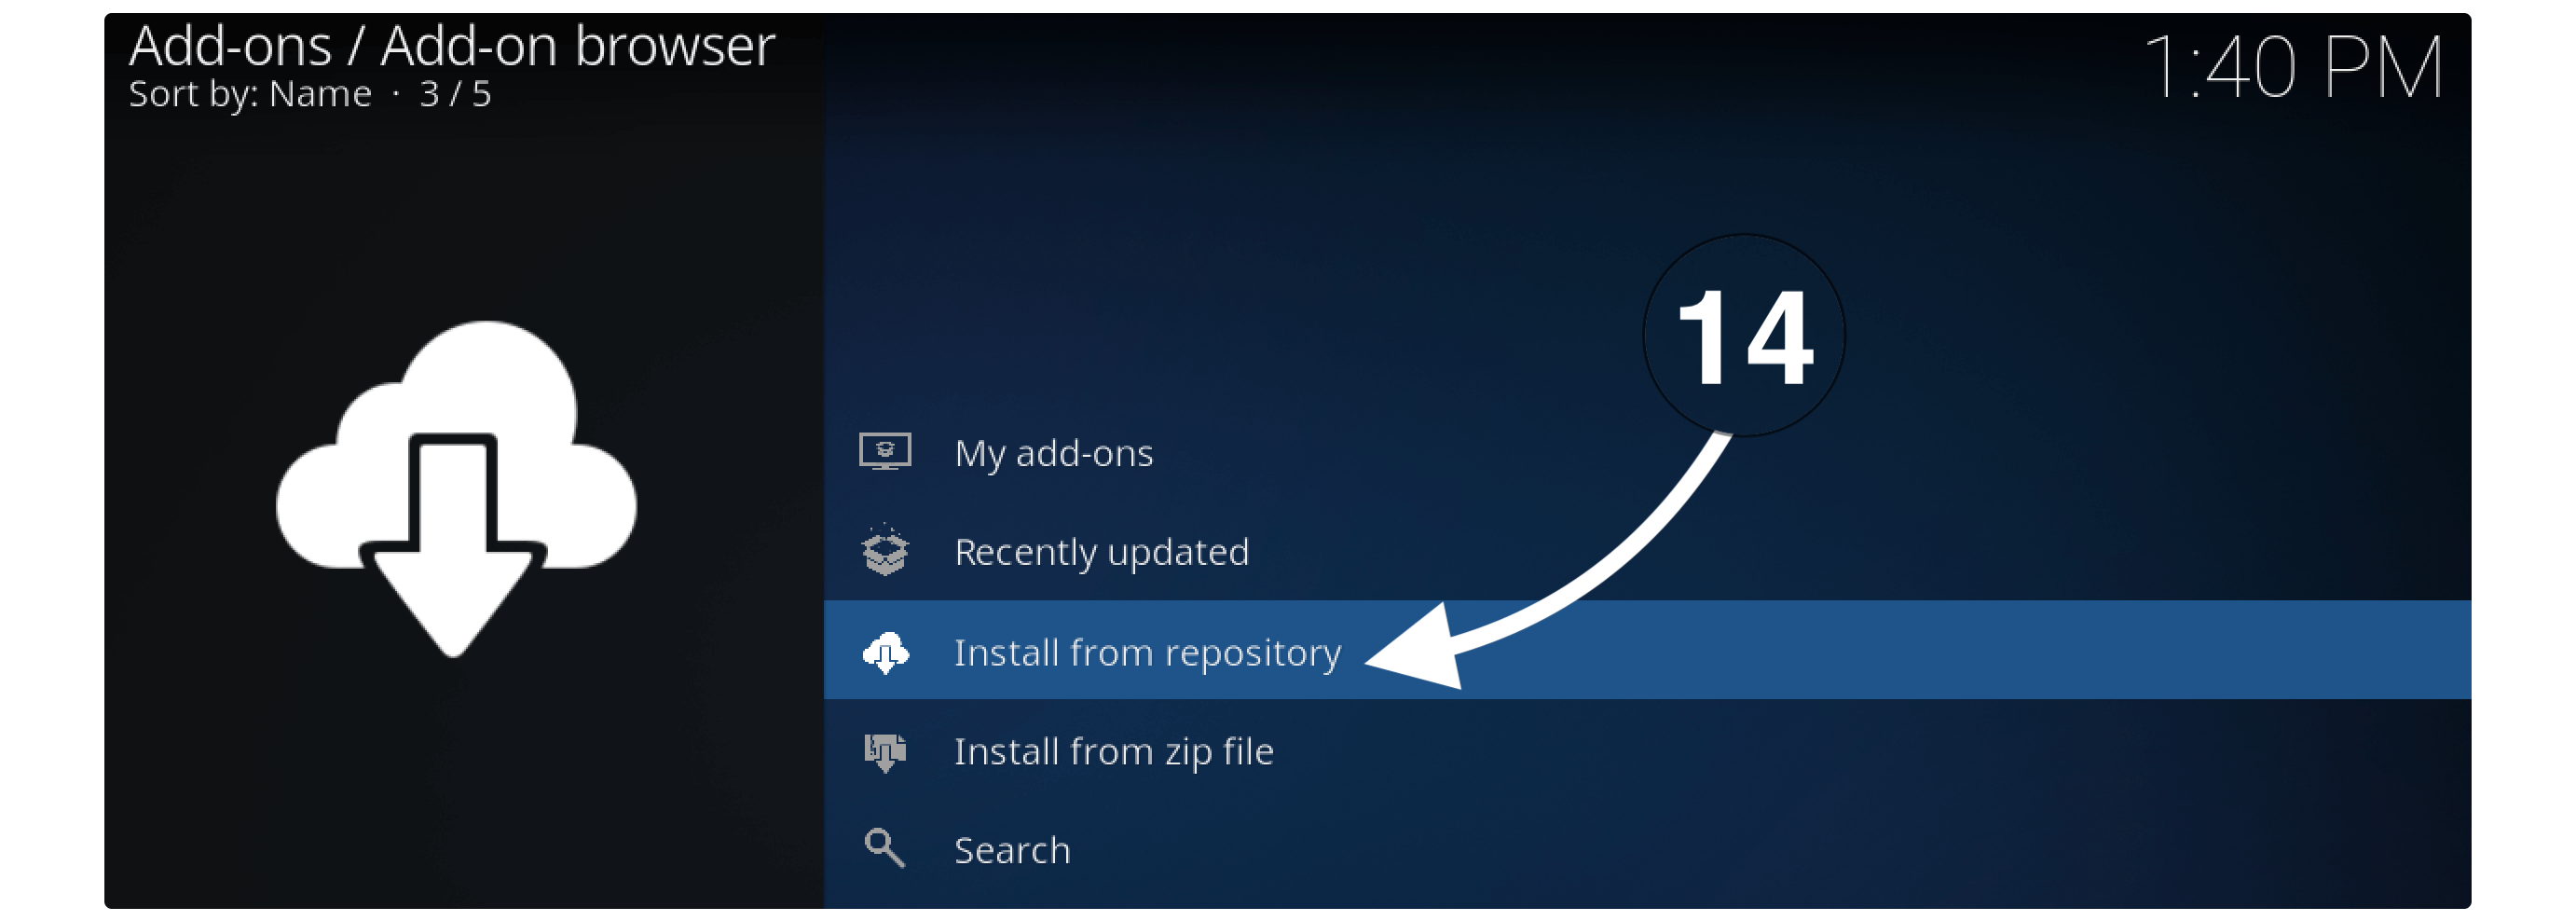
Once that notification appears now go to the Install From Repository folder.
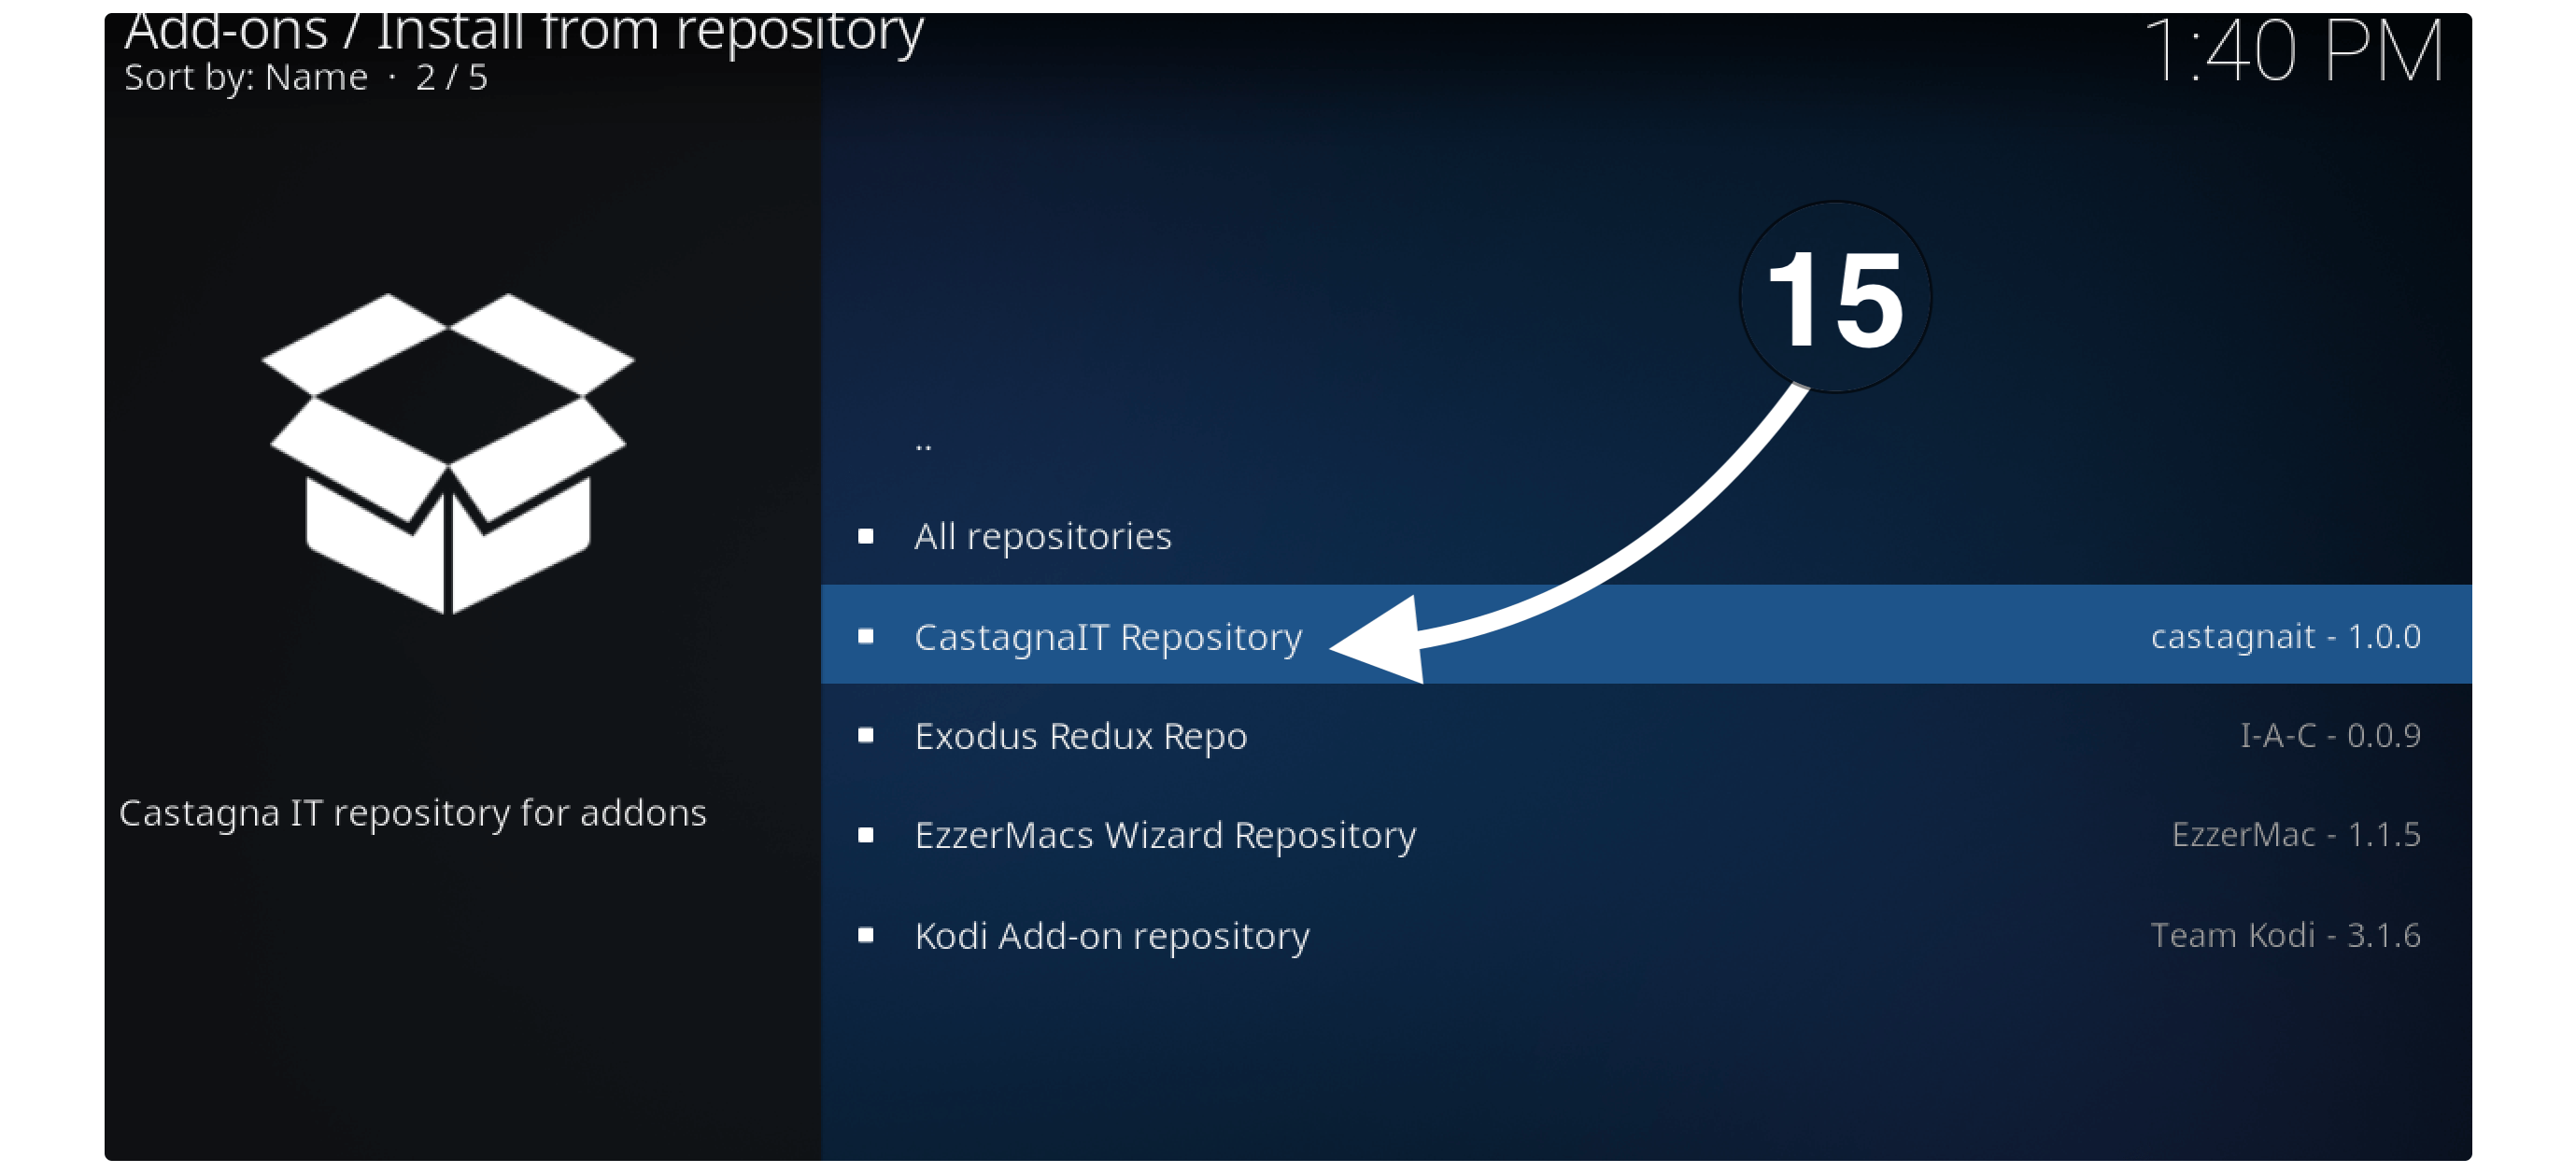
Here you will see the list of all reports that you have previously installed so now scroll down and open CastagnaIT Repository.
Once going there you need to open Video Add–ons.
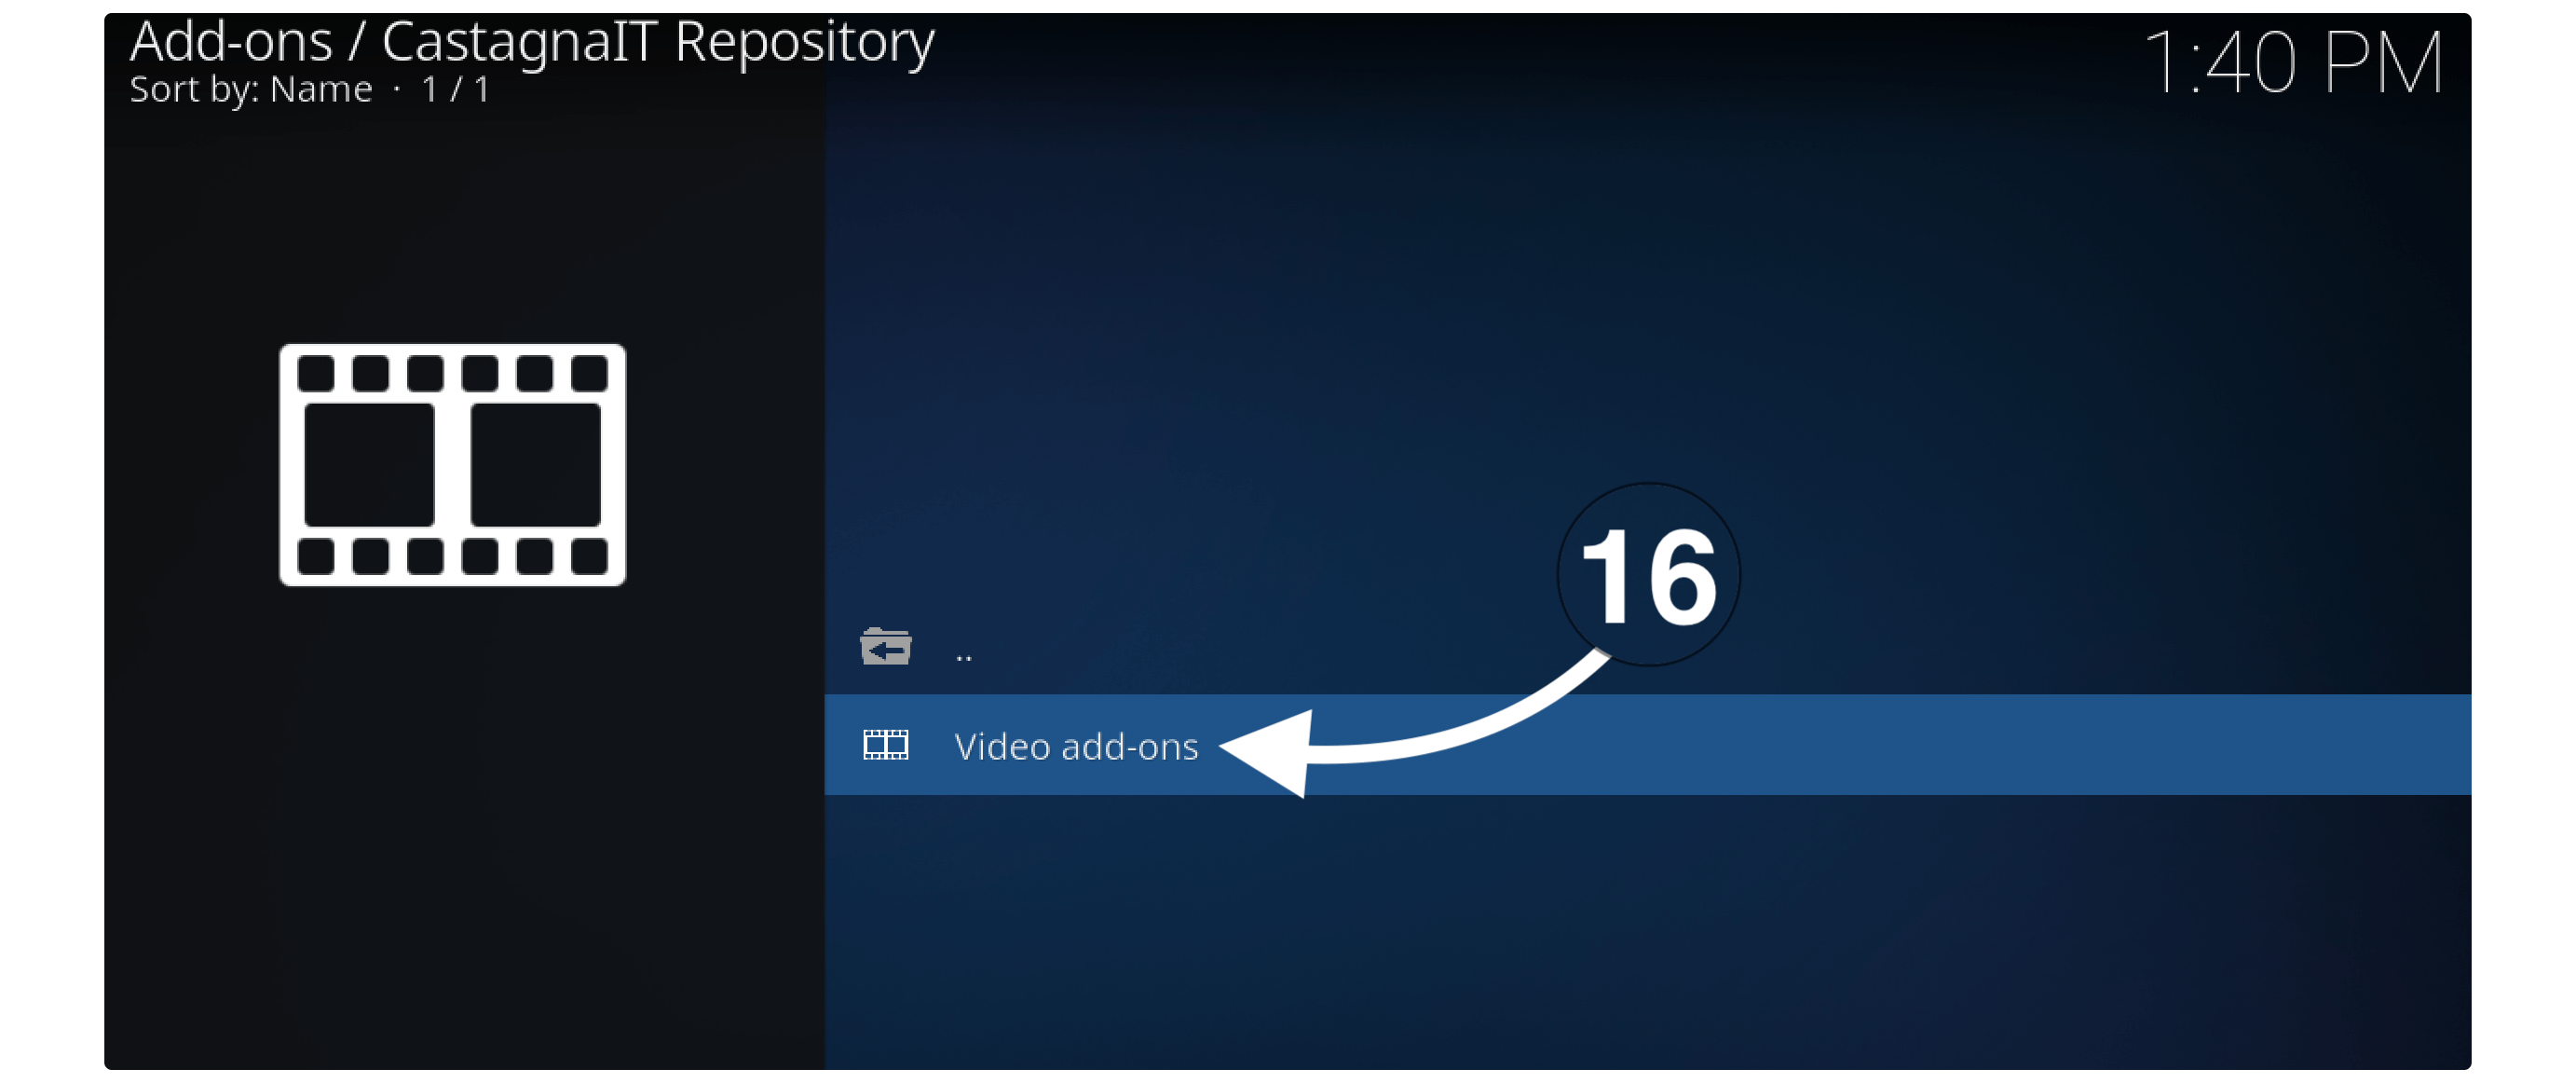
From there you just need to select Netflix.
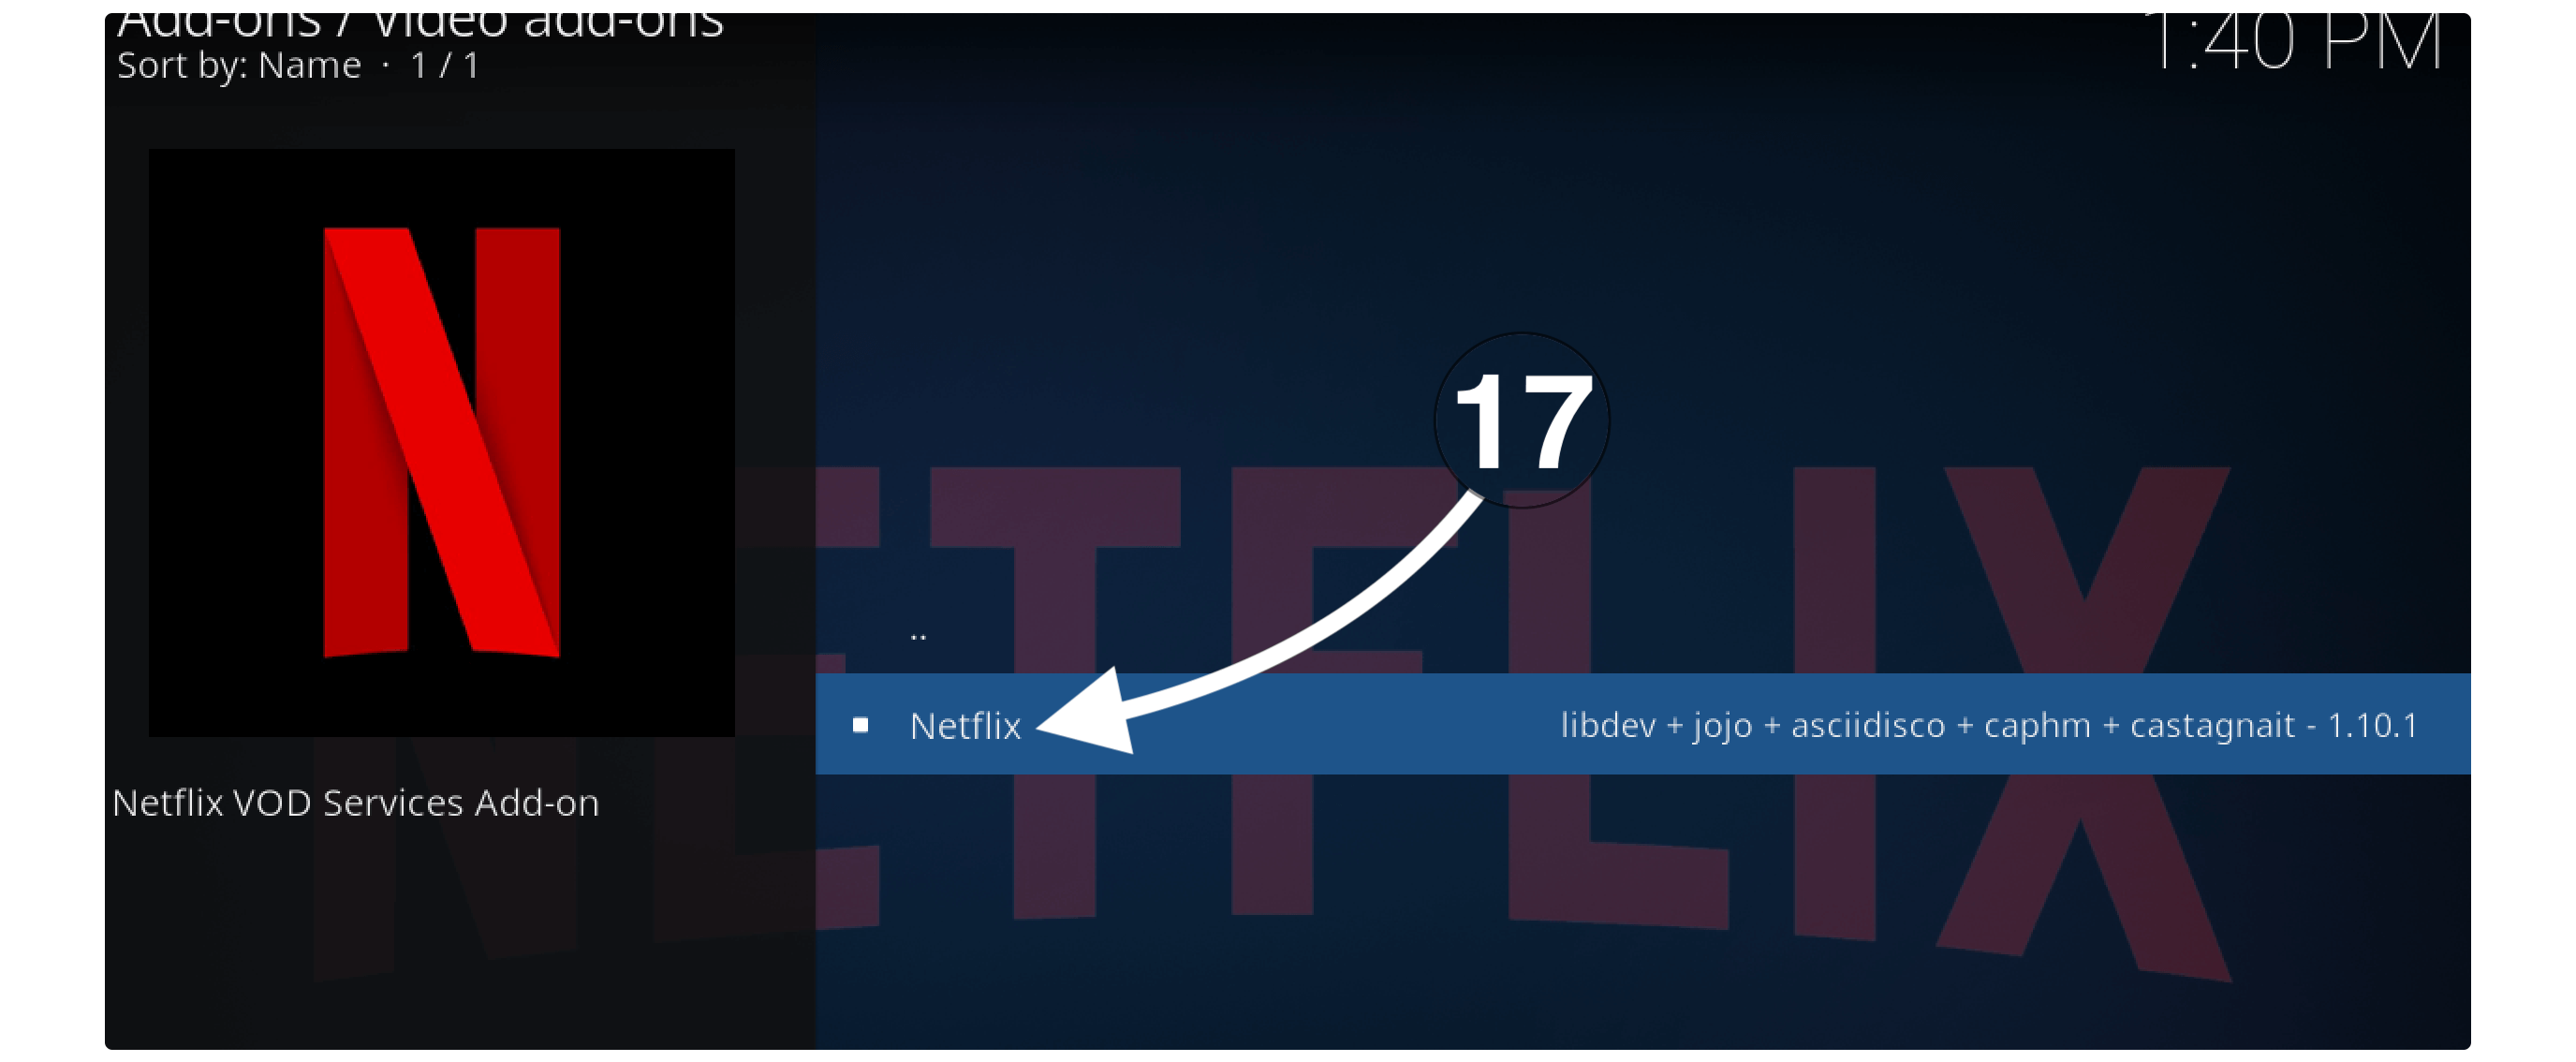
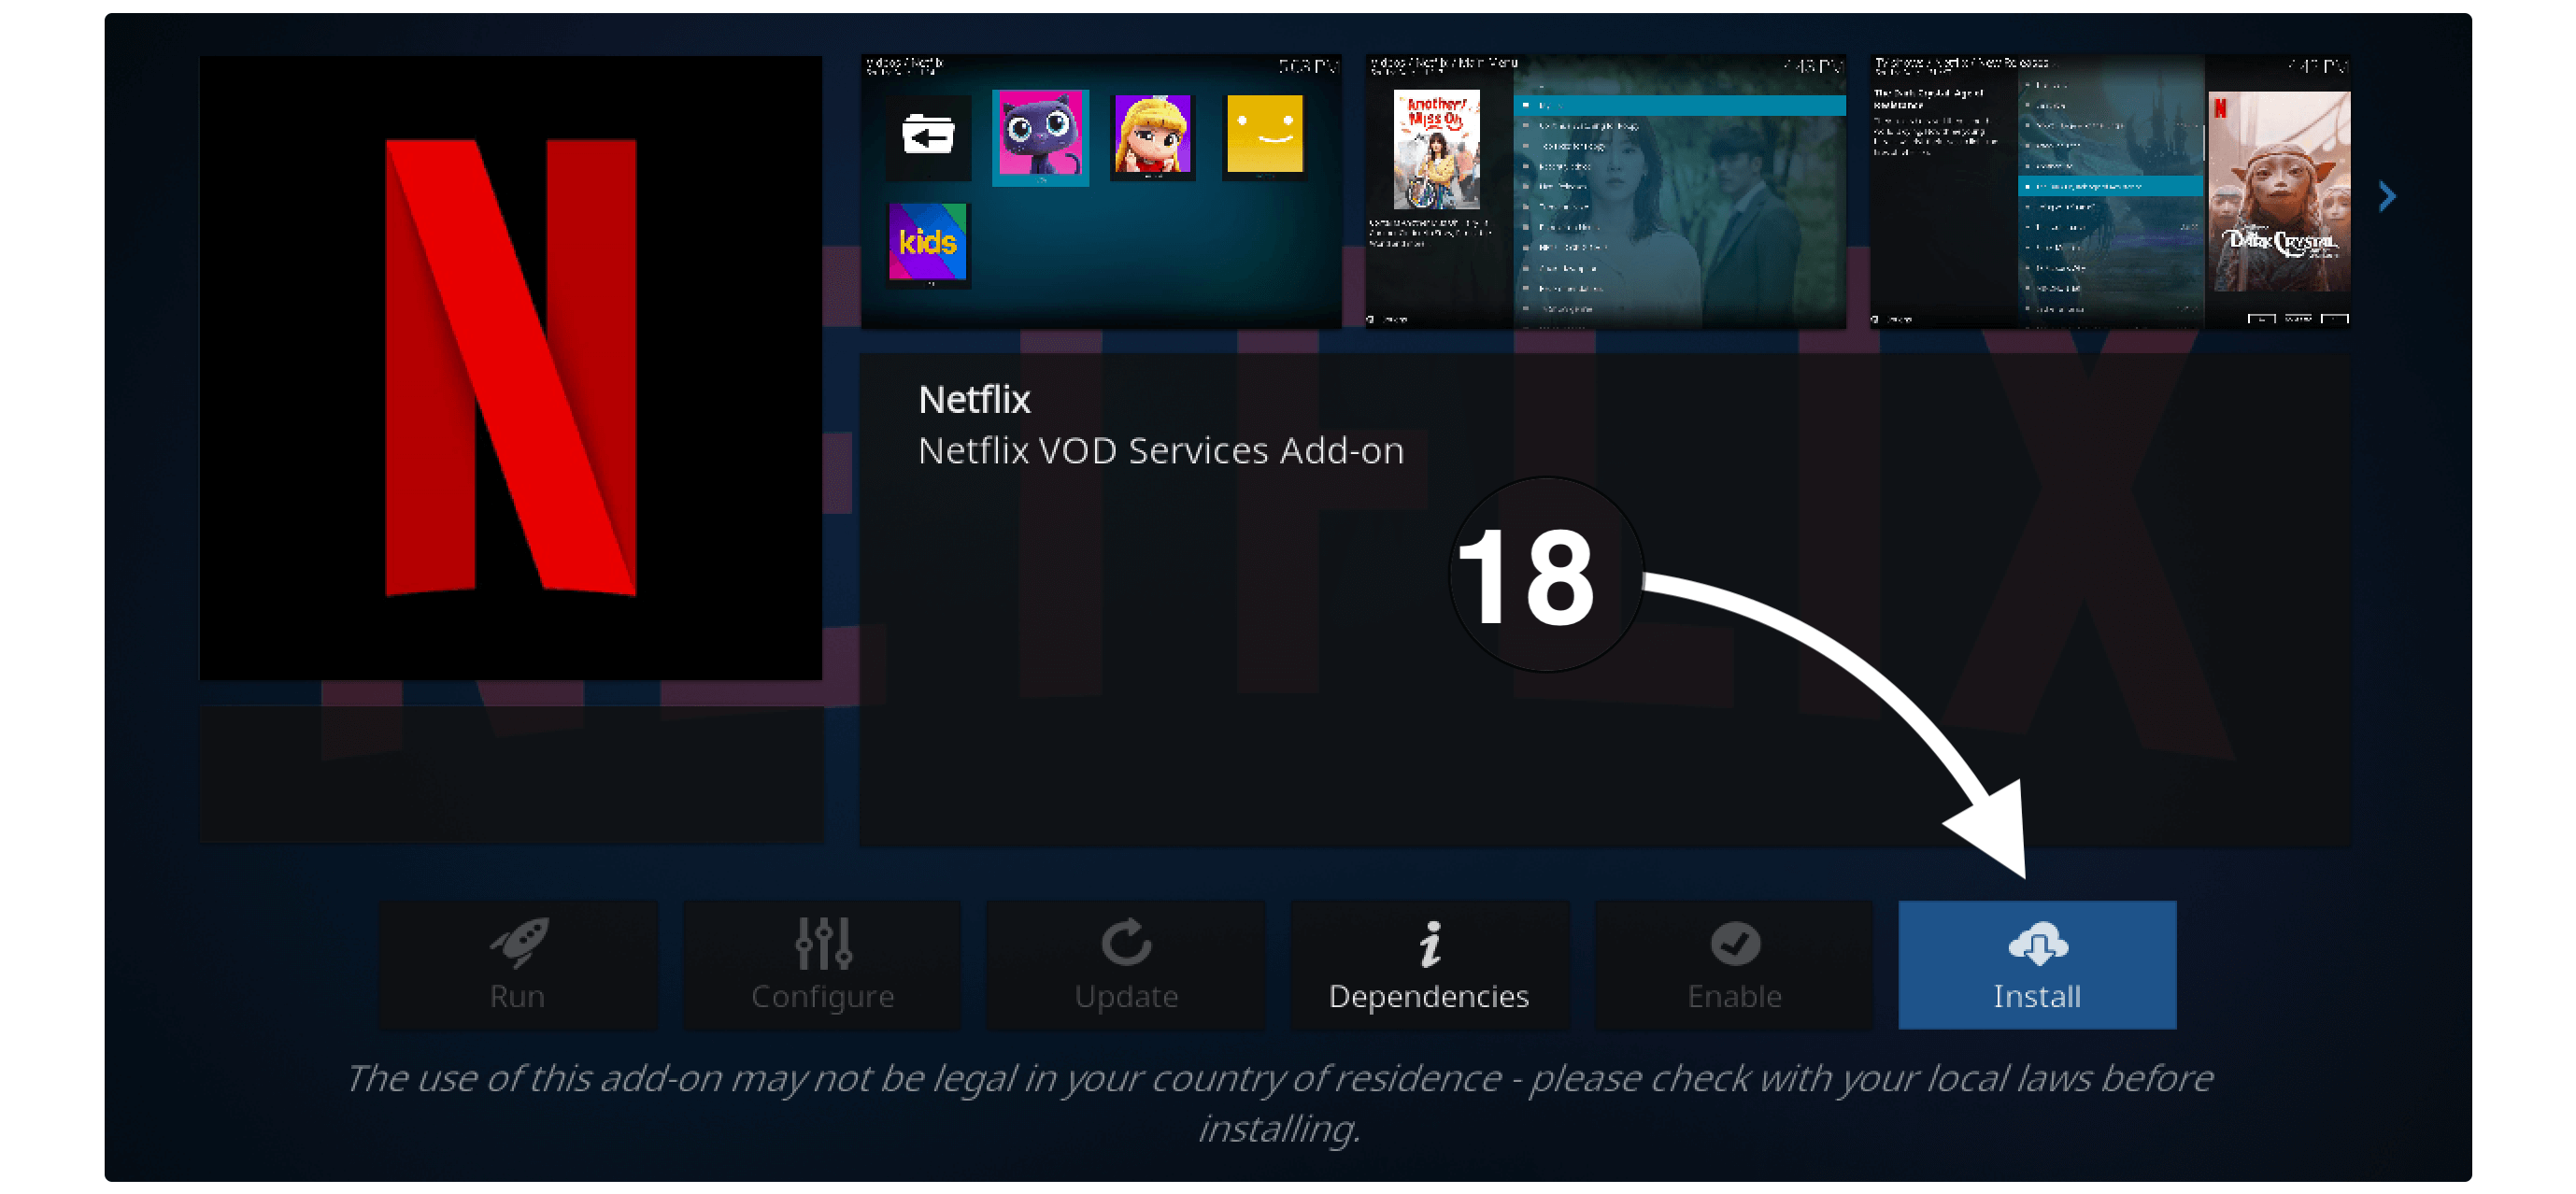
After this just click on the Install button from the below menu.
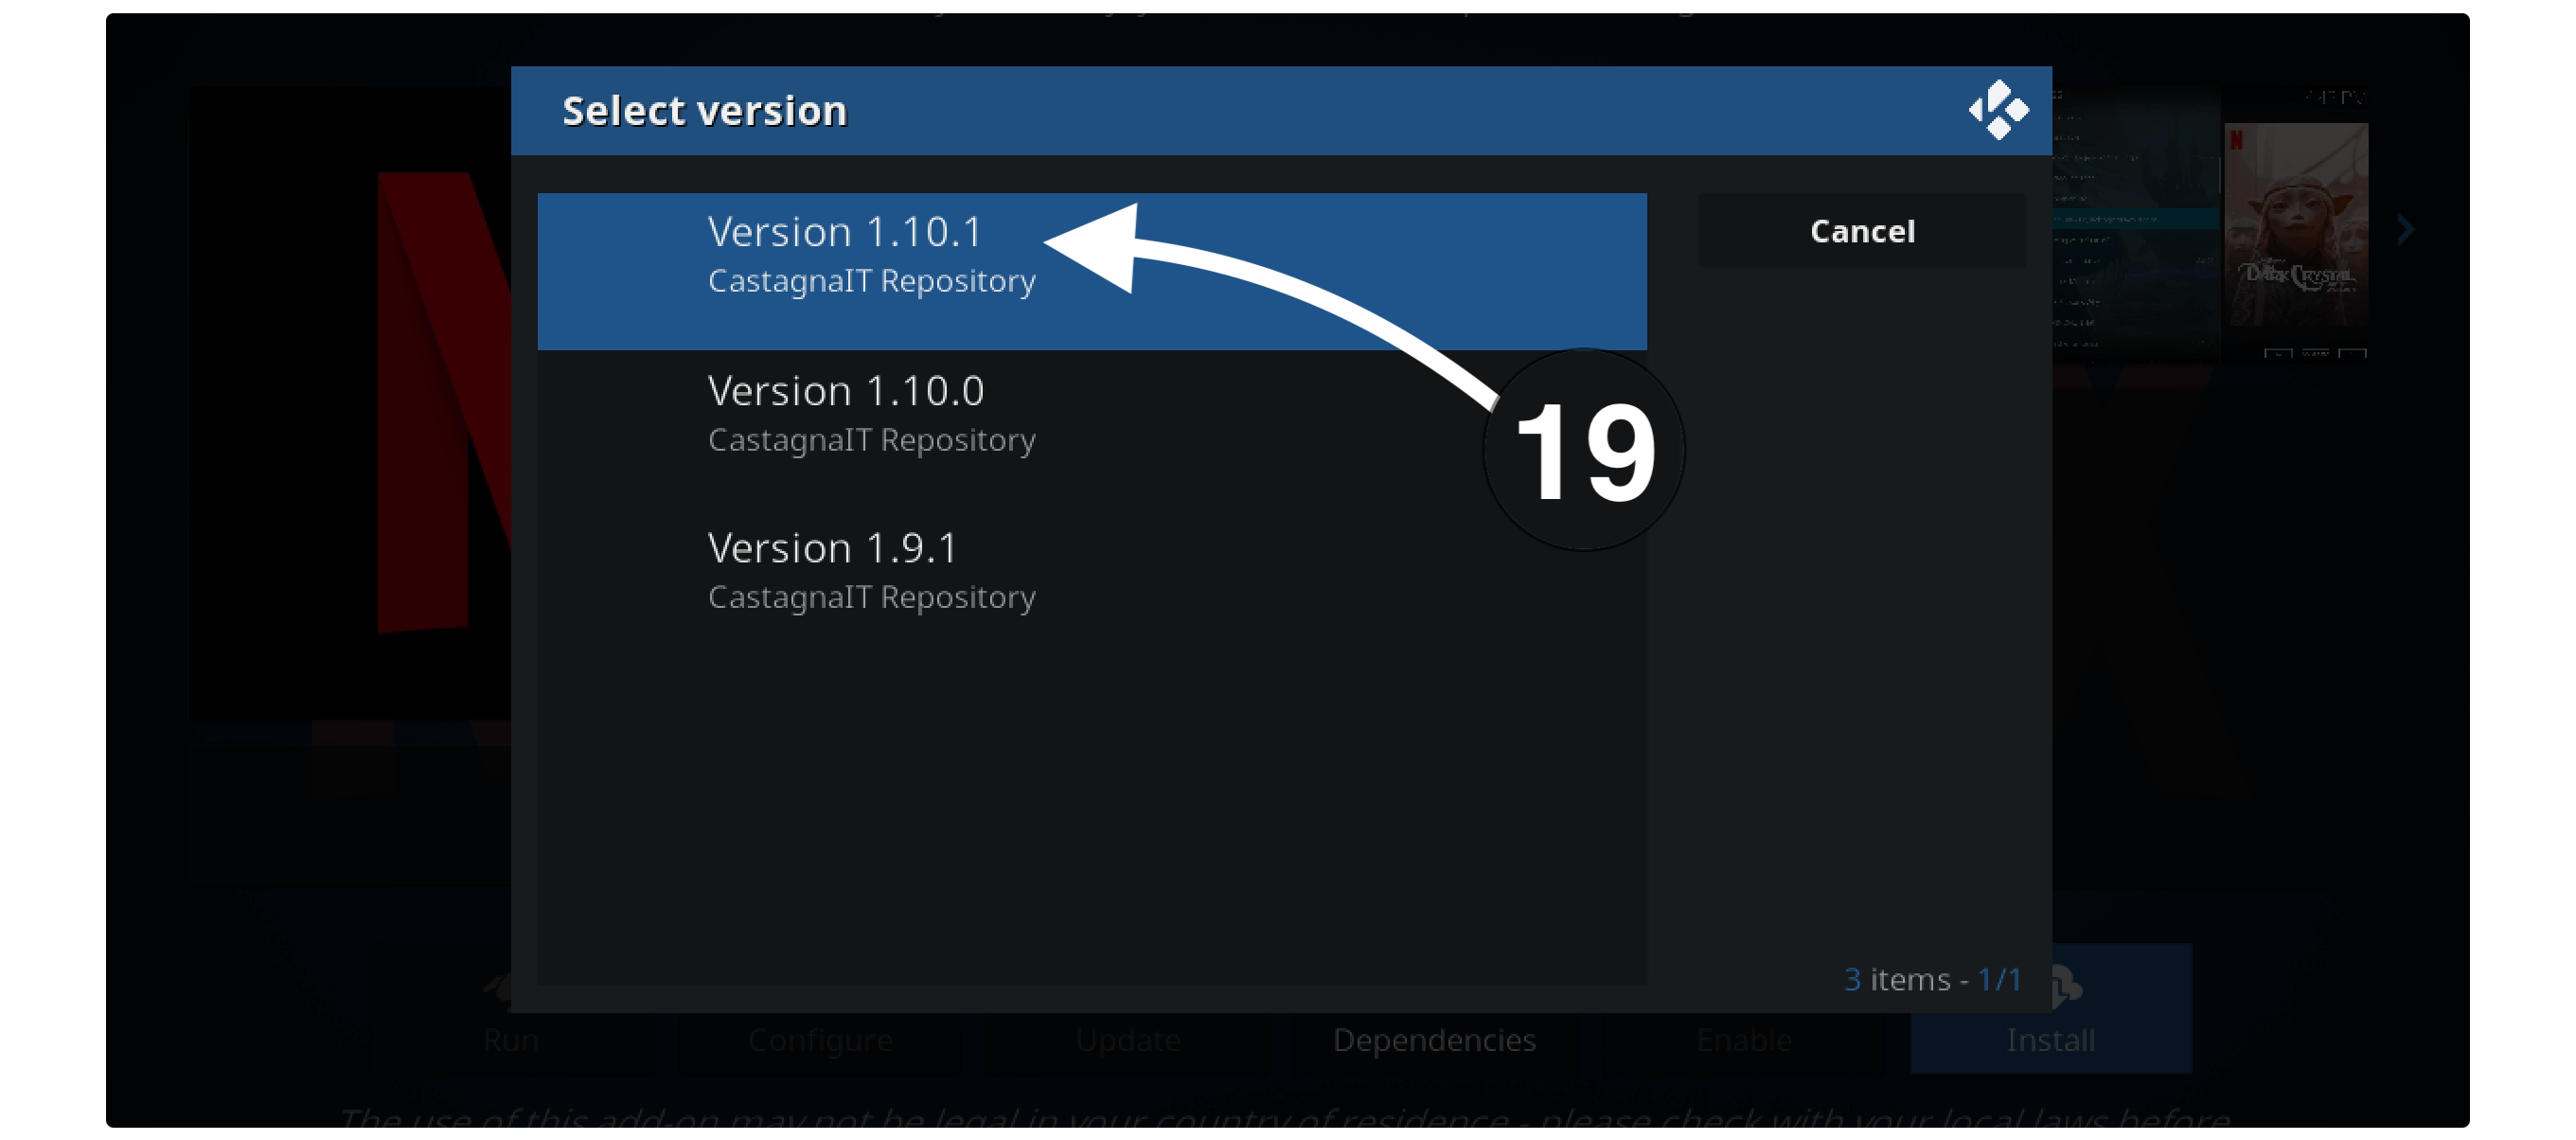
When you click on it a window will appear that shows the available version and then click the first option (in my case it is version 1.10.1).
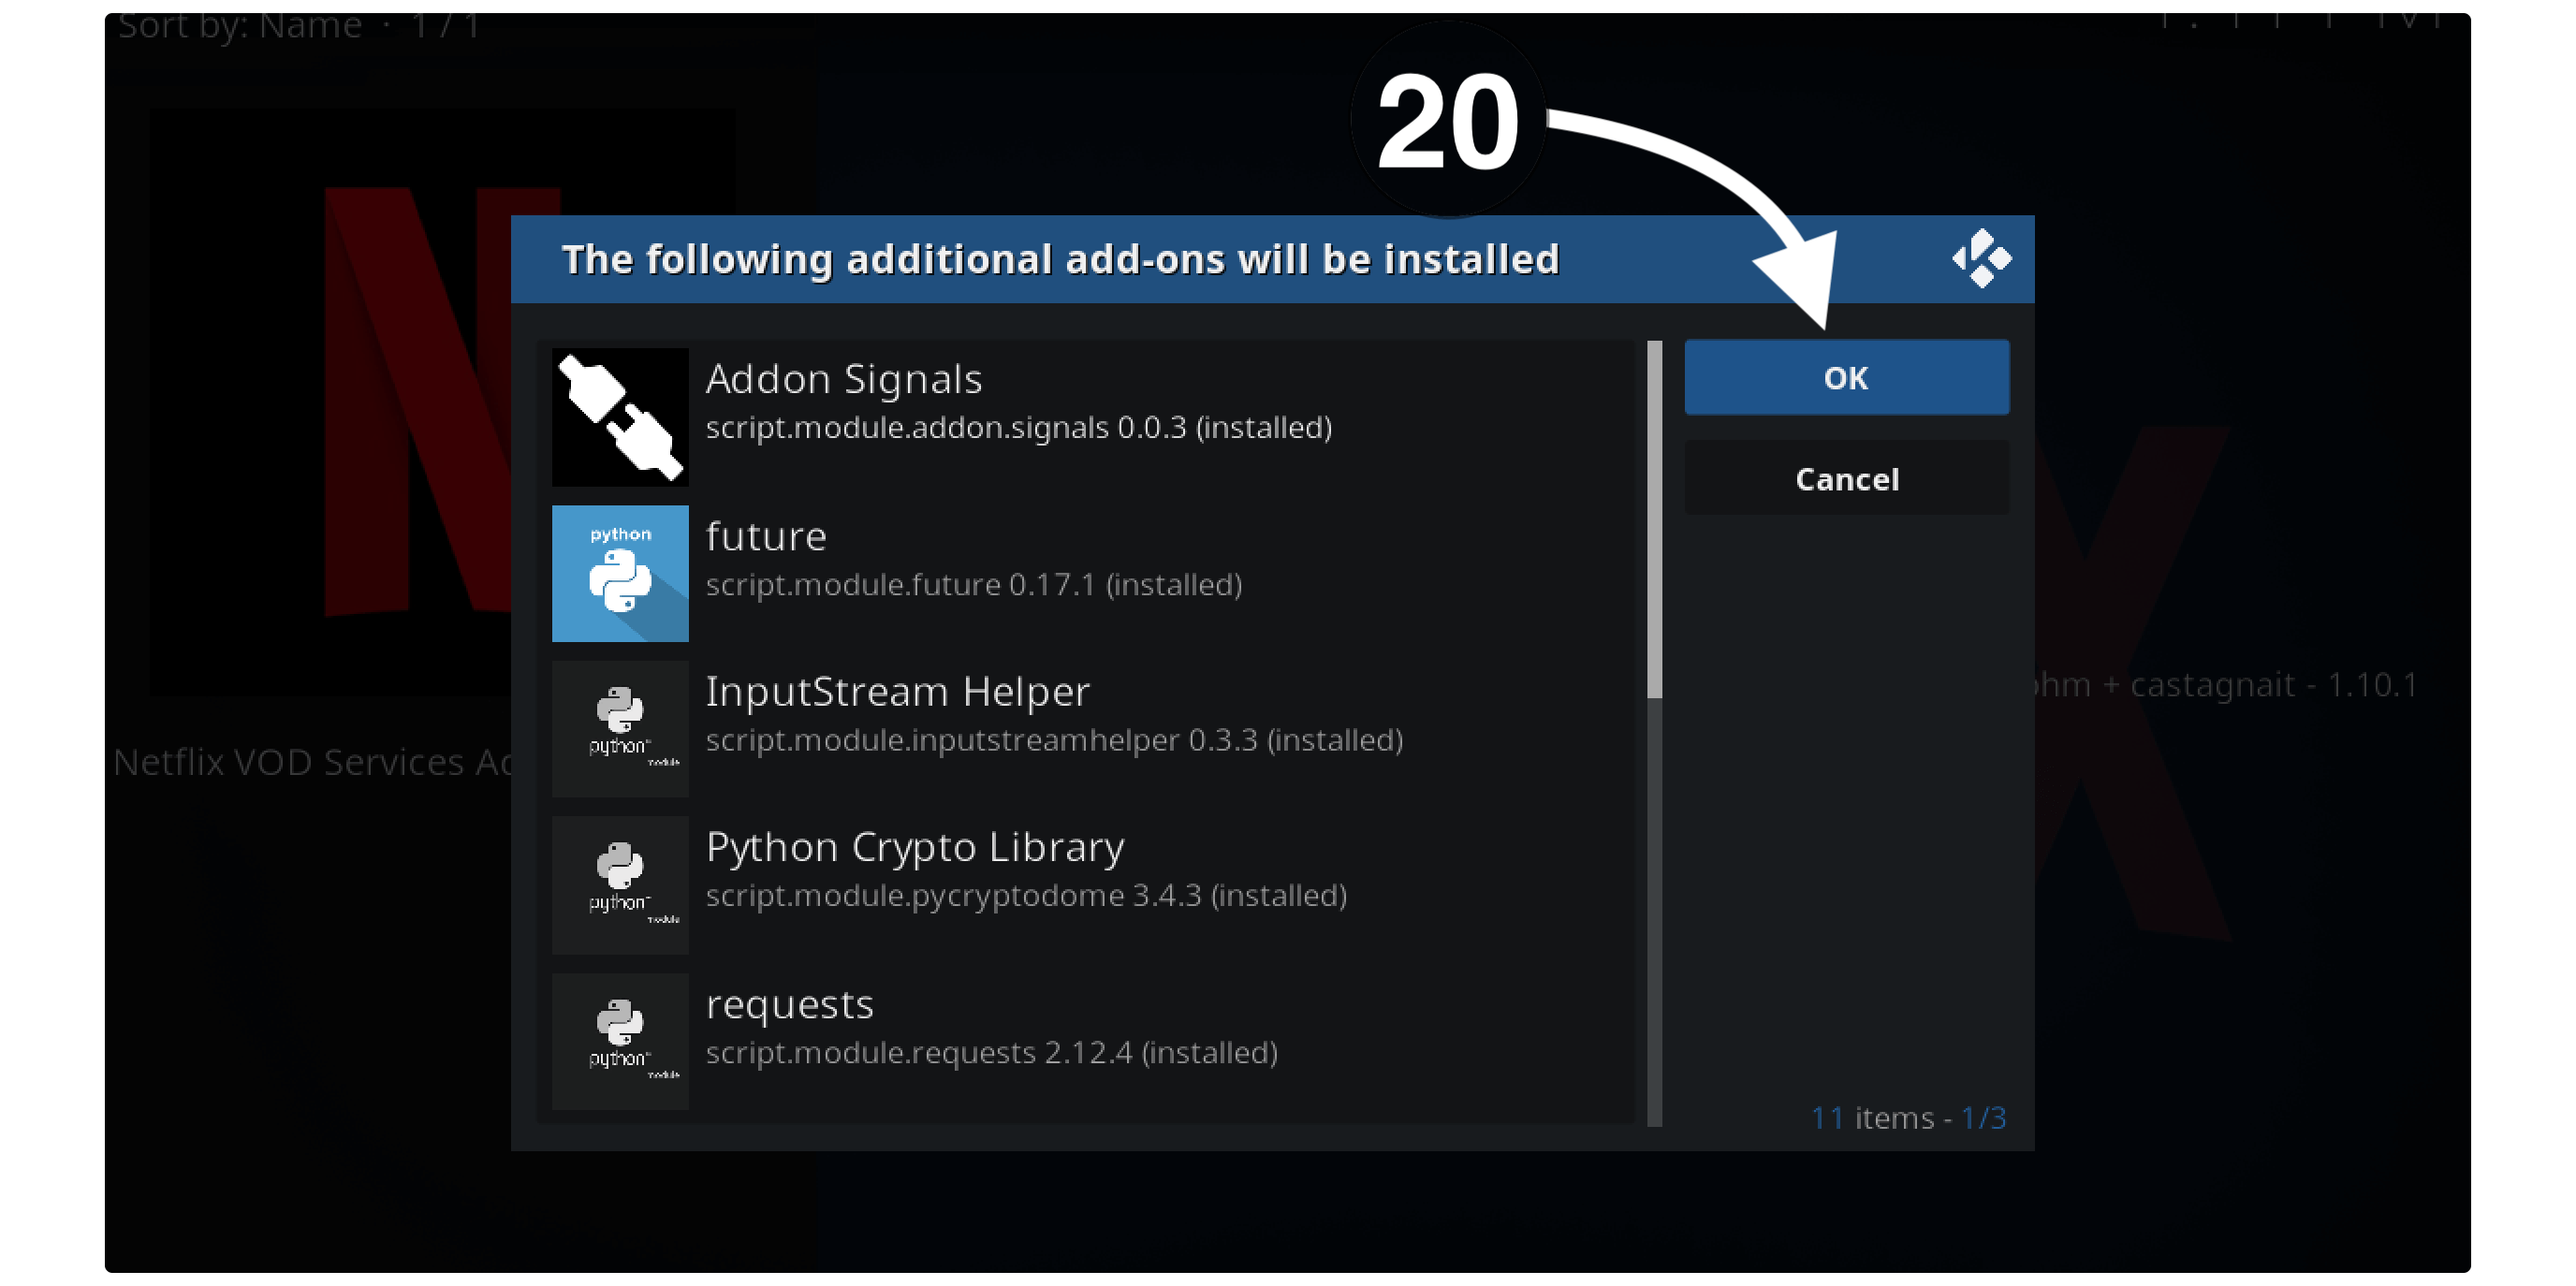
Once selecting the version you will then notice it shows “the following Add-ons will be installed” so now click Ok to allow it. This will start downloading the Add-on and you can see the progress there.
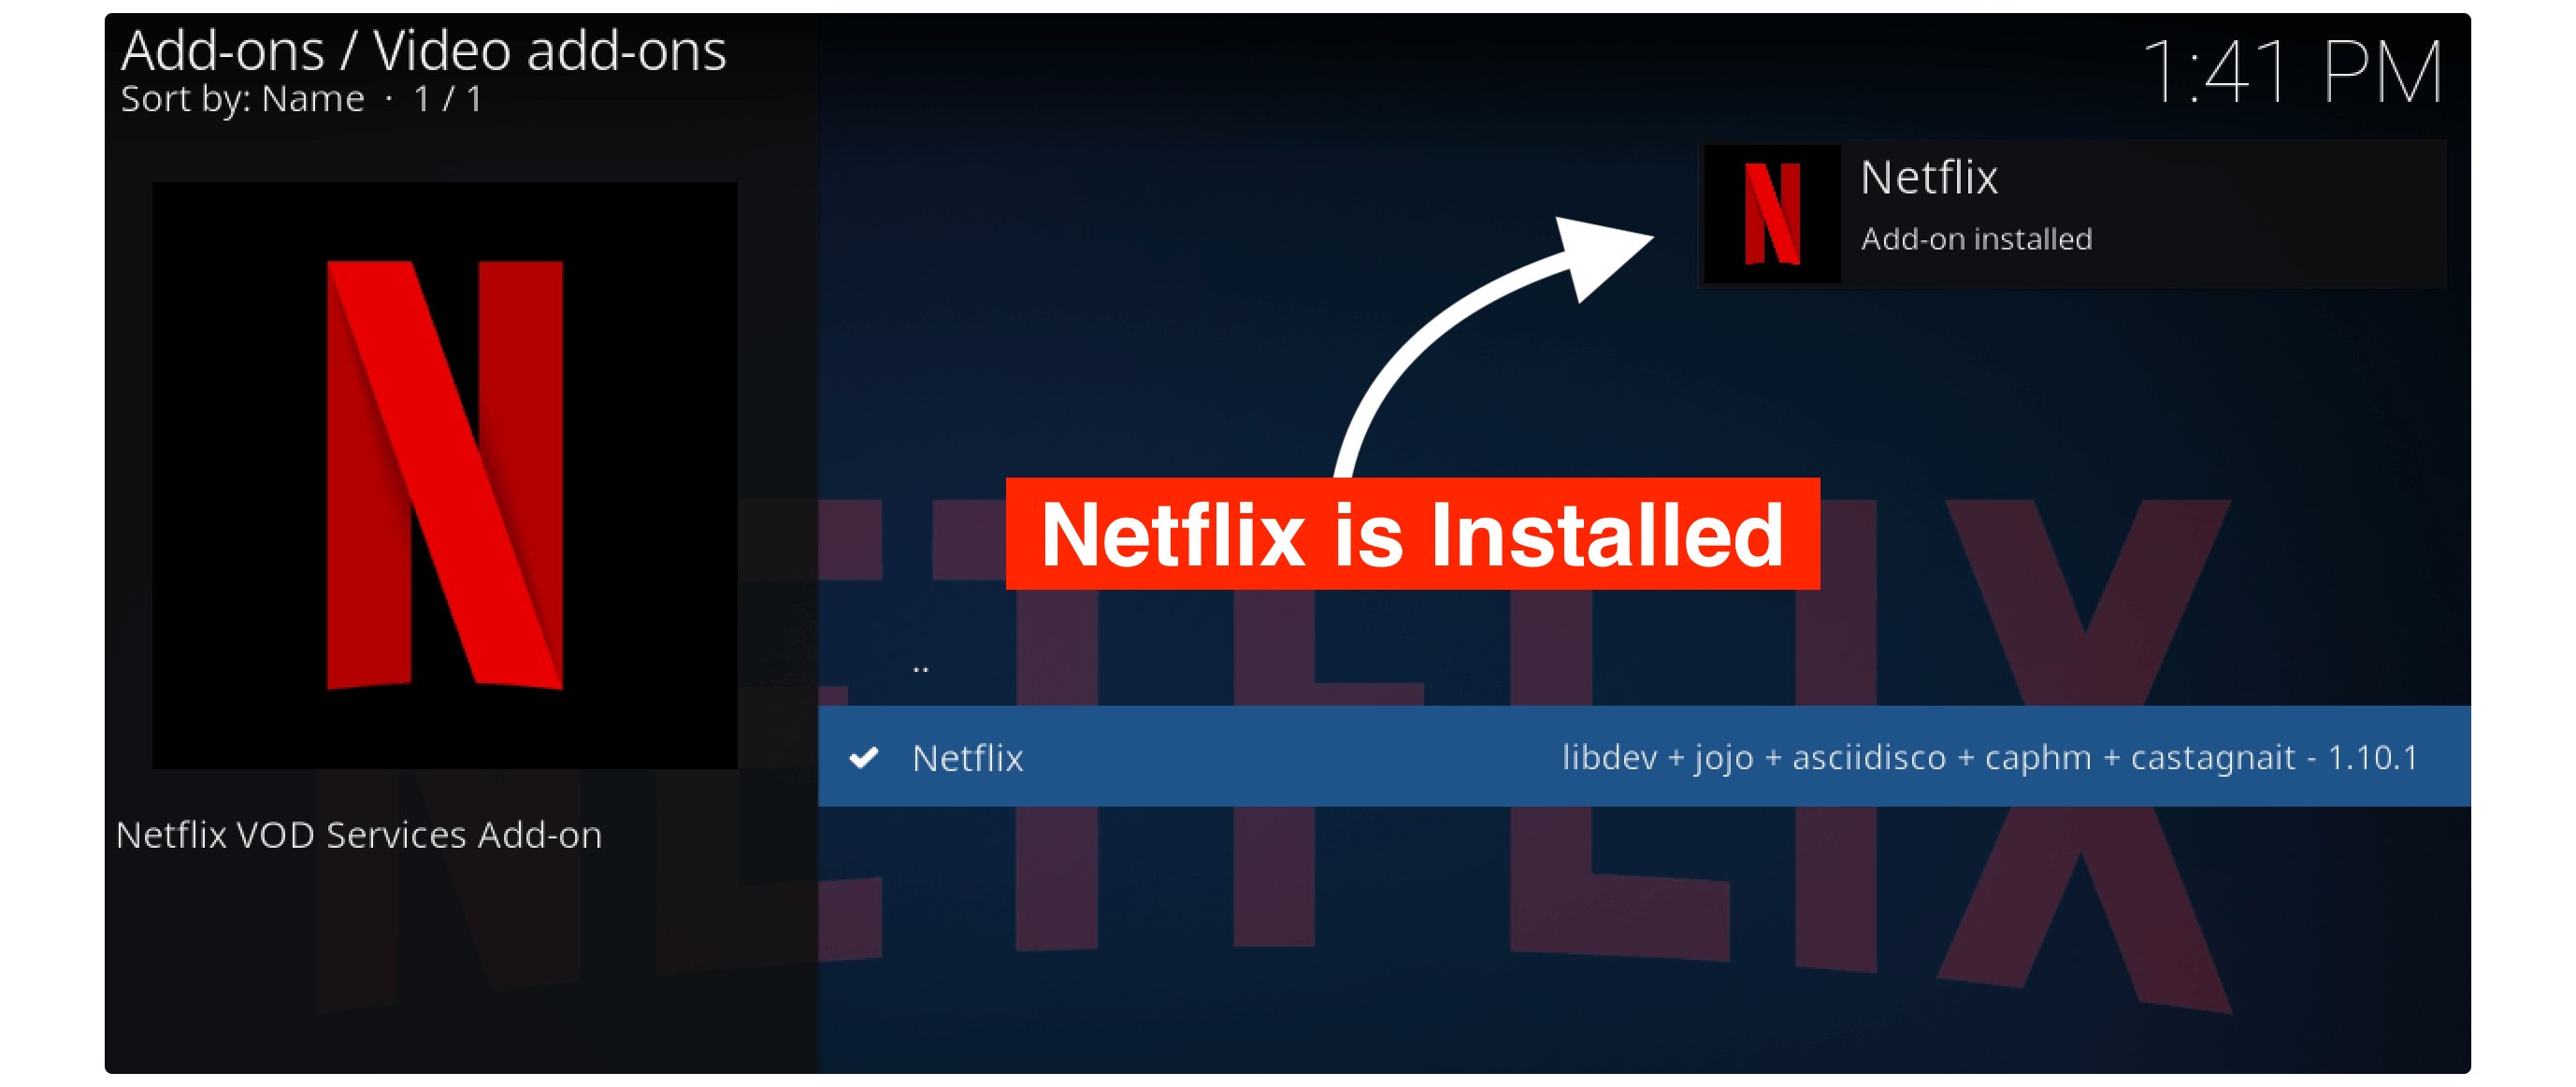
Once the Add-on has been downloaded it will be installed automatically. A notification will appear on the top right-hand side saying “Netflix Addon installed”.
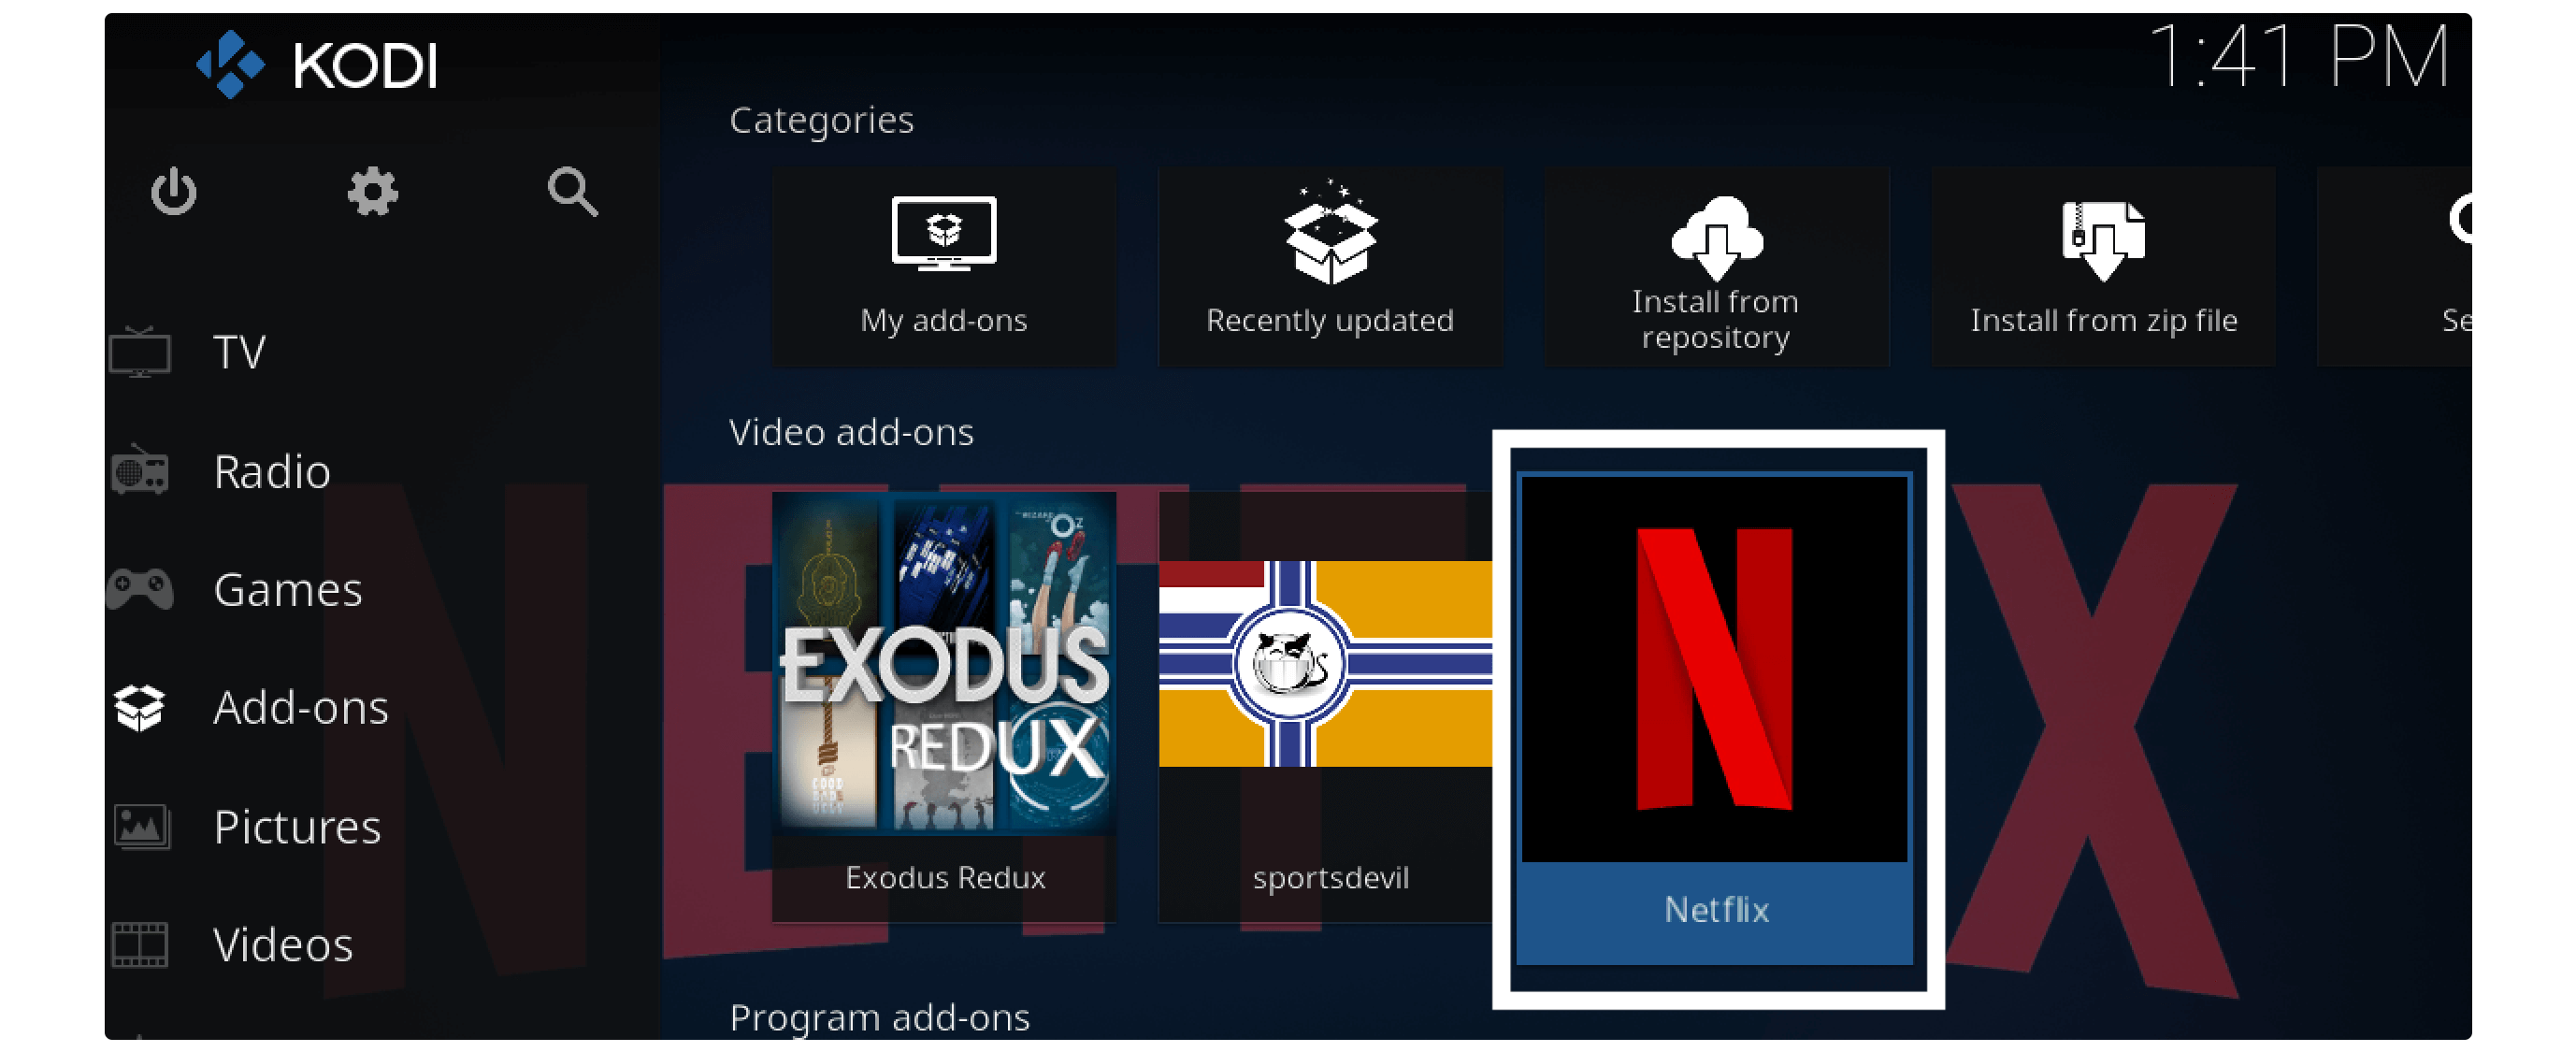
That’s it now you can easily use this Addon to watch your favourite web series anywhere and on any platform. You just need to use the authentication key or email password to log in with your account and once it’s done you will be able to stream all content instantly.
Please keep in mind that this Add-on doesn’t provide any free source so you can only use it if you already have a premium membership of Netflix. Although if you are looking for any free source then there are several free and the Best Kodi Addons are already available on the internet.
Below are some amazing Addons that provide free Movies, TV Shows, News, Sports and several other free stuff:
How To Update Netflix Addon on Kodi
Once we have successfully installed Netflix on Kodi our job isn’t done yet. It is because updating this Add-on is highly recommended. With the latest update, you will be able to see the new features, bug fixes, and some other improvements as well.
Instead of this old version may stop working and that’s why you will face several errors. To avoid such problems you just need to make your Add-on updated. In case you don’t know how to update it then you should keep reading this section as well.
Follow the given below steps to update Netflix on Kodi:
- Open Kodi and then from the Home Screen click on the Add-ons from the left panel.
- After this, you need to click on the Package Installer or Box icon.
- Now from here just go to the My Add–ons section.
- From My Add-ons you will see the list of various categories so now open the Video Add–ons folder.
- It will then show the list of all installed Add-ons just scroll down and select Netflix from the list.
- Once going there you will see the menu appears below and from there click on the Update button.
- When you click on that button the list of all available versions will appear and then click on the version that is located above.
- Now you will be asked for the confirmation so now click Ok to allow this Add-on to update.
That’s it now within a few seconds you will see the notification Add-on Netflix Updated on the top right-hand side. This means the Add-on has been updated successfully and then just open it to see the latest features and some bug fixes as well.
If you don’t want to follow all these steps again and again then I would recommend enabling the Auto-Update feature. Just open Netflix from the Video Add-ons and then click on the Auto-Update button located next to Update.
At this time your Addon will be updated automatically and it checks for available versions every time you connect to the WiFi or the internet.
Frequently Asked Questions (FAQs)
Did you successfully install Netflix Addon on Kodi but still you are having some problems? Or else you have any questions that you want to ask? If yes then below is the list of some most asked questions that will be helpful.
I have collected these questions from various sources as many people are asking these questions again and again. However, if reading this doesn’t work then feel free to let me know in the comment section. I will try my best to answer that question and help you with any problem that you are facing.
Do I Need VPN To Watch Netflix On Kodi?
No, VPN isn’t required to watch movies or TV Shows on Netflix as this is not any 3rd-party Add-on. It is the official Add-on that can be used only when you have the premium membership. But VPN can be only used when you are living in a country where this service is restricted. Best VPN For Kodi | Reviews Of The Top Fastest VPNs
Is Netflix Free On Kodi?
No, Netflix is a monthly-based premium streaming service and to use this Addon on Kodi you will be required to have a paid membership. If you don’t have it yet then first go to their official website and purchase any plan from them. Their prices are quite affordable and anyone could buy it and the best part is it works in almost every country.
How to Get Free Netflix on My Kodi?
To get free Netflix on Kodi you will be required to install any 3rd-party Add-on like Exodus Redux, Covenant, Yoda, etc. These types of Addons provide 100% free content and you can even watch Hulu, Prime Video etc. Even though some of them also come with free live TV channels, Sports, News, Lifestyle, and some other free content.
I have listed some of the best Add-ons for Kodi that you can get by following this link: Best Kodi Live TV Addons
Conclusion
This is the simplest way to install Netflix Addon on Kodi to start streaming your favourite Web-Series and Movies on any platform. Till now Fusion is the only repository available that provides this Add-on so you just need to read the whole steps carefully. Even if you are having a problem then you should check out the screenshots that are attached below.
If this Add-on isn’t working on your device then there could be a reason that it is geo-restricted in your area. That’s why I would rather recommend using a VPN service to unlock it in your area to stream all the content from there. Even if Netflix isn’t restricted then there are some TV shows that can be streamed to a specific location so using VPN you can also stream them.
If you find this article helpful and you want to show some love then please don’t forget to share it with others. Also, don’t forget to share your experience with us so other people also know this method is working.

