

Last Updated on 2 years by Amelia Johansson
If you are looking for a guide on how to Install Yoda Kodi Addon, then you came to the right place. Because in today’s guide, I am going to share with you all the steps to get this awesome Addon right on your Kodi Media Player.
No doubt that many other Addons are available on the internet, but most of them don’t work after some time because the developer stopped working on them.
But this is the only Add-on that keeps working for years and provides us with the latest and old streaming links.
This excellent Add-on will give you access to various types of entertainment like Sports, Movies, Health & Fitness, etc. It is a clone of the Exodus & Covenant, which is shut down some months ago, so if you are a fan of that Addon, then you will surely be going to love this as well.
What is Yoda Addon?

Are you still confused about what this AddonAddon is? Then don’t worry, I am here to tell you everything you wanted to know about this. So, it is the fork of some most popular Addons named Covenant and Exodus, and it is part of Supremacy Repos.
If you already know about Supremacy, then I am sure you already understand how useful this could be. Because it is the only trusted repo that provides us with great and useful Addons, these are free to use and will never show ads or ask for money to watch any content.
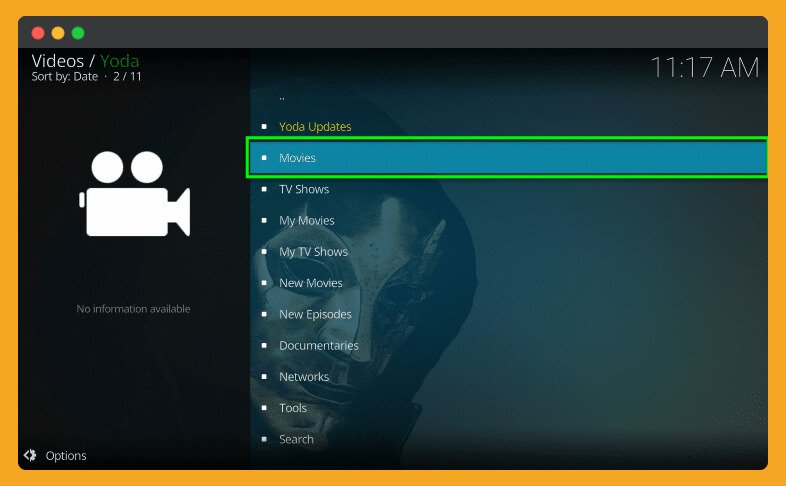
In Yoda, you will see different types of menus like Yoda Updates, Movies, TV Shows, My Movies, My TV Shows, New Movies, New Episodes, Documentaries, and so on. By just looking at these options, you can easily understand what you get in each option, so in short, it is user-friendly and easy to use.
How To Install Yoda Kodi Addon
OK, so as you know how useful is this Add-on then let’s check out the proper installation of it. As you know that this is not from the official Kodi repository, this means we have first to add the Source to the app, and then we will be able to install it.
Instead of this, we have to make a few changes to the application because, by default, we cannot install any third-party source on this app.
For this, we have to enable installation from an Unknown Source, and it is similar like we did in our Firestick to sideload applications.
OK, so enough intro let’s move to the step-by-step guide:
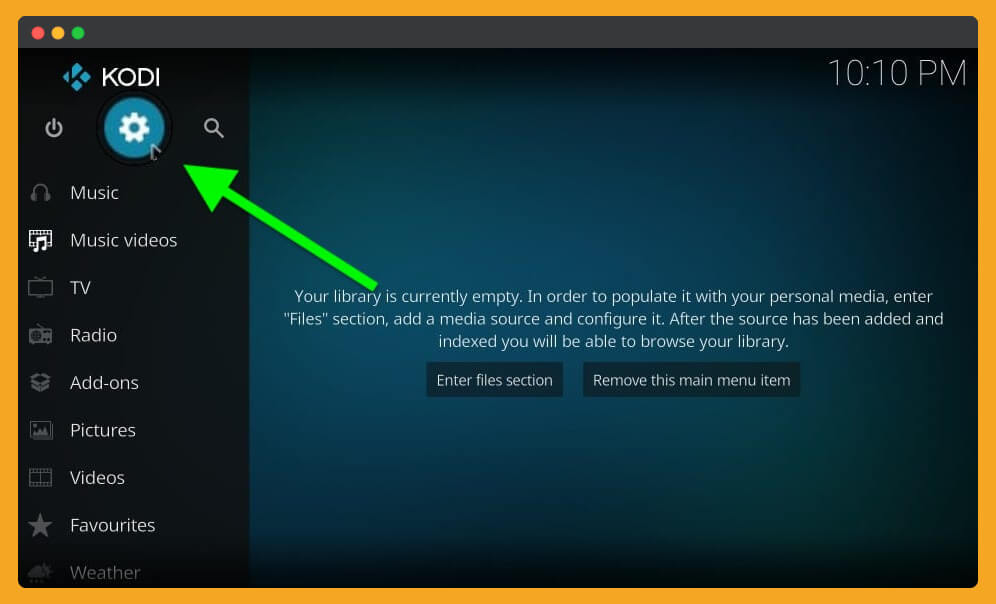
After this, you need to launch the Kodi application, and then from the Home Screen click on the Settings or Gear icon located next to the power button.
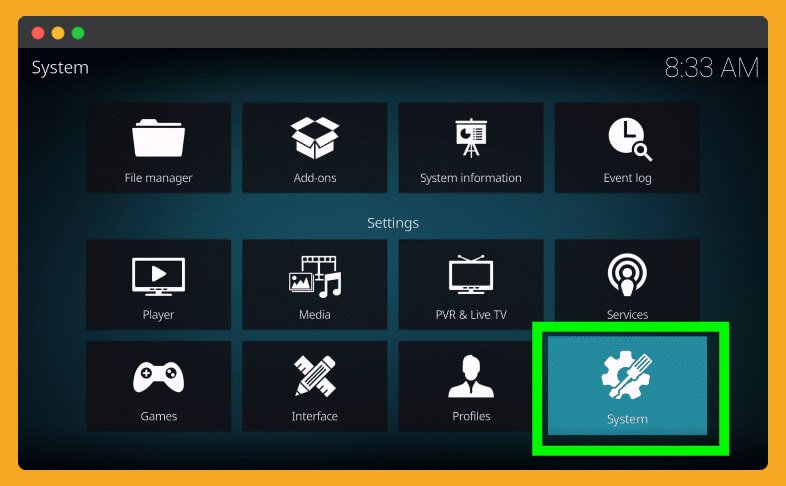
Here you will find all the Settings available, so simply select System Settings from the list.
At this time, select Addons from the left side and then simply enable Unknown Sources.

A warning message will appear, so ignore it and select Enable again. Yes.

That’s it now we are ready to add a source of the Addon and then will move to the installation section.
Add Yoda Kodi Addon Source
So, by following the above steps, we have successfully enabled the installation of an Unknown source. Now it’s time to add a source to the repository so we can download this Add-on.
Here are the steps to follow:
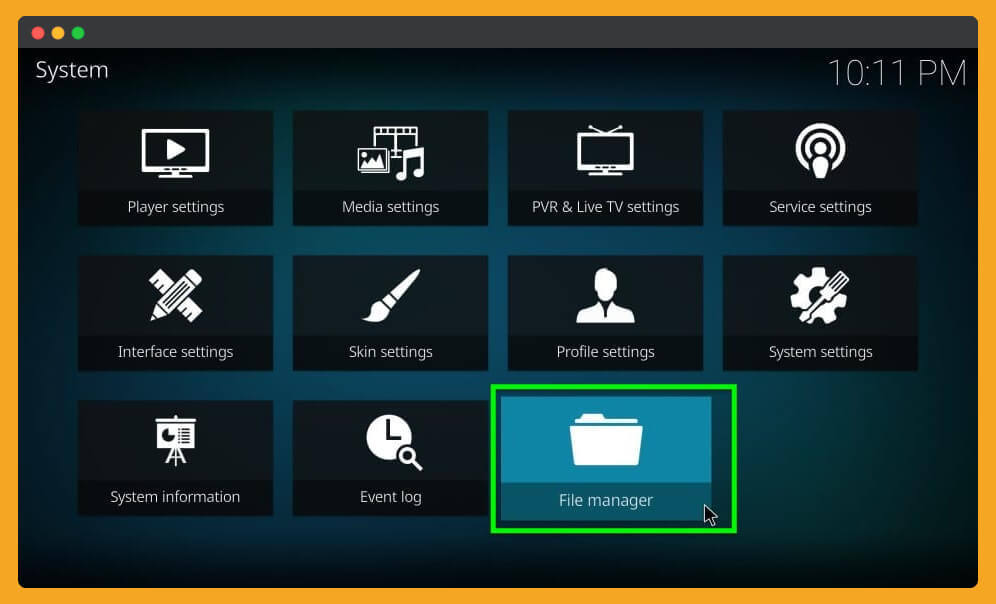
Go back to the Home Screen of Kodi Media Player and then again click that Gear or Settings icon located next to the power button.
Now at this time, you will be required to click on the File Manager.
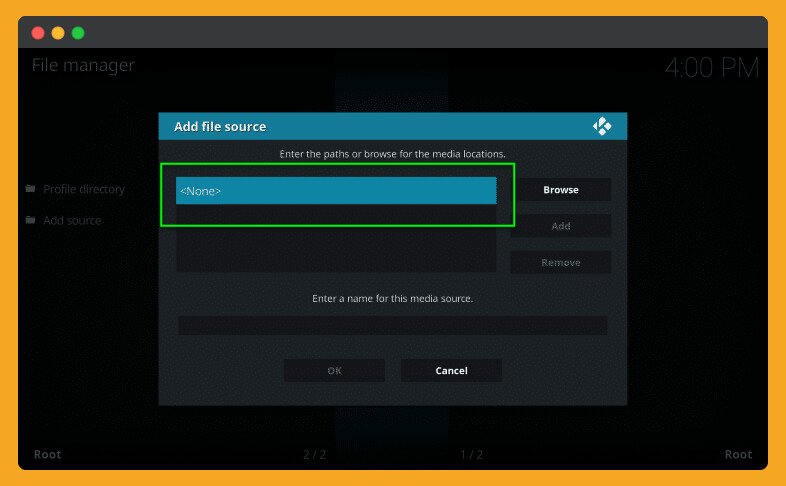
From the File Manager, you will see all the Sources that are added already, so simply double-click Add Source.
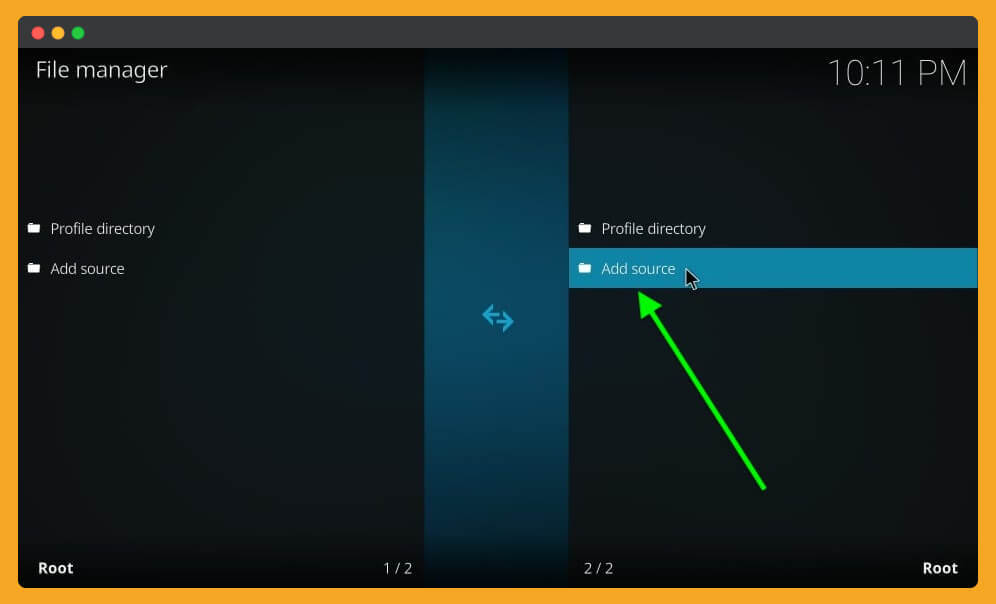
It will then launch a new window and from here select None-
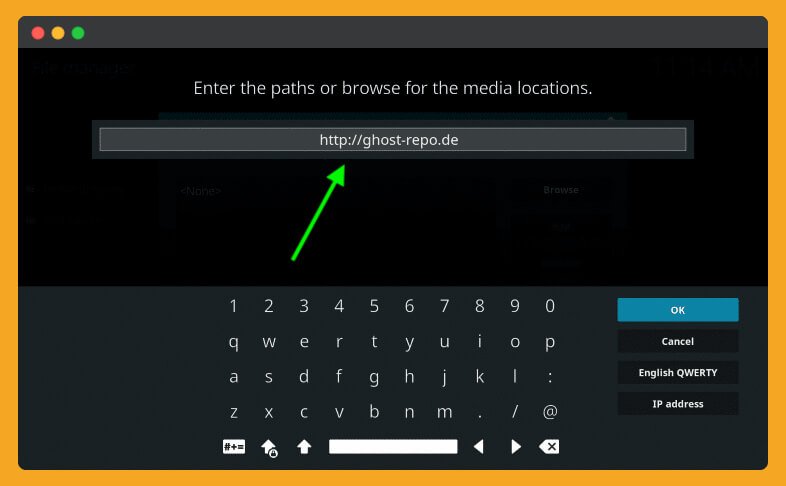
When you click on it, you will be asked to enter the address of that Source, so just type this address in the box: http://www.lvtvv.com/repo/ and hit OK.
Now again, click on the box located below and then type the name of that Source in my case I am typing Ghost.
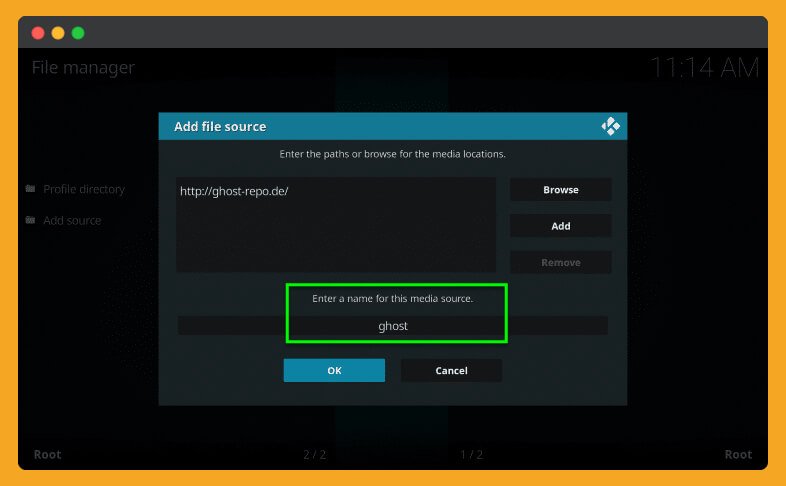
Right after you typed the name, now click OK. Then again, click OK from the box, and here you see the name of that Source available there.
This means the Source has been added successfully, and now we are ready to install Yoda Kodi Addon on Firestick.
Install Yoda Kodi Addon & Repository
Make sure to read the steps twice before applying; otherwise, you may make some mistakes that can damage this application.
OK, so let’s check out the steps below:
After adding the Source, just go back to the Home Screen and, at this time, select Addons from the left-side menu.
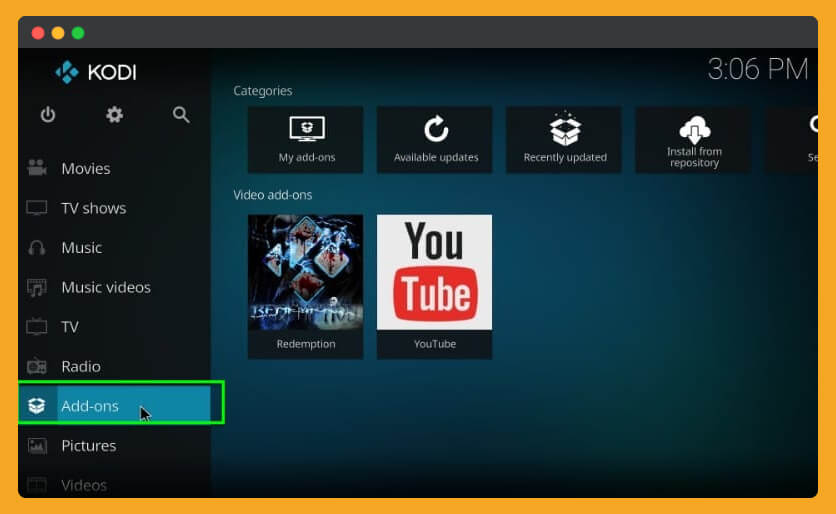
Now you need to click on the box that is located above near the Settings icon (you can check in the screenshot below).
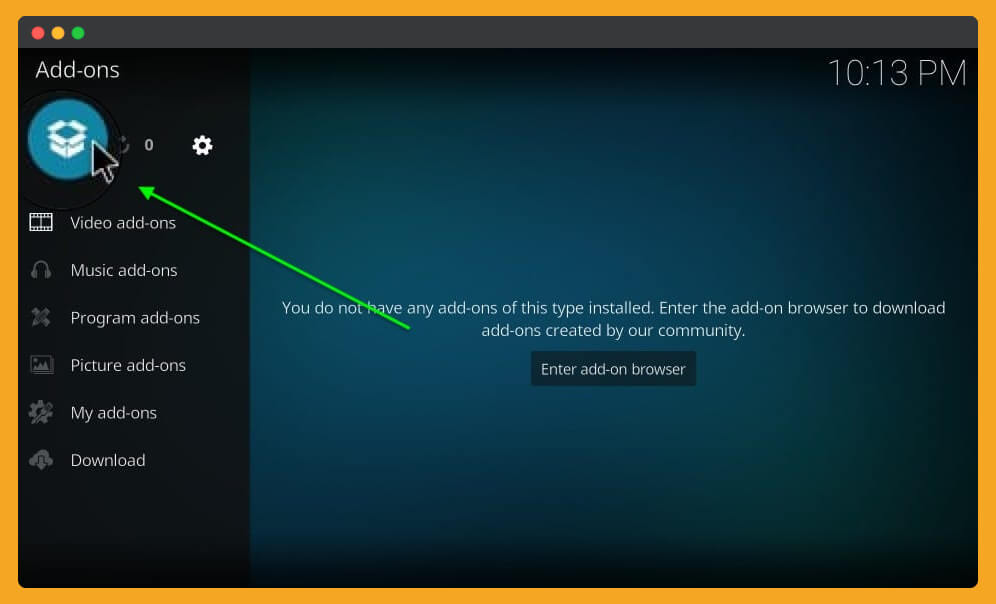
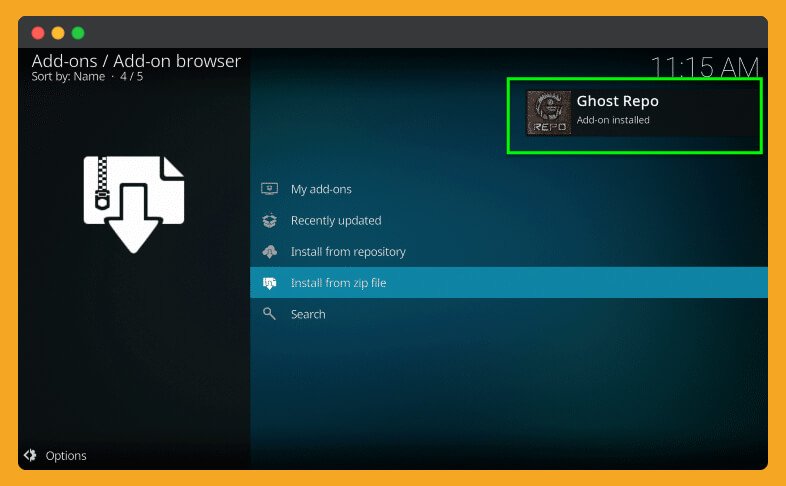
Here you see many other options available so just choose Install From Zip File.
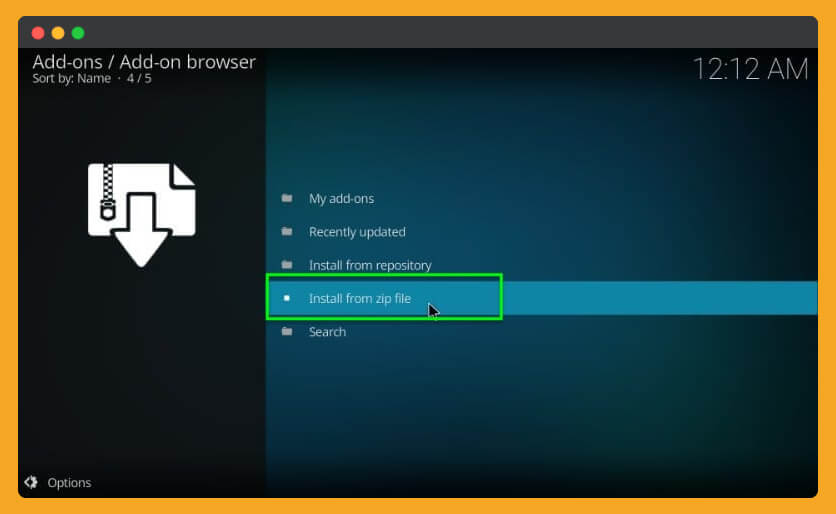
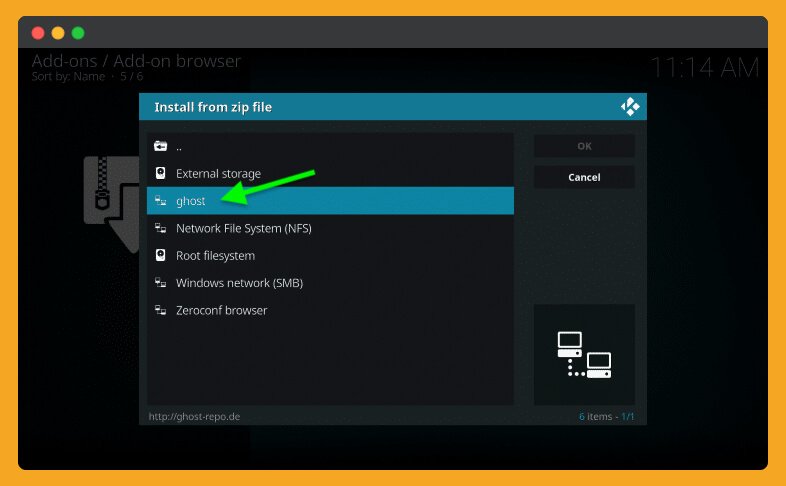
It will then show you a pop-up window where you will see all the sources available. From this list, find the Source we added above. In my case, it is Ghost, so I will select the Ghost and hit the OK button.
Now you will see some files that are available in this source URL. From here we need to select ‘repository.Ghost.zip‘. The numbers that are shown are the current version of that repository this means we have installed Kodil version 1.3. So, when you are installing it and find the numbers are not the same then don’t get confused as they have updated the repo.
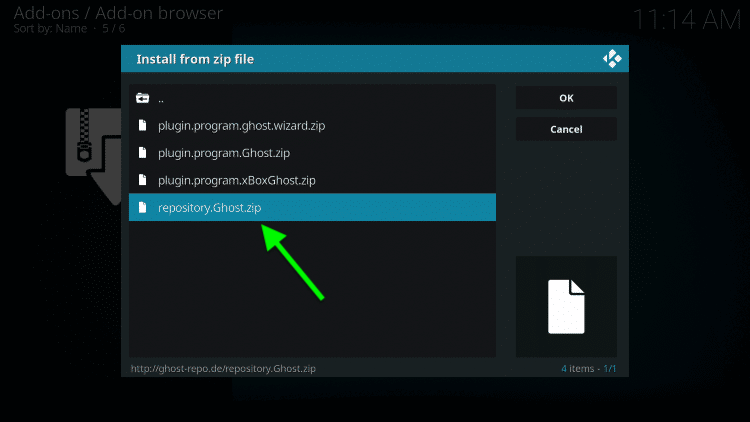
After selecting Kodi now wait for some time until you see the notification from the right-side above saying ..Ghost Repo Add-on Installed.
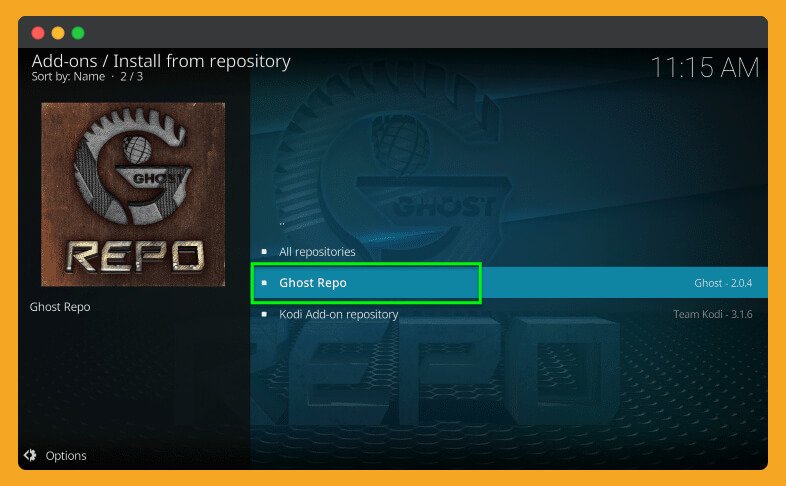
Now you need to select Install From Repository.

At this time you will see all the available repositories so from the list find ..Ghost Repo and open it.
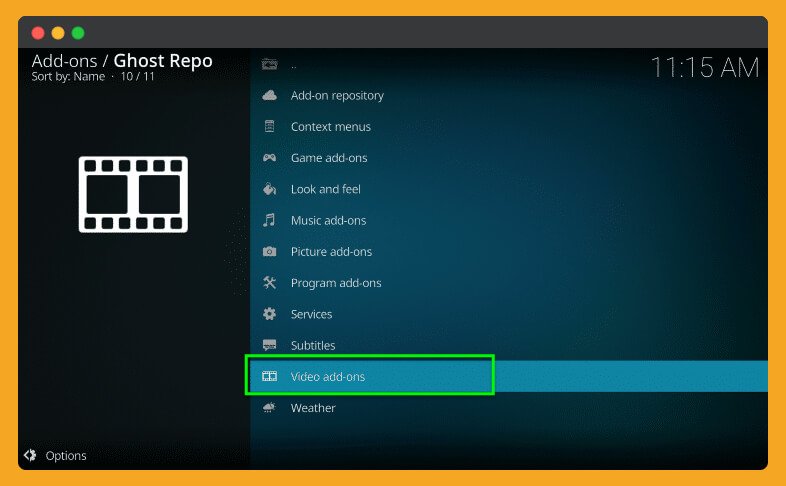
Now go down and select Video Addons from the list.
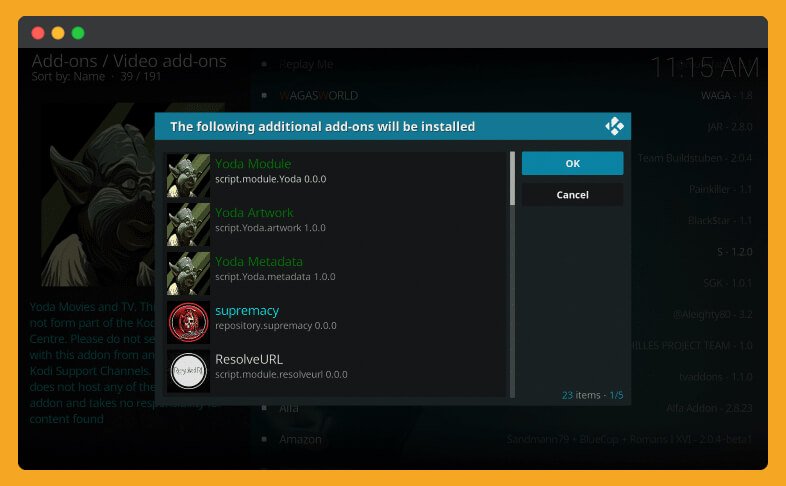
After this scroll down below until you find Yoda Addon. Then simply press the OK button, and it will start downloading the Addon.
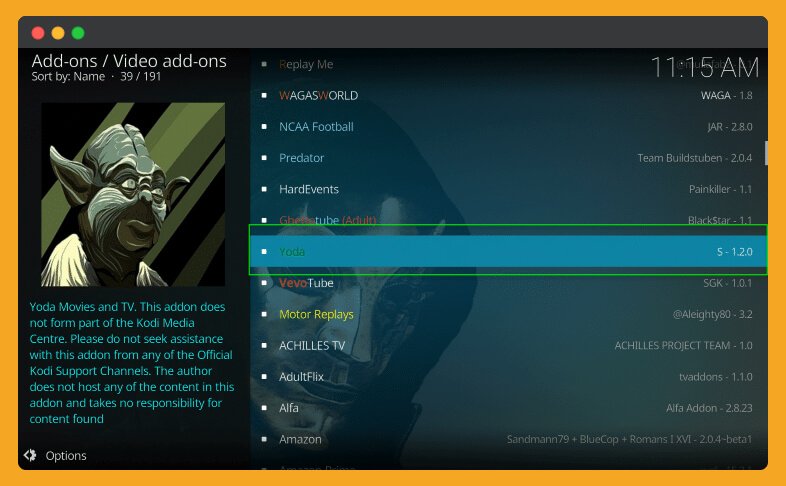
Now, wait for some time until you see the Yoda installed Successfully notification appears on the right side above. When you see the notification, this means you have successfully installed this AddonAddon on Kodi.
That’s it now go back to Home Screen and then select Add-ons from the left-side menu. Now choose Video Addons, and here you can see the icon of Yoda appears there.
![]()
If you don’t find the icon there, then you need to follow the steps again as the AddonAddon is not installed yet. But if the icon is there, then everything is set, and enjoy using this excellent Add-on on your device.
Install Yoda Using Supremacy Repository
As I have already mentioned the method of installation above, some people have reported that the above repository doesn’t work. In this case, I have finally found a working repository from where we can quickly get the Yoda Addon.
The name of this repository is Supremacy and is very well-known among Kodi users because it has various numbers of Addons. In this repository, you can get Exodus Redux, Cartoon Network, and Adult Swim. F4mtester, Joyride, and other types of plugins.
OK, so here are the steps that you need to follow:
As we have already enabled installation from Unknown Source and understand how to add the Source of the Repository so we can move to the next step.
Open Kodi > Go to Settings > File Manager > Add Source > click None- > add source URL http://2supremacy.uk/repo/ > Enter name Supermacy > Ok.
Go back to Home Screen and then select Addons.
Now choose the Box icon near Settings.
From here, choose Install from Zip File.
In this box, you need to select Supermacy or whatever you named the Source.
After this, just choose repository.supremacy-x.x.zip (x.x is a version, so don’t get confused).
Wait for some time until you see the notification “Supremacy Installed.”
At this time, go to Install From Repository.
Here you will find all the list of reports that are available in that Source, so simply scroll down and select Supremacy.
Now you need to open Video Addons.
From there, you will find Yoda so hover over it and press OK.
After this, simply press the Install button.
And again, wait until you see a notification saying, “Yoda Addon Installed.”
That’s it now we have the latest version of Yoda installed on our Kodi, and now we have access to all the latest and old content. You can now start watching your favourite movies, shows, and many other fresh and exciting things.
It may show you some slow streaming links, so if you wanted to get fast and 100% working links, then you will be required to use Real-Debrid.
This Add-on supports the integration of Real-Debrid, so if you are interested in it, then you can follow the below steps for the proper method.
How To Integrate Real-Debrid with Yoda
Before proceeding, makes sure to create an account on Real-Debrid by following the link.
1. After signing up now, launch Kodi and then open Yoda from the Video Addon section.
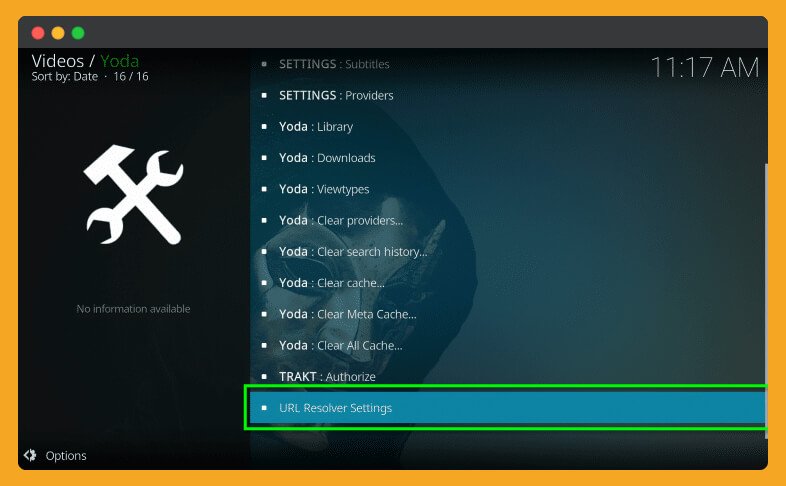
2. Scroll down to the bottom and then select Tools from there.

3. Now again, scroll down and, at this time, choose URL Resolver Settings.
4. It will then open a new Pop-up menu, so from the left-side select Universal Resolver now scroll down under the Real-Debrid section and select (Re)Authorize My Account.

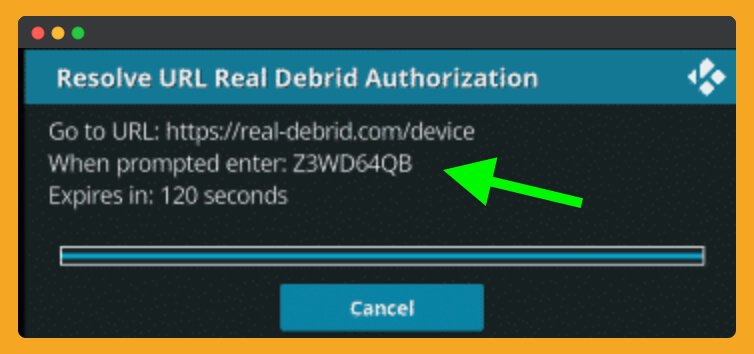
5. This will show you a screen with some type of code that you need to enter into your account, so note this code and move to the next step.
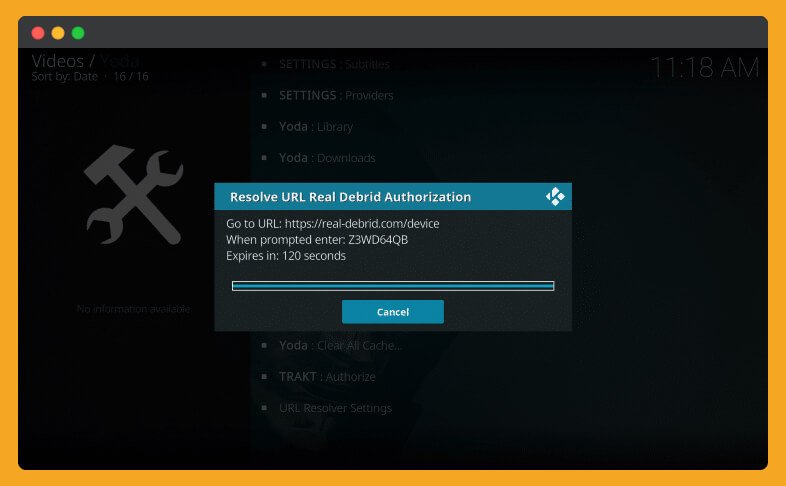
6. Now from a computer or mobile phone, open a web browser like Chrome or Firefox and then go to https://real-debrid.com/device.

7. You will then see a pop-up menu, so type the code you get in step 5 and click Continue.
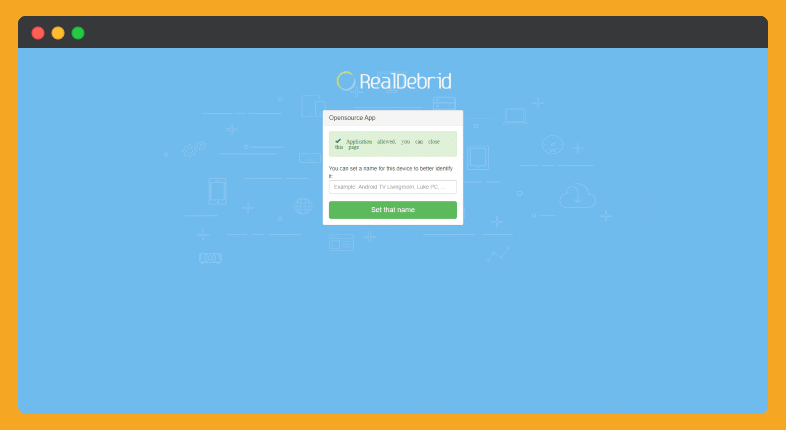
8. It will then show you a notification Your Real-Debrid Account is now approved.
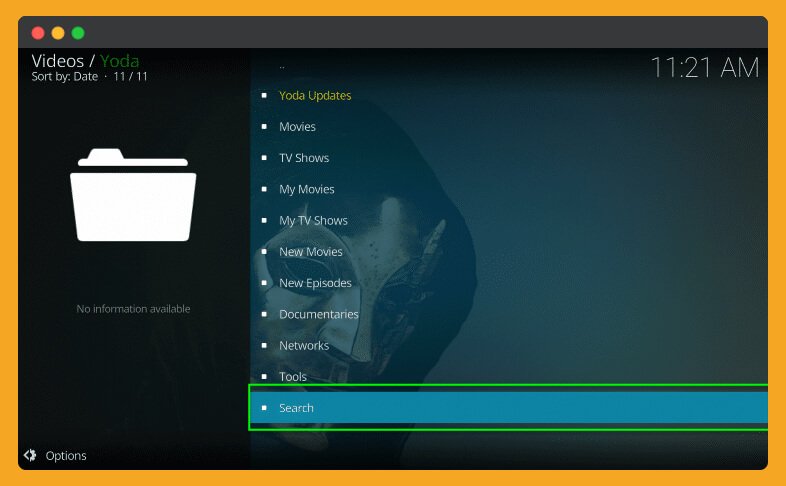
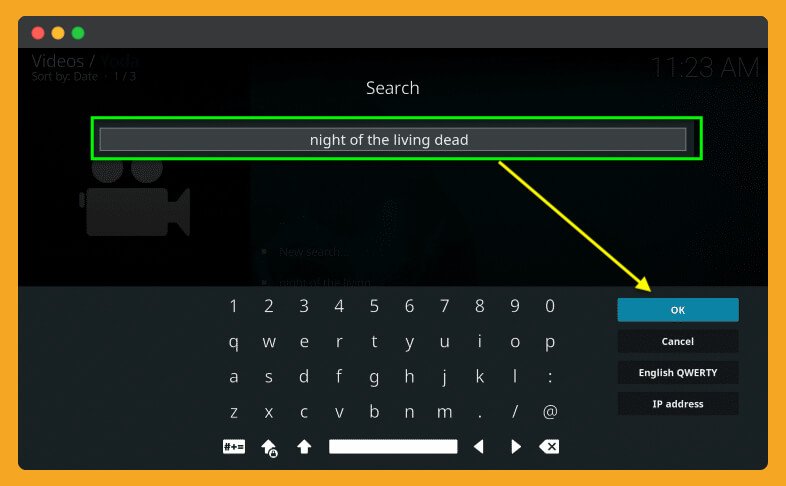
9. OK, so go back to the Yoda and later try to search for a movie, you can do this by scrolling at the bottom of the Home Screen and then clicking Search,
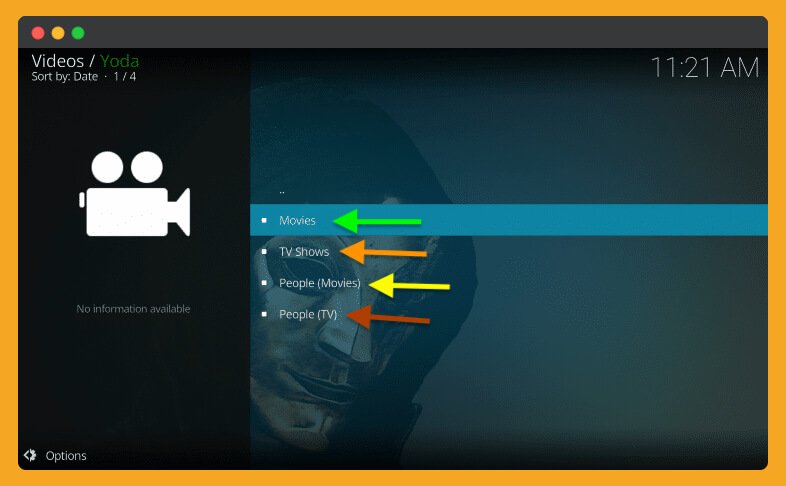
10. Now choose what you want to search like a Movie, TV Show, etc.
11. After this select New Search.

12. Just type any name of the movie or show (depending on the search option you choose above) and hit OK.
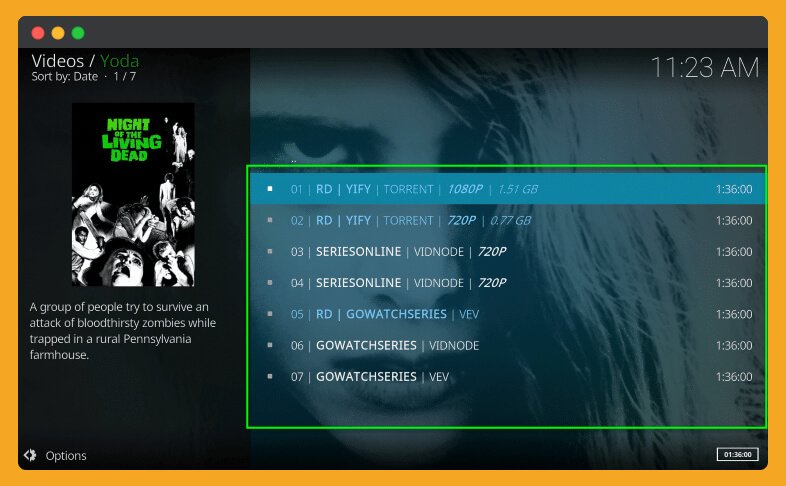
13. Now you will see all the available sources, and you will also notice there is RD written next to a title. This RD means Real-Debrid, and you can use them to stream faster than from an ordinary link.
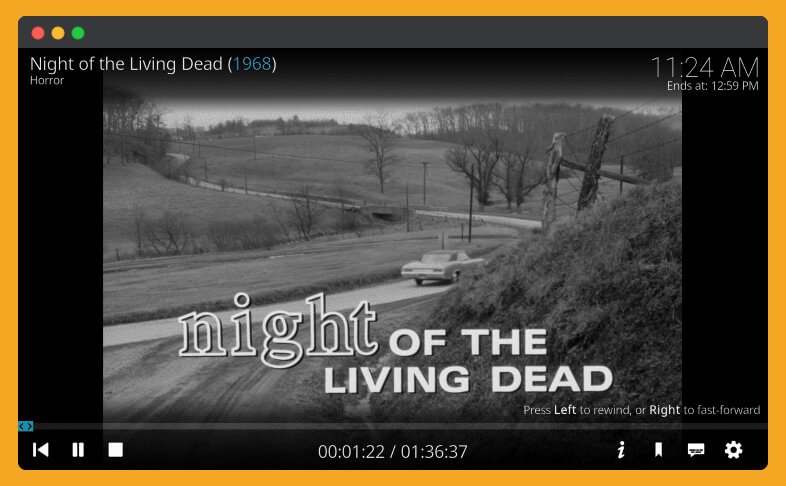
That’s it now you are ready to watch your favourite Movies, TV Shows and other types of content on your TV with fast speed.
You may not find all the movies in this Addon, but don’t worry as I have listed some Best Kodi Addons for Firestick that you should check as well.
Frequently Asked Questions (FAQs)
Now, as we have understood the complete method of installing this awesome Addon on our device. But still many people have some doubts about what they are looking for. In this case, I have collected the most asked questions from the internet that maybe help to clear that doubt.
But if you didn’t find anything relevant to your question, feel free to comment down below. I would love to help you and will try my best to solve the problem (if you are facing any) or answer your question.
Is Kodi Addon and Build Different?
Yes, of course, these are two different things Kodi Addon just contains some type of links for various entertainment.
But in the Kodi Build, you will get some great Addons, Customize Themes, Skins, and many other things. If you are interested in Kodi Builds then you should check out this article as well: Best Kodi Builds For FireStick
Is Yoda Addon still working?
Yes, it is working perfectly fine on both Kodi Leia and Kodi Krypton as well.
A few months ago, when the Supremacy Repository shuts down this Yoda also shuts as well. But recently, a new repository brings this back you can get its link from the above guide.
Is Yoda Addon worth using?
If you are a fan of Exodus or Covenant, then I would like to say Yes. This AddonAddon is worth downloading as it is the exact copy of the most famous Exodus and Covenant. It is a multi-purpose entertainment tool that provides you with Movies, Shows, Live TV, and so on
Conclusion
I hope you followed all the steps mentioned above and learned how to install the Yoda Kodi addon on Firestick. These two are the possible ways to get it on your device. Maybe some other repos provide it as well, but I would recommend only using these two repos because these are trusted.
In case you are using any other source, then I am not responsible for any damage you make. So, always use the Source that is provided by me because I personally test them by myself, and then I post it here. If you have a Real-Debrid Premium account, then you can also integrate it by following the above guide.
If you love my work and find it helpful, then don’t forget to share it with others because share is care. In this way, others can get benefit from it, and it will help to encourage me to bring more cool stuff for you. If you still have some questions don’t hesitate to ask in the comment section.