
Are you fed up with running out of storage on a FireTV device? Now you want to learn how to expand Firestick Storage but didn’t find any helpful guide out there? Well! in that case, your search is finally over in this article we are going to learn the simple and the easiest way to increase internal storage on this device.
However, the steps provided here are a little bit complicated and that’s why I would suggest you read this article until the end and don’t miss any step provided here. It is because if you missed anything then you may not be able to increase the space or end up having some damage.
In this way, I am not responsible for anything that happens to your device so to avoid this issue just stick with this article. Furthermore, these steps are checked on Fire Stick 4K, Fire TV Stick 2nd, 3rd Generation and even on lite. I don’t know much about the older device so I don’t guarantee if it works or not.
Can You Expand Firestick Storage
Now before moving toward the article let me answer the question that people are asking as if they can expand Firestick storage or not. Well, the answer is Yes, a user can expand Firestick Storage with a simple trick and will take less than 5 minutes to complete. Once completes you can simply increase internal storage to install more apps than usual.
There is no doubt that this is the amazing streaming stick available out there but it has a huge drawback when it comes to internal storage. It is because Roku is its competitor streaming stick and it offers users to install around 500 different channels on their device without any restrictions.
While on the other hand Fire TV offers less than half the number of app installations to the device because of having limitations. It only provides 8GB while the usable storage is only 5GB or less which is quite low in these years. As many people either use 3rd-party apps or different subscription apps to stream their favourite TV Shows.
Although the app size is now increasing as well as they are adding new features and providing some other advantages as well. And if you run out of storage you face various problems like a blank screen, app freezing, Optimizing Storage & Applications etc. This is the reason why people prefer to increase Firestick storage so they can download more apps.
How To Expand Firestick Storage
Now that we know we can expand storage and install various apps I am sure you will be curious to learn the process. Well, in that case, you don’t need to worry about it anymore because we are now moving toward the instructions. But before we do this there are a few things that you need to know.
To increase the storage I am going to use the PenDrive as internal storage on a Firestick device. Since the FireTV is the streaming stick that means it doesn’t offer a separate port for USB. That means to increase the storage you first need to buy a USB OTG cable to connect your Pendrive.
So, here are some things that you are required to have:
- Fire TV Stick 4K (or another of your choice).
- xStream USB Port Adapter (to attach Pendrive).
- USB 3.0 Flash Drive (minimum 64GB).
- Remote ADB Shell App (installation instructions are provided below).
Now first you need to have these things that are mentioned above as without them you won’t be able to follow this guide. As I already mentioned that the FireTV doesn’t have a port for Pendrive and that’s why we need to use an OTG cable instead. While on the other hand, you need a USB 3.0 drive.
It is because 3.0 is much faster than others and works just fine than 2.0 and even sometimes 2.0 might show you an error. In this way, if you don’t have a drive yet then you probably first need to buy from the link provided above. Also, make sure you are using Firestick 4K, or the latest generation.
So, once you have everything now follow the steps provided below to expand Firestick storage:
1 First thing you need to do is connect Pendrive to the port on the OTG cable and also connect Micro USB to Firestick and use the Female port to connect the power adapter and turn on the TV.
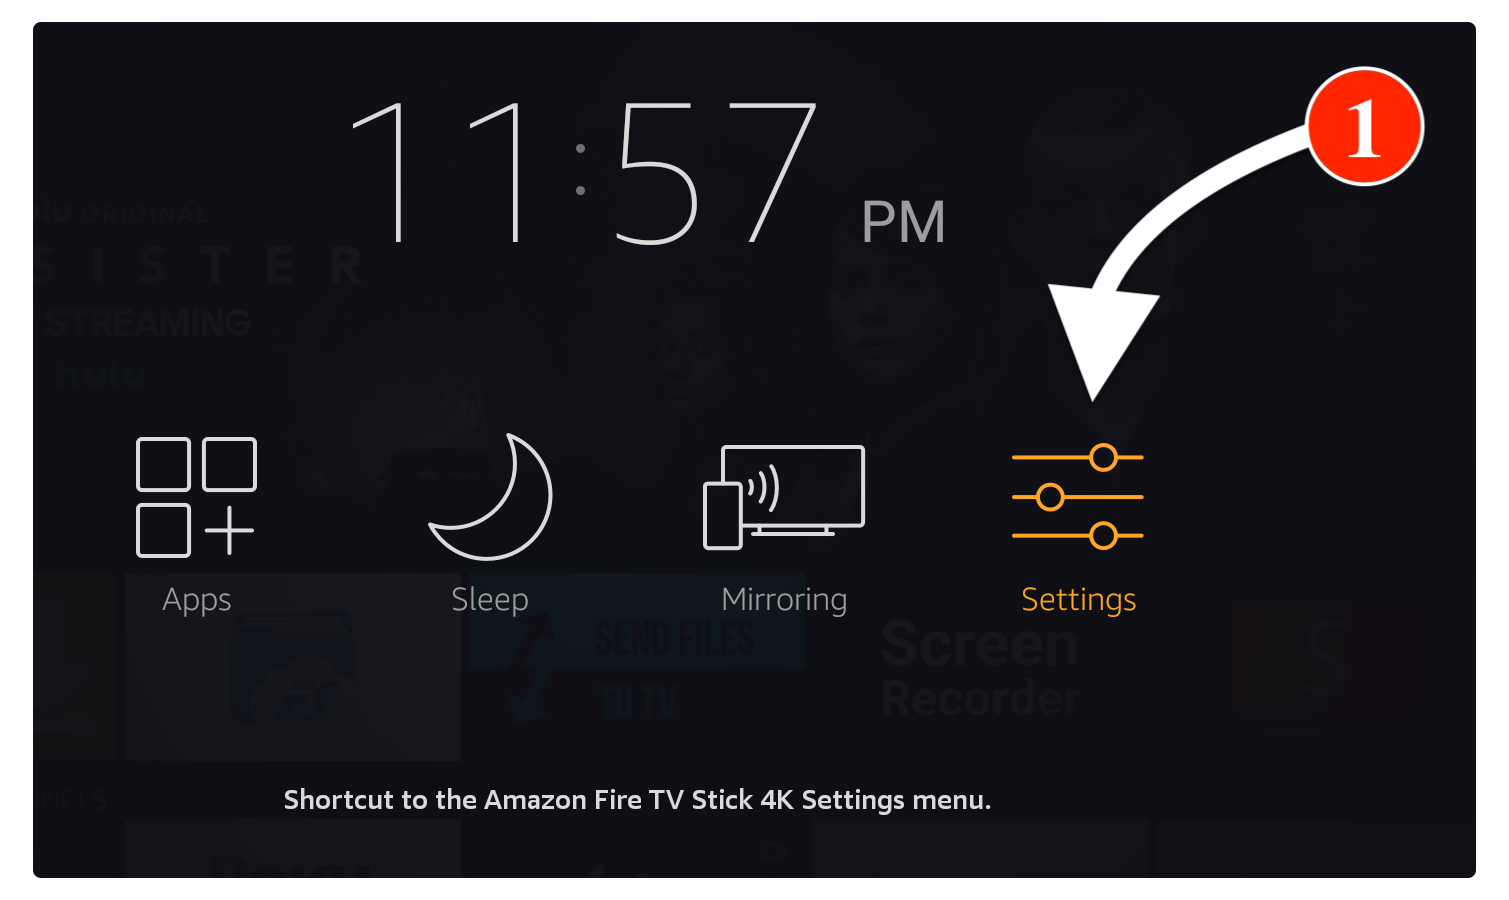
Once you turned on the TV now from Home Screen hover to the above section and then select Settings. Or else you can press and hold the Home button for a while and click on Settings.
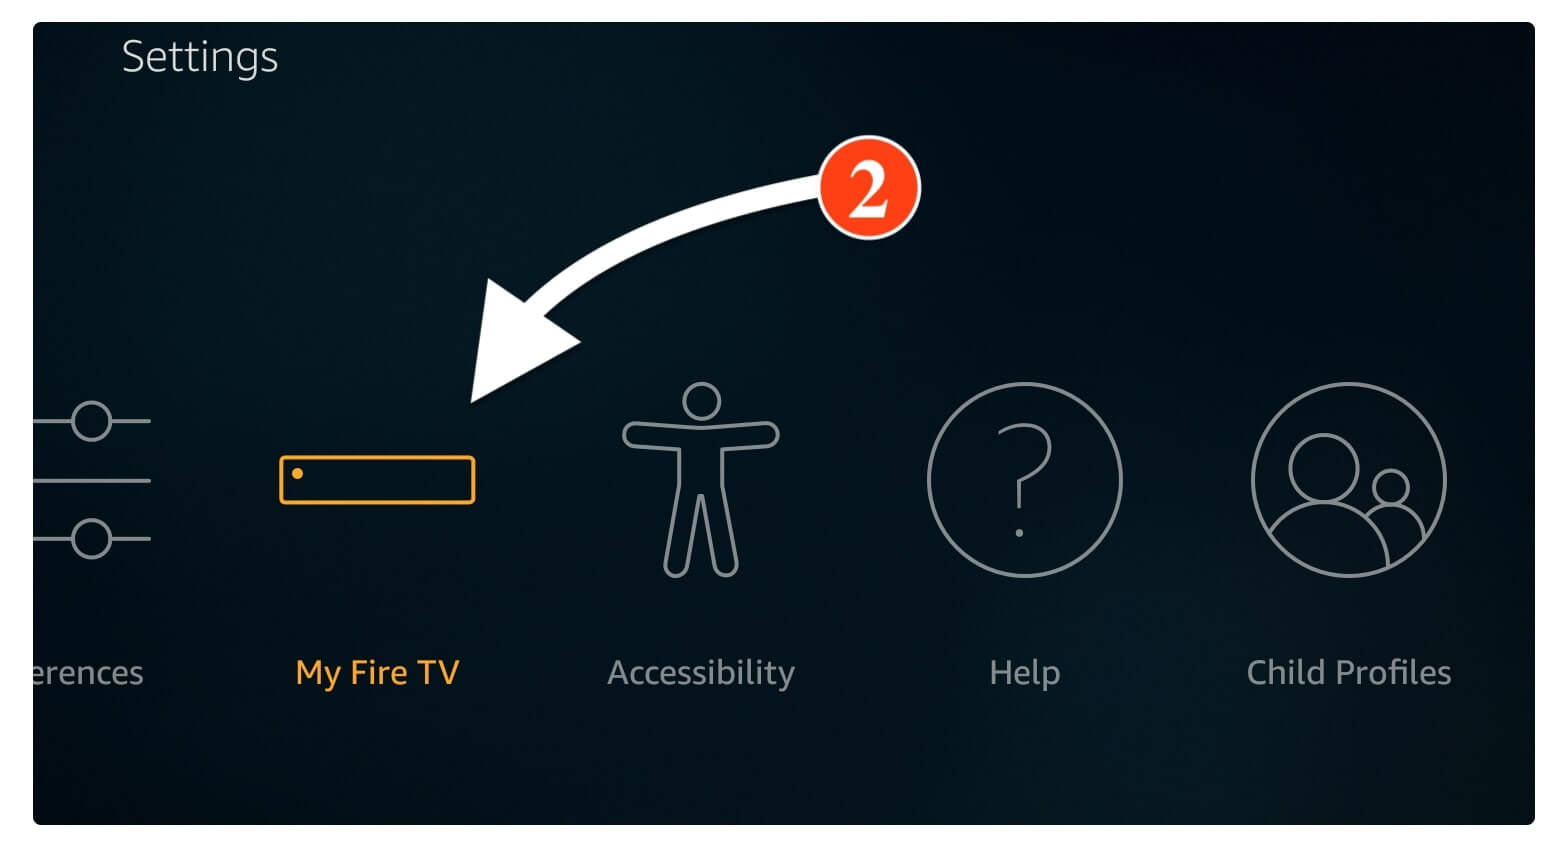
After entering the Settings just move across and from there click on the My Fire TV.
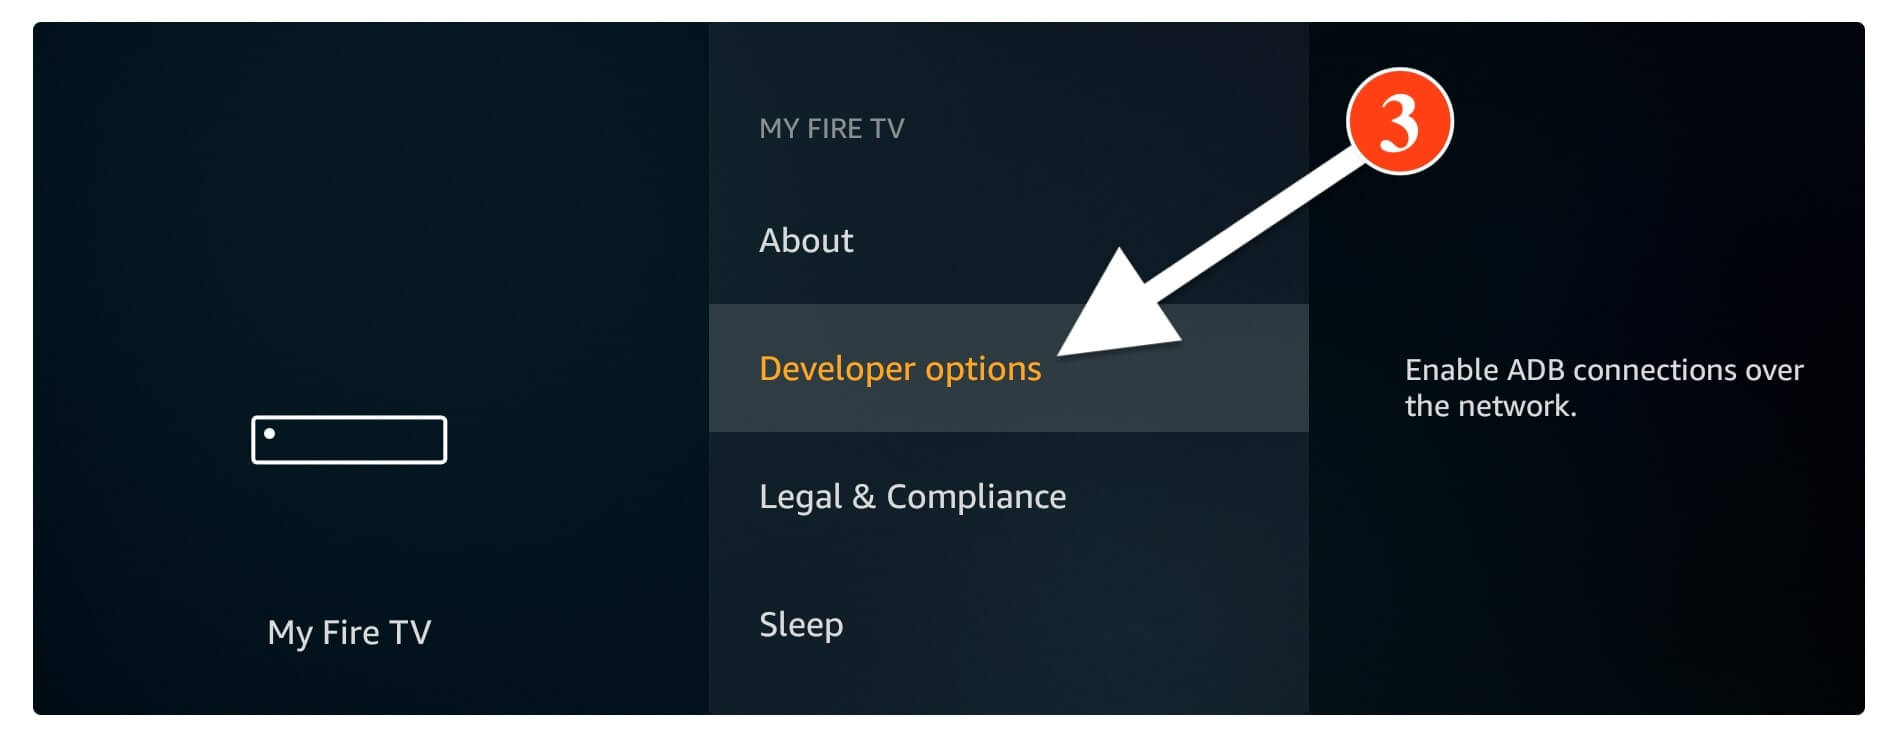
From here just scroll down and then select Developer Options.
At this time hover to the Apps from Unknown Source and press the Select button.
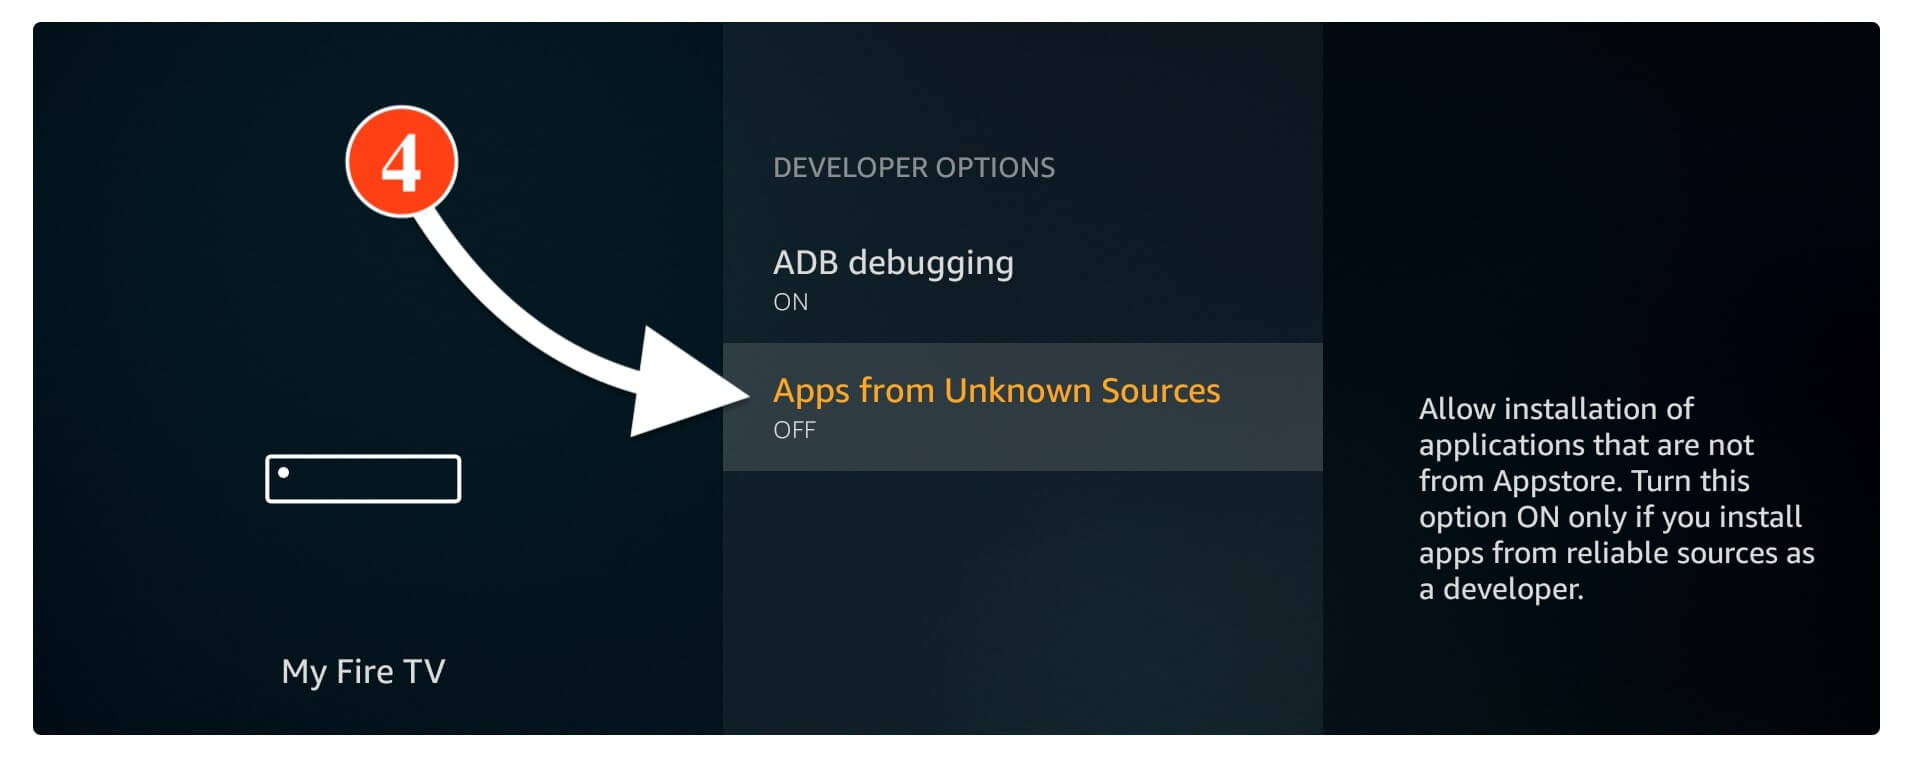
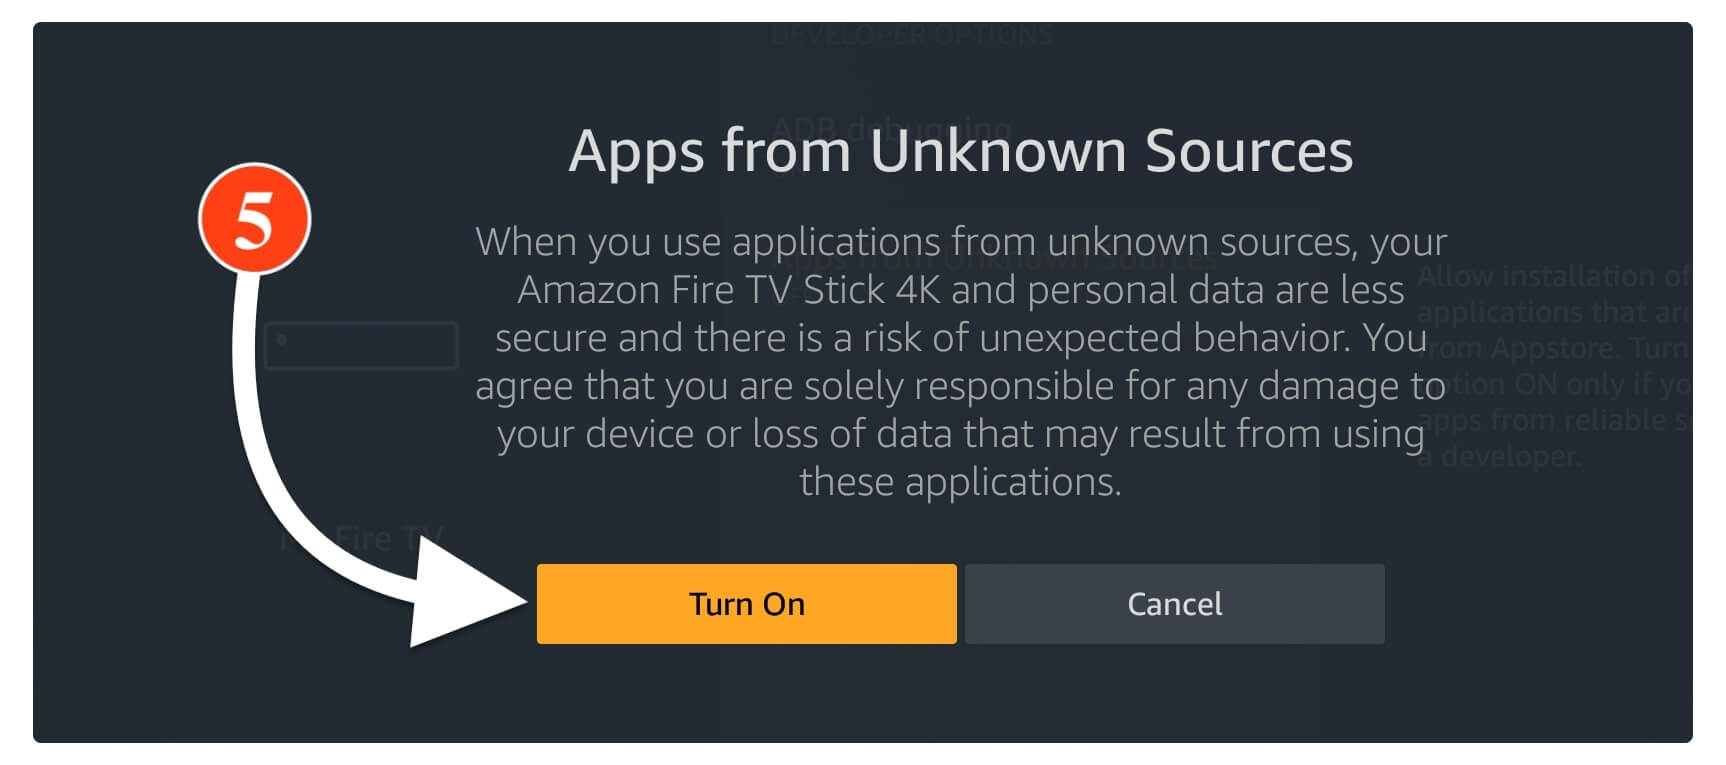
You will be then asked for the confirmation just select Turn On to enable it.
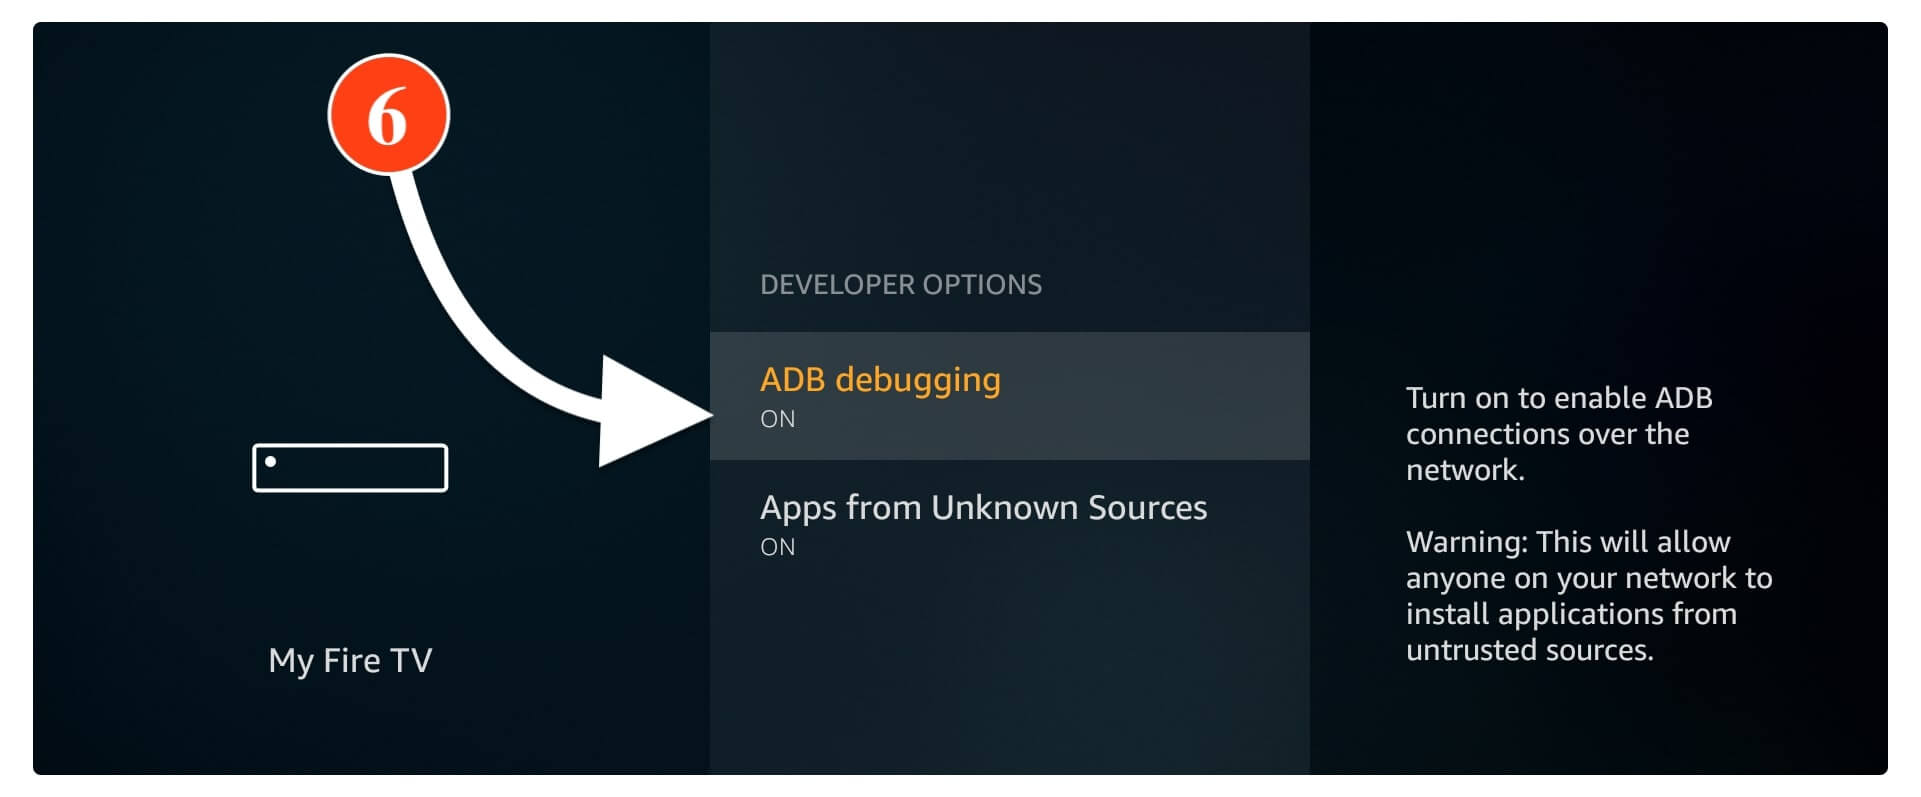
After this simply hover over the ADB Debugging and press the Select button to Enable it as well.
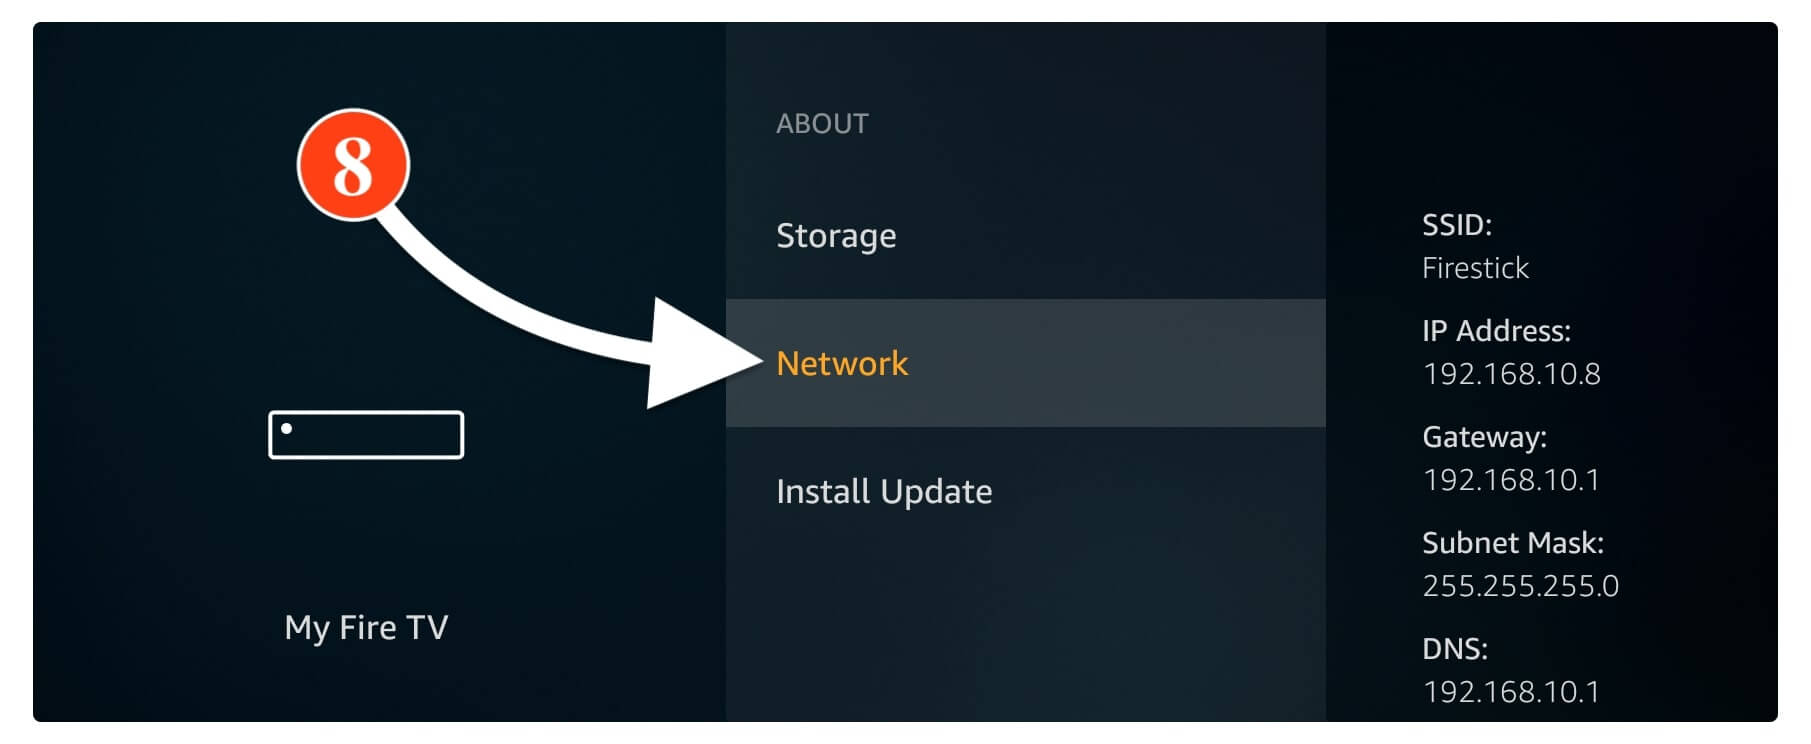
Once these both are enabled then go back to the My Fire TV section and now select About.
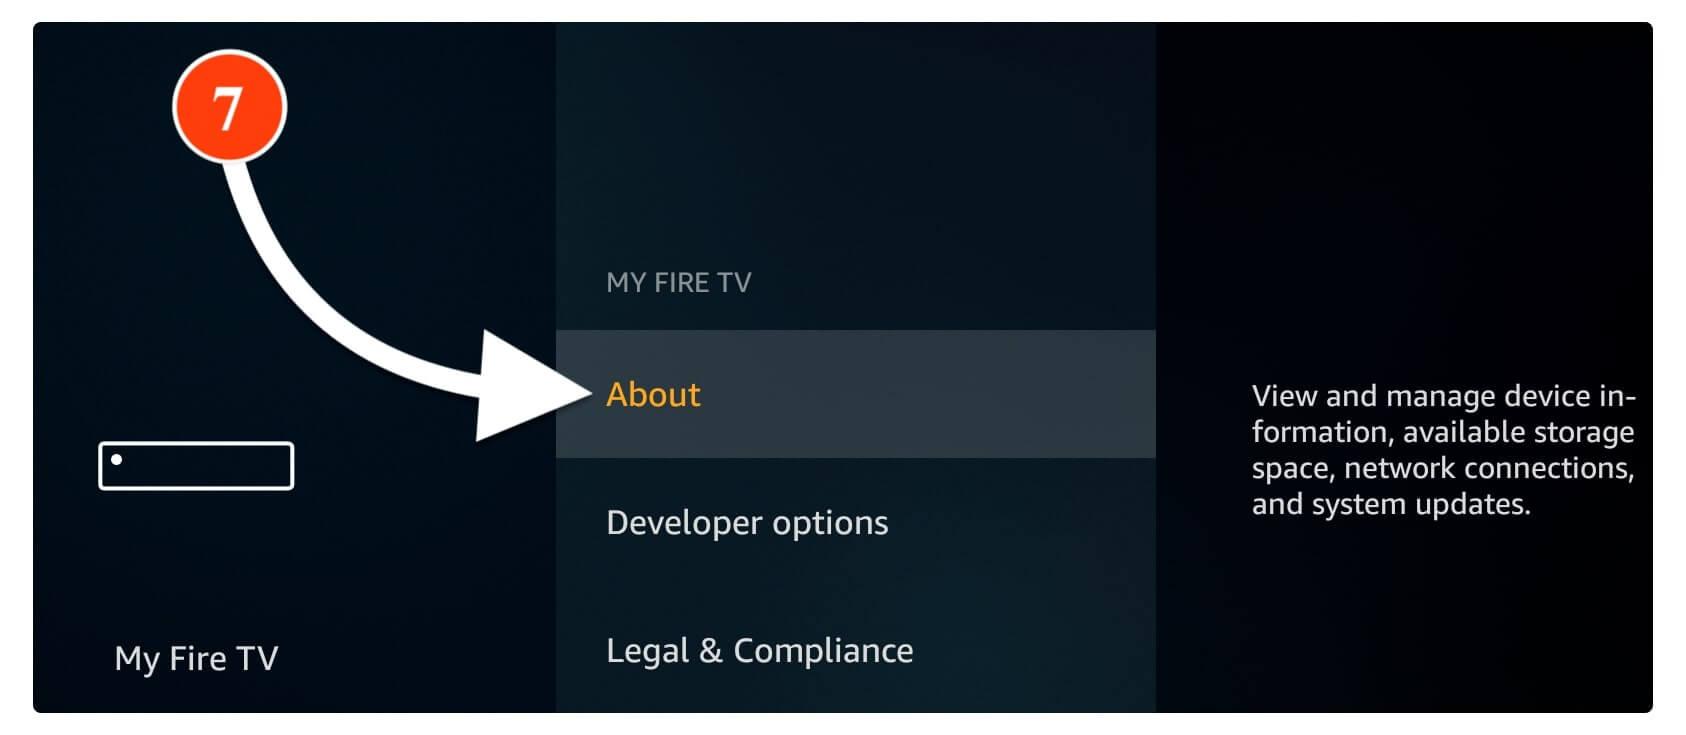
From here scroll down and hover to the Network and from the right side write down your IP Address.
Now the first part of this guide is completed that means we can now move further. So, now we need to download and install the Remote ADB application so we can expand Firestick storage. However, this app is not available on the app store and that’s the reason we enabled Apps from Unknown Source.
As we have enabled Unknown Sources now let’s follow further steps below:
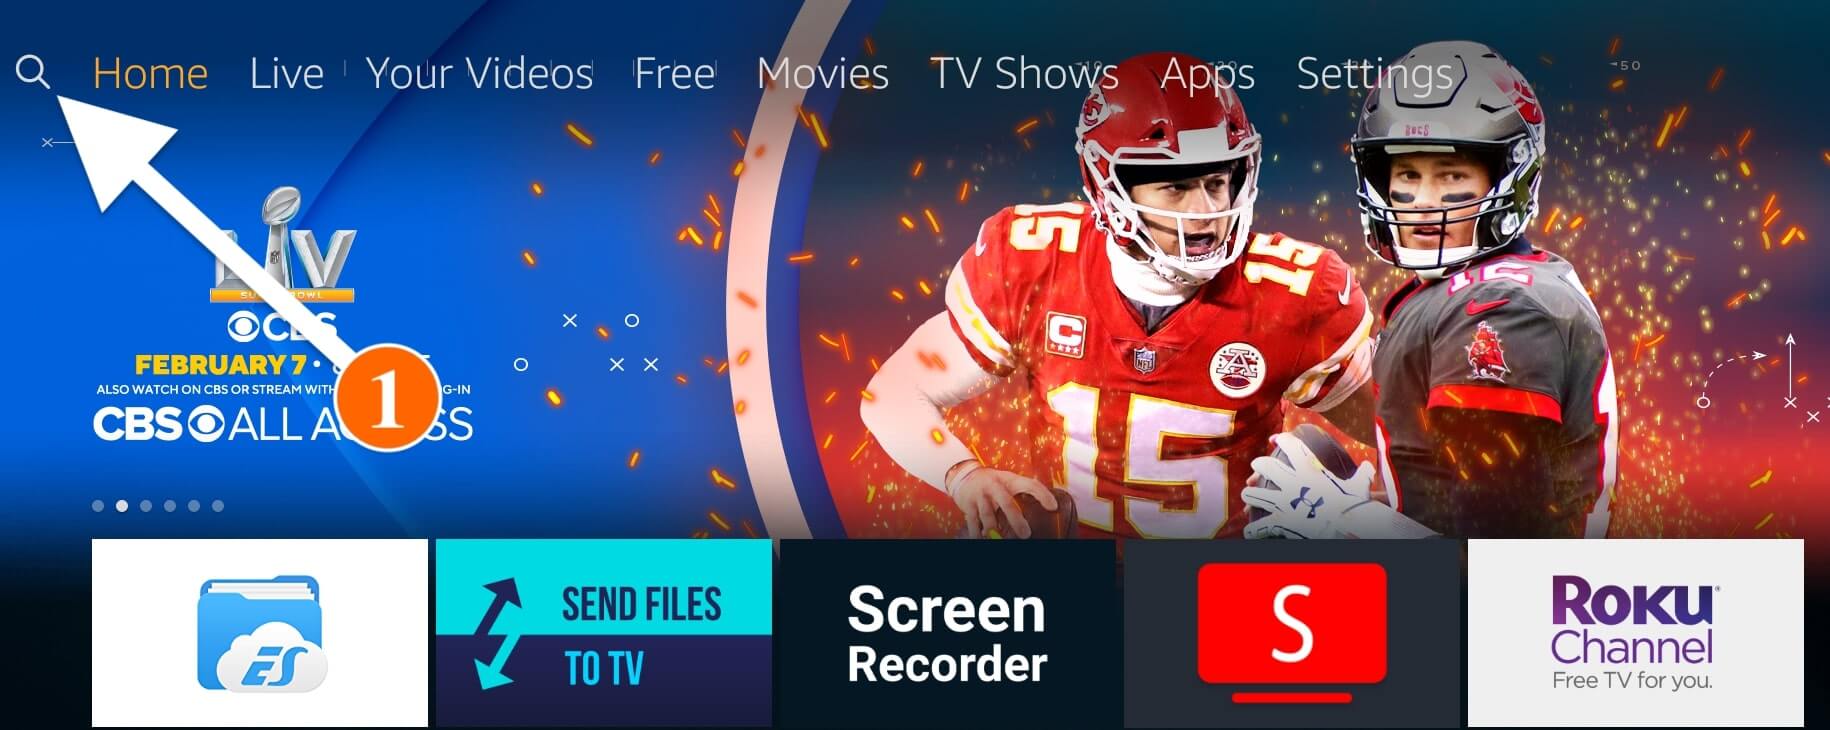
Go back to the Home Screen and from there select the Search icon located at the top menu.
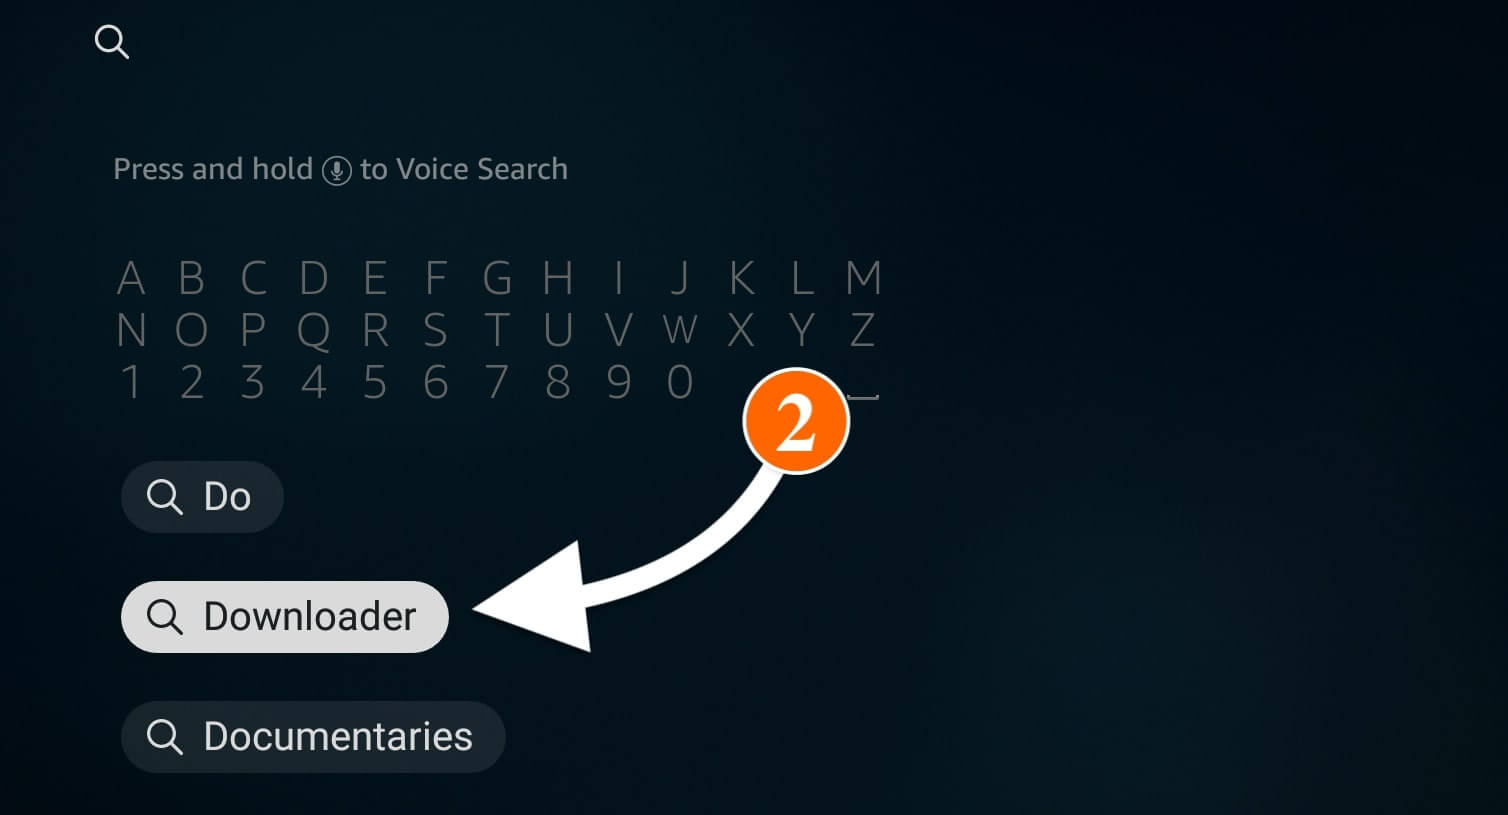
After going there using that keyboard type Downloader and then select the first suggestion from below.
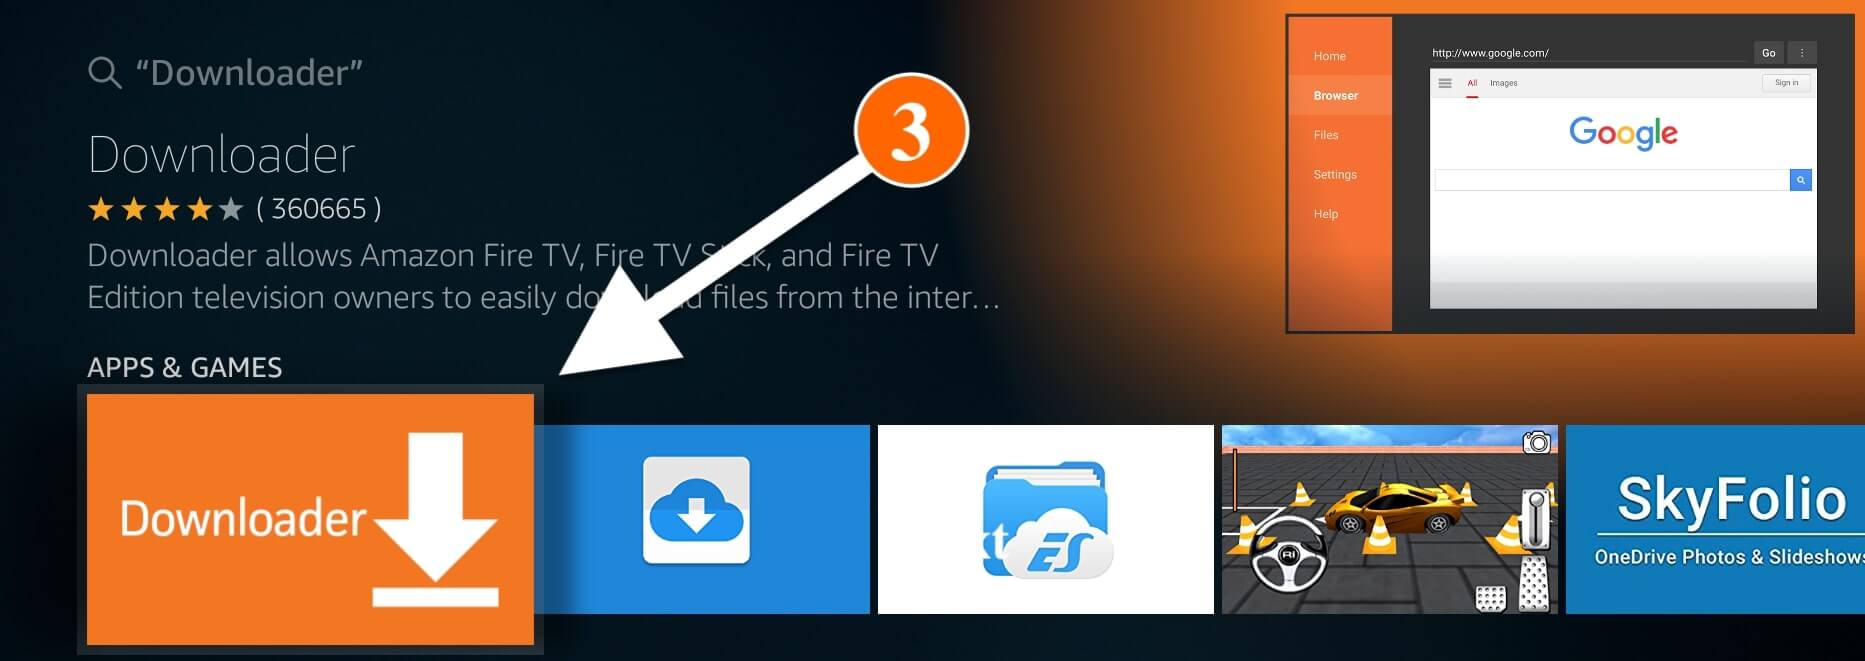
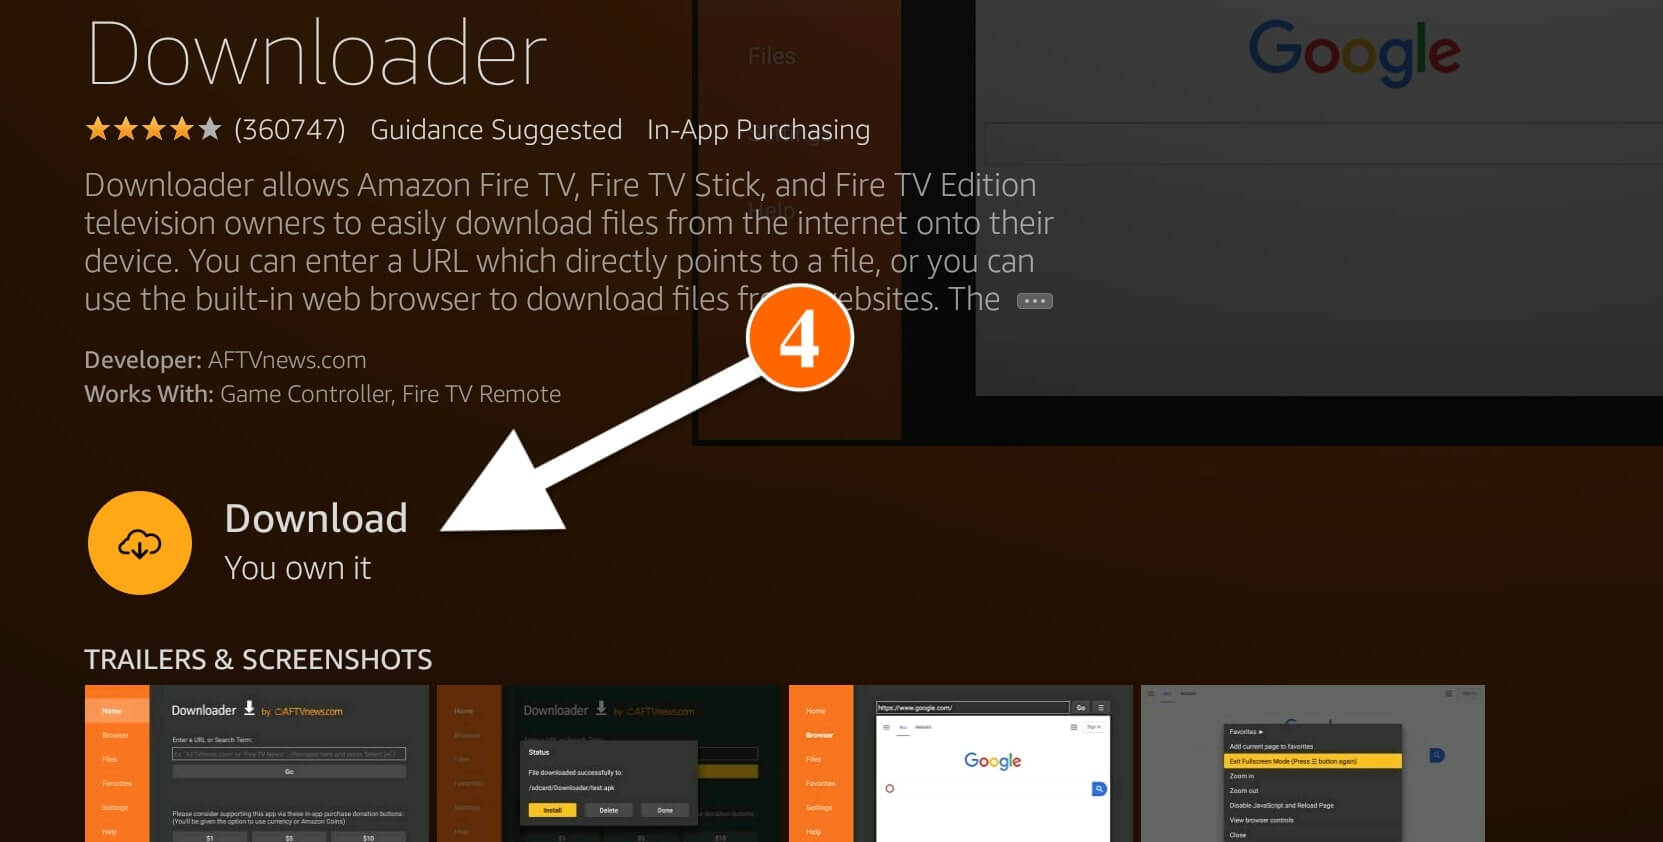
From the next screen, you will see many apps appears related to your search term so select the one with Orange Background (check the screenshot below).
At this time you simply need to click on the Get (Free to Download) button to install the app.
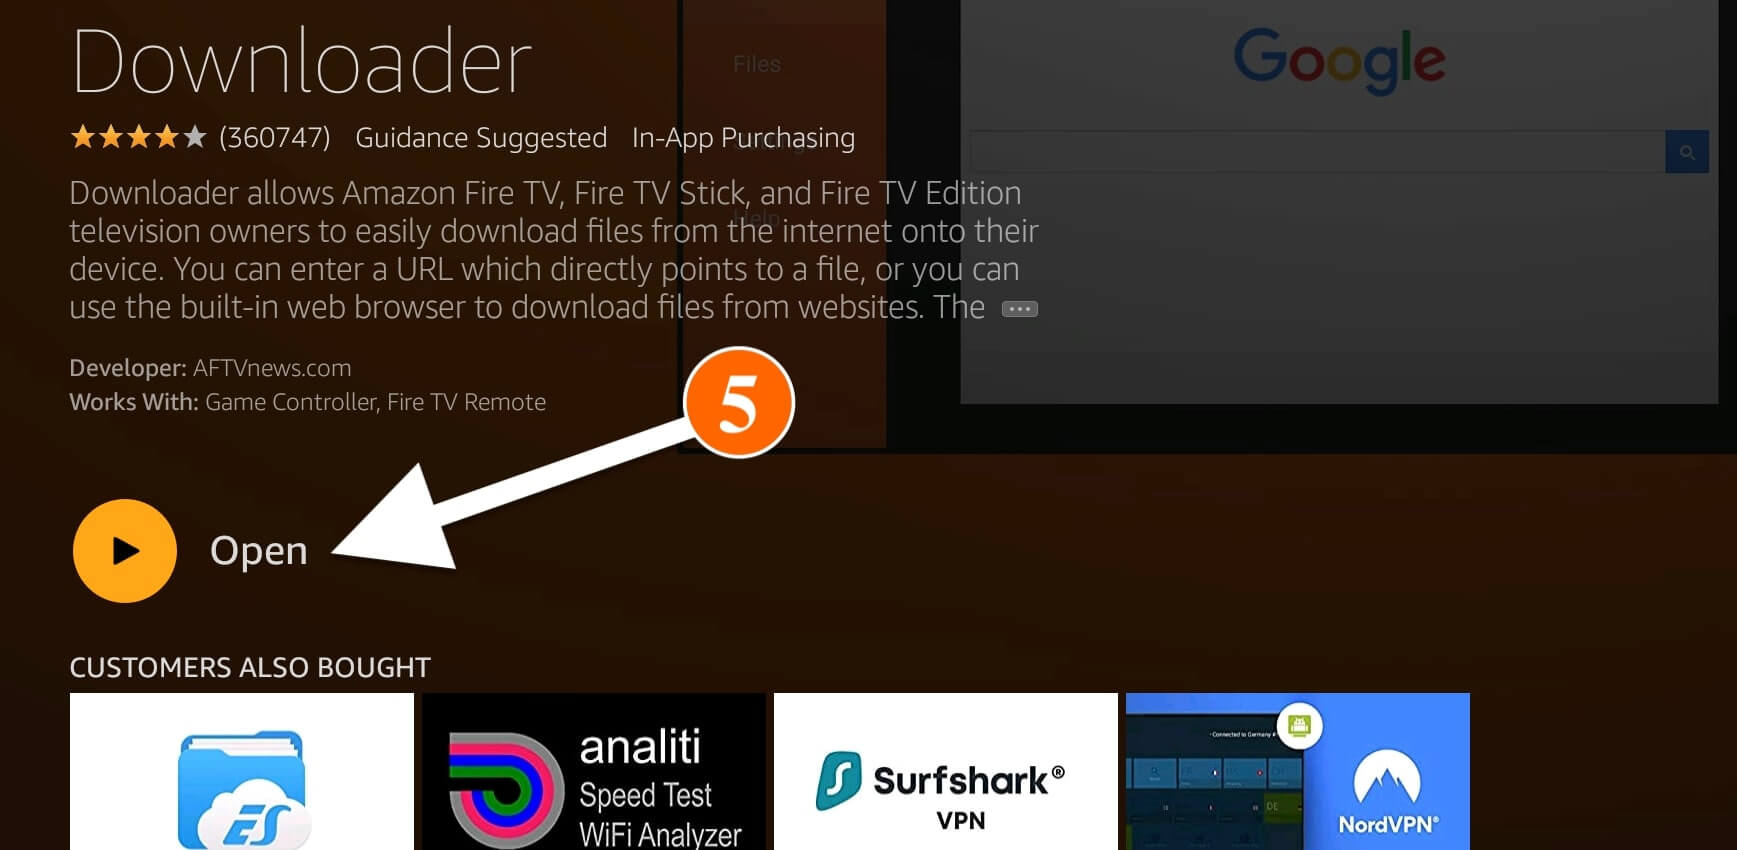
This will take a while and once the app is installed now just select Open to launch Downloader.
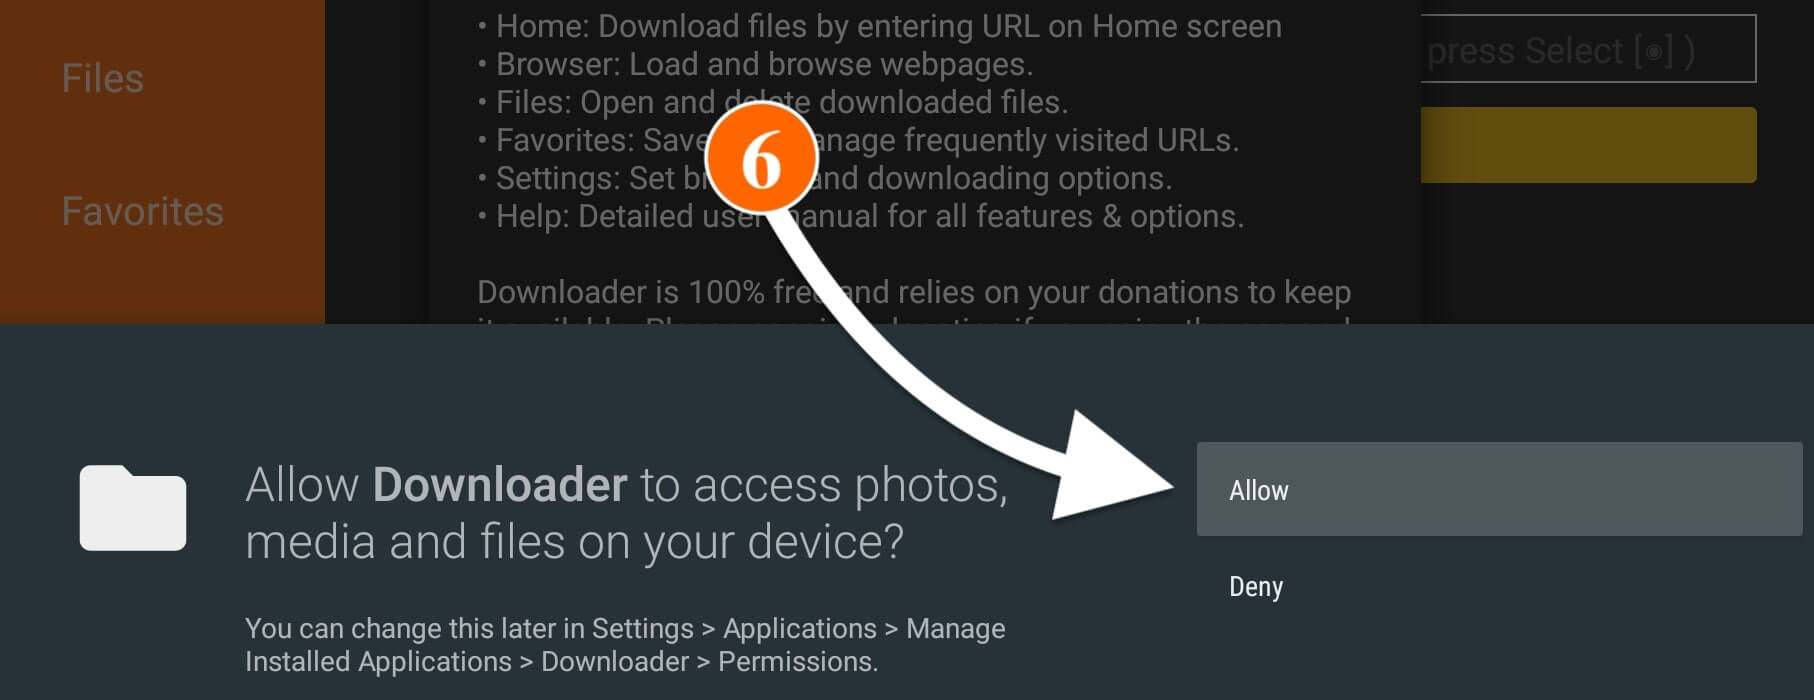
When you launch Downloader for the first time you will be asked permission to access Media, Files and Photos, then simply click on the Allow button.
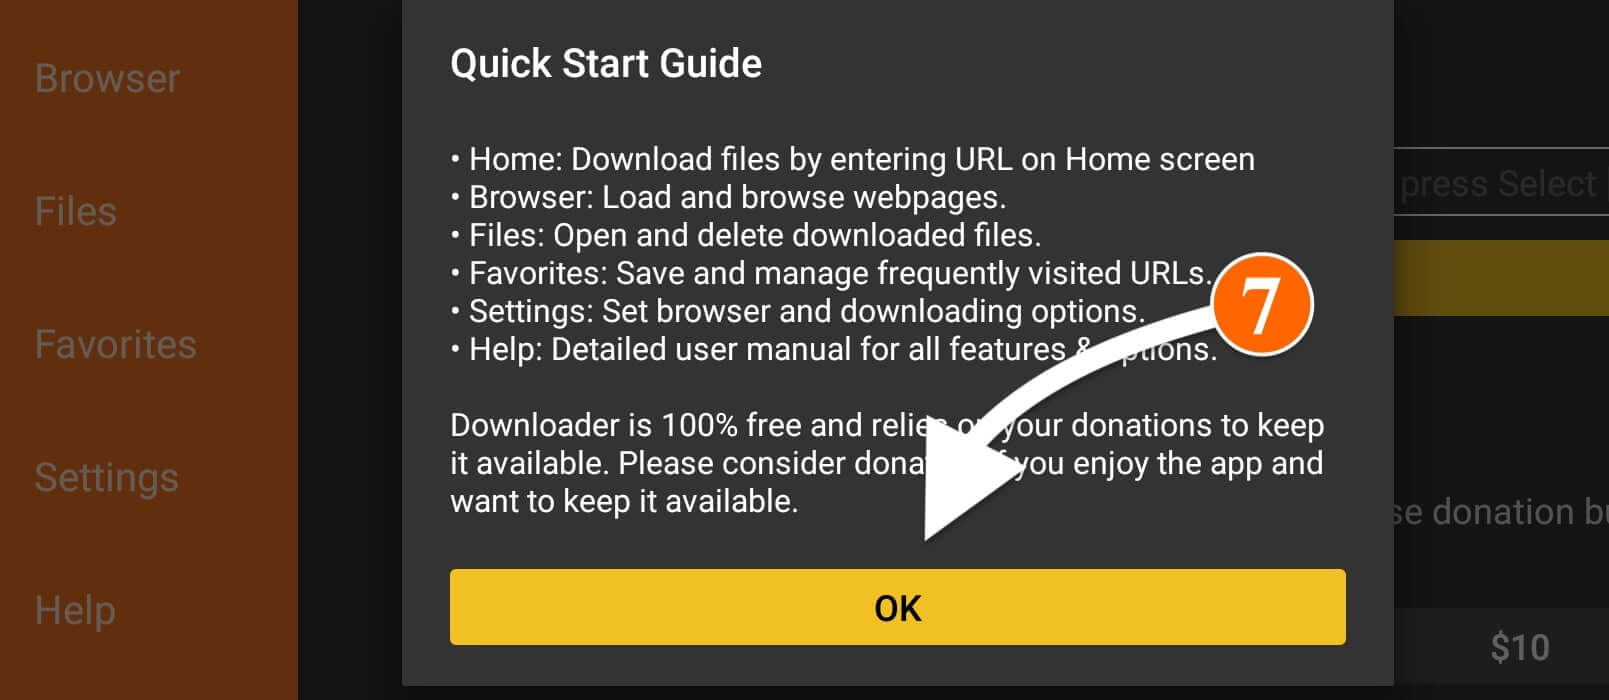
Once the permission is allowed now a notification will appear with Quick Tour Guide just ignore it by clicking on Got it.
This is the home screen of the Downloader app now hover over the small box and then press the Select button to open the keyboard.
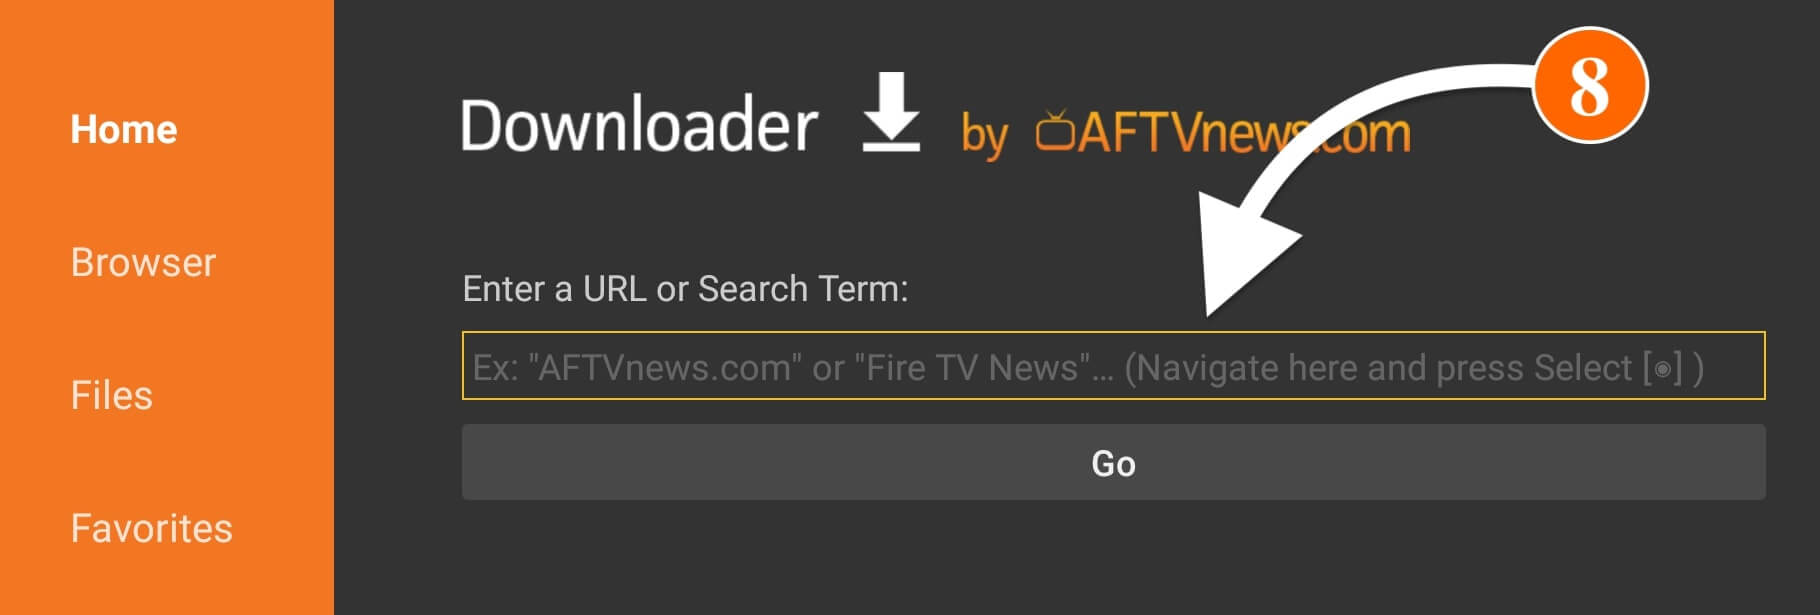
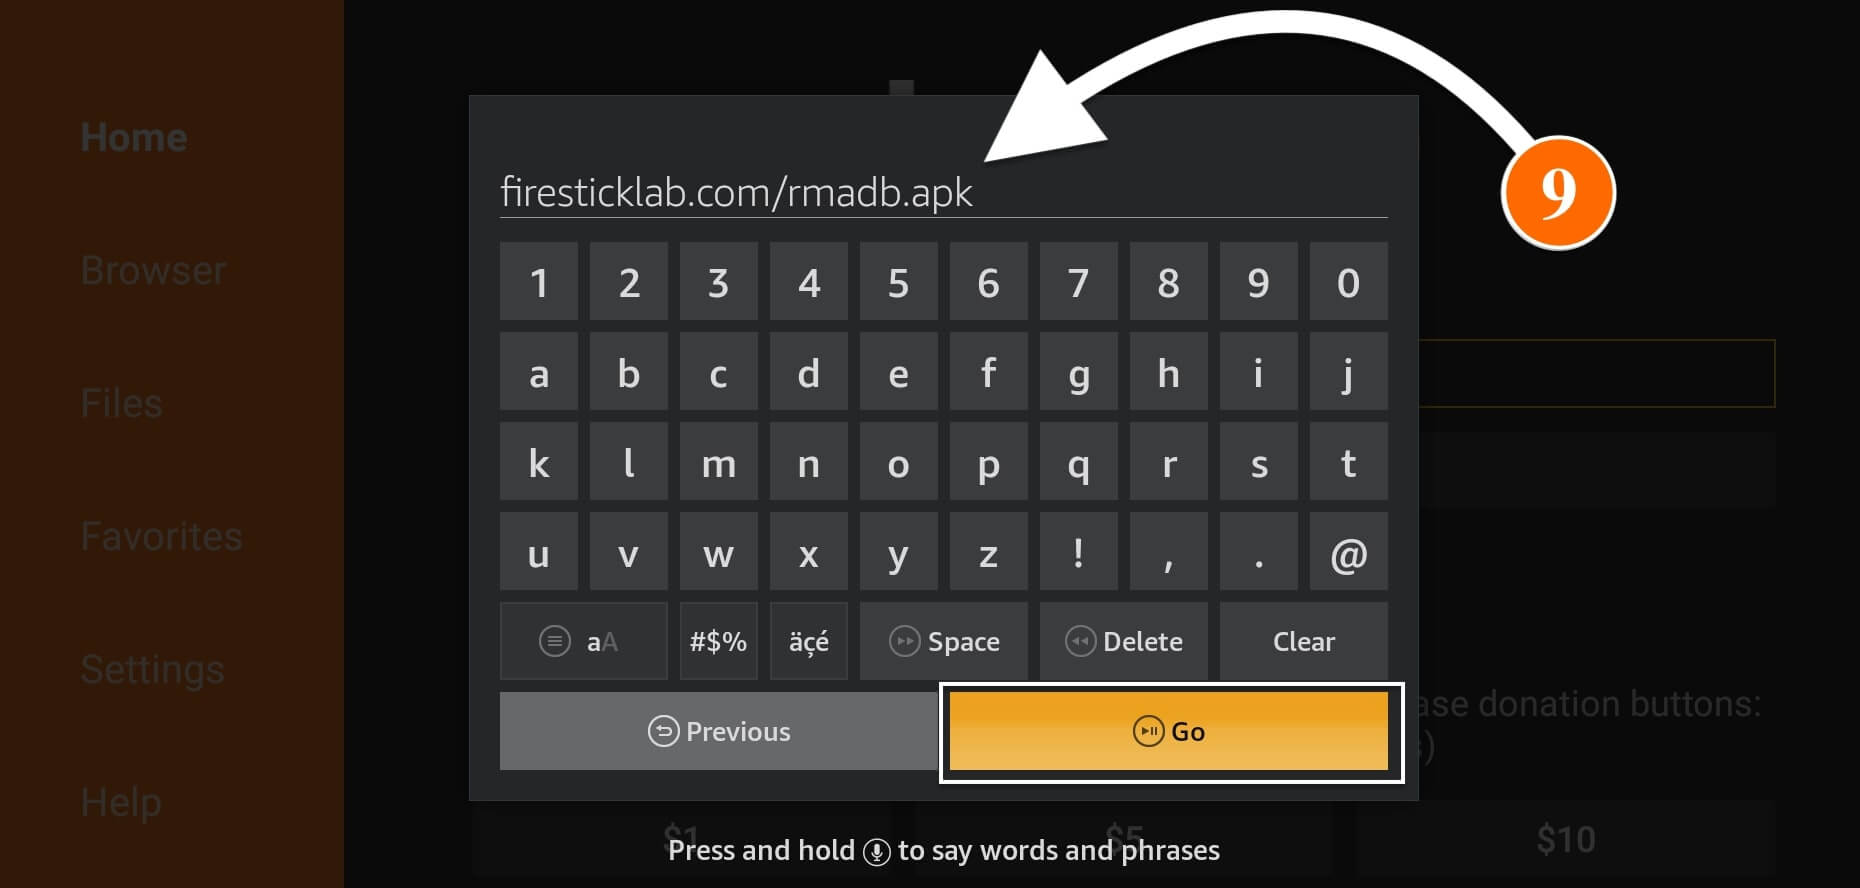
When the keyboard appears use this type https://tvexpertguide.com/rmadb.apk and then hit the Go button.
The app is now downloading and you will see the Status on your screen so wait for a while until it is downloaded.

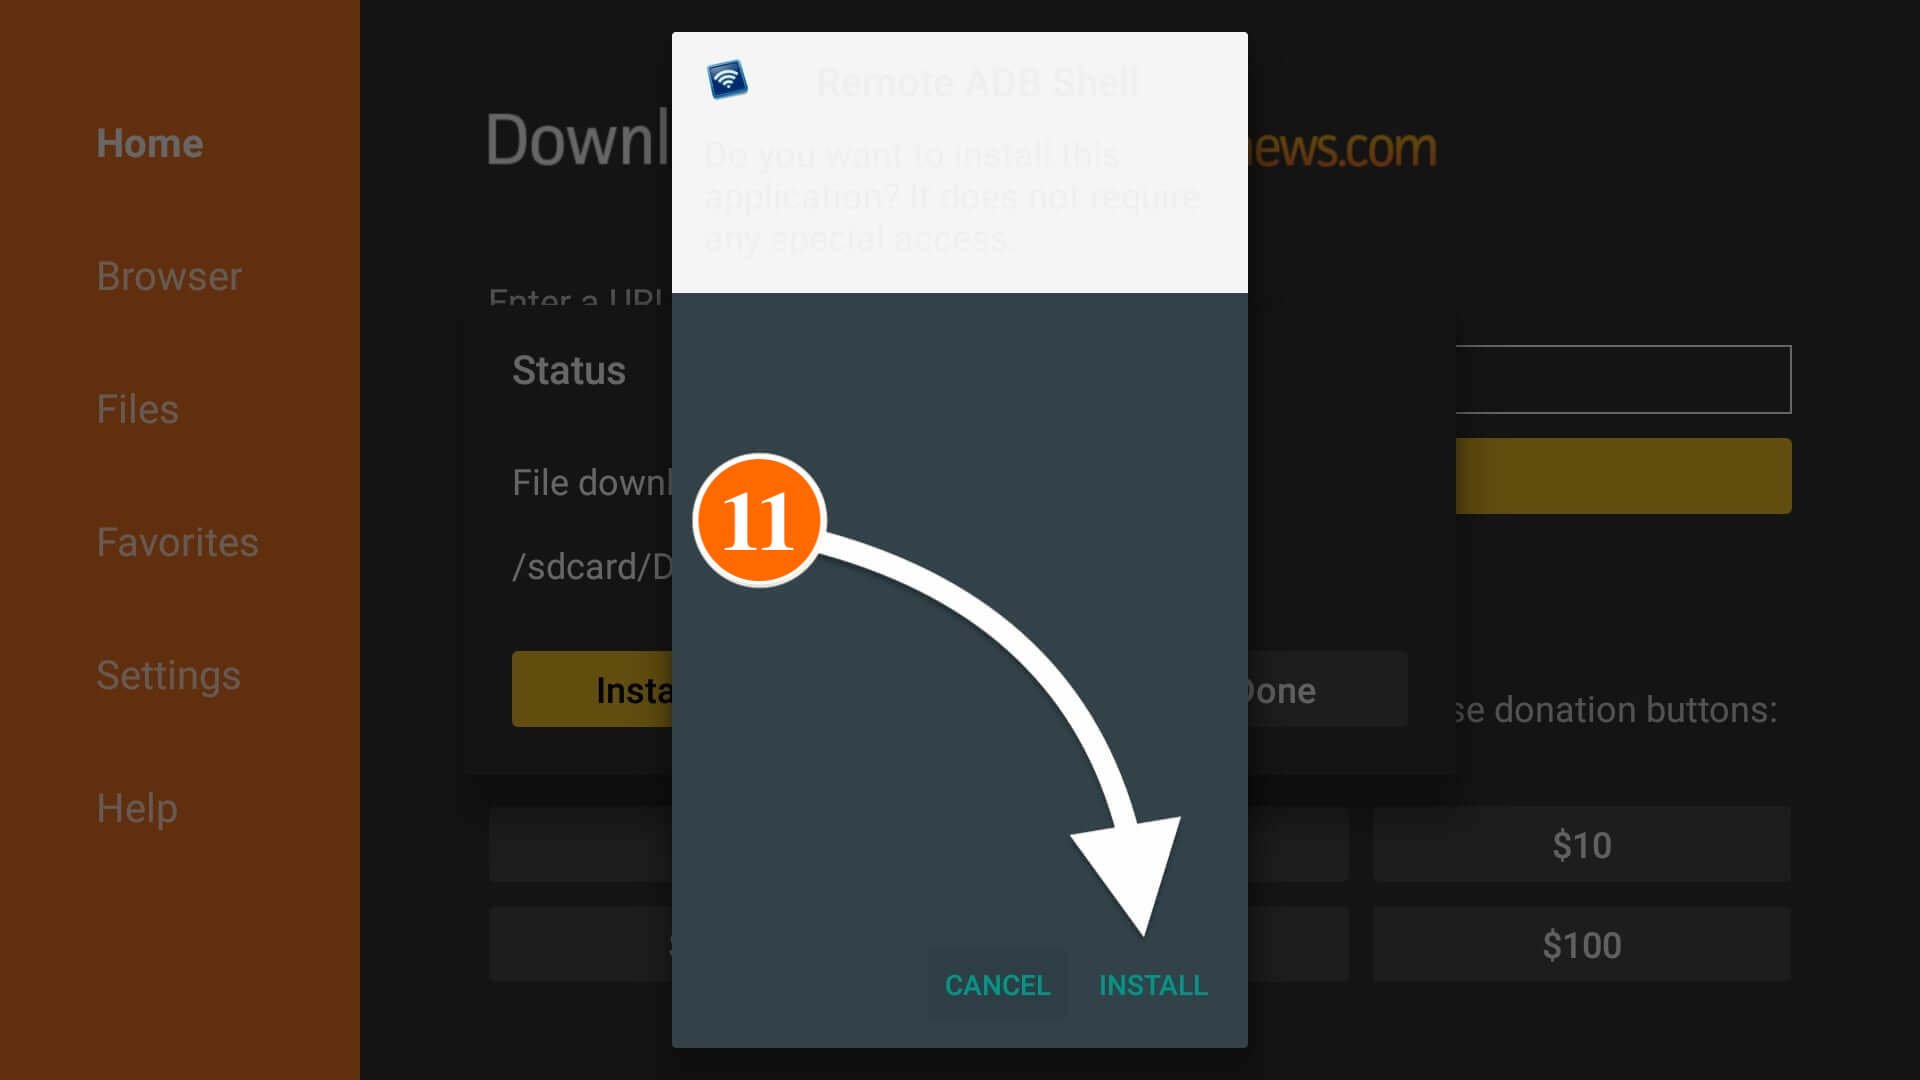
After the app is downloaded you will see the installation window on the screen then simply click on the Install button.
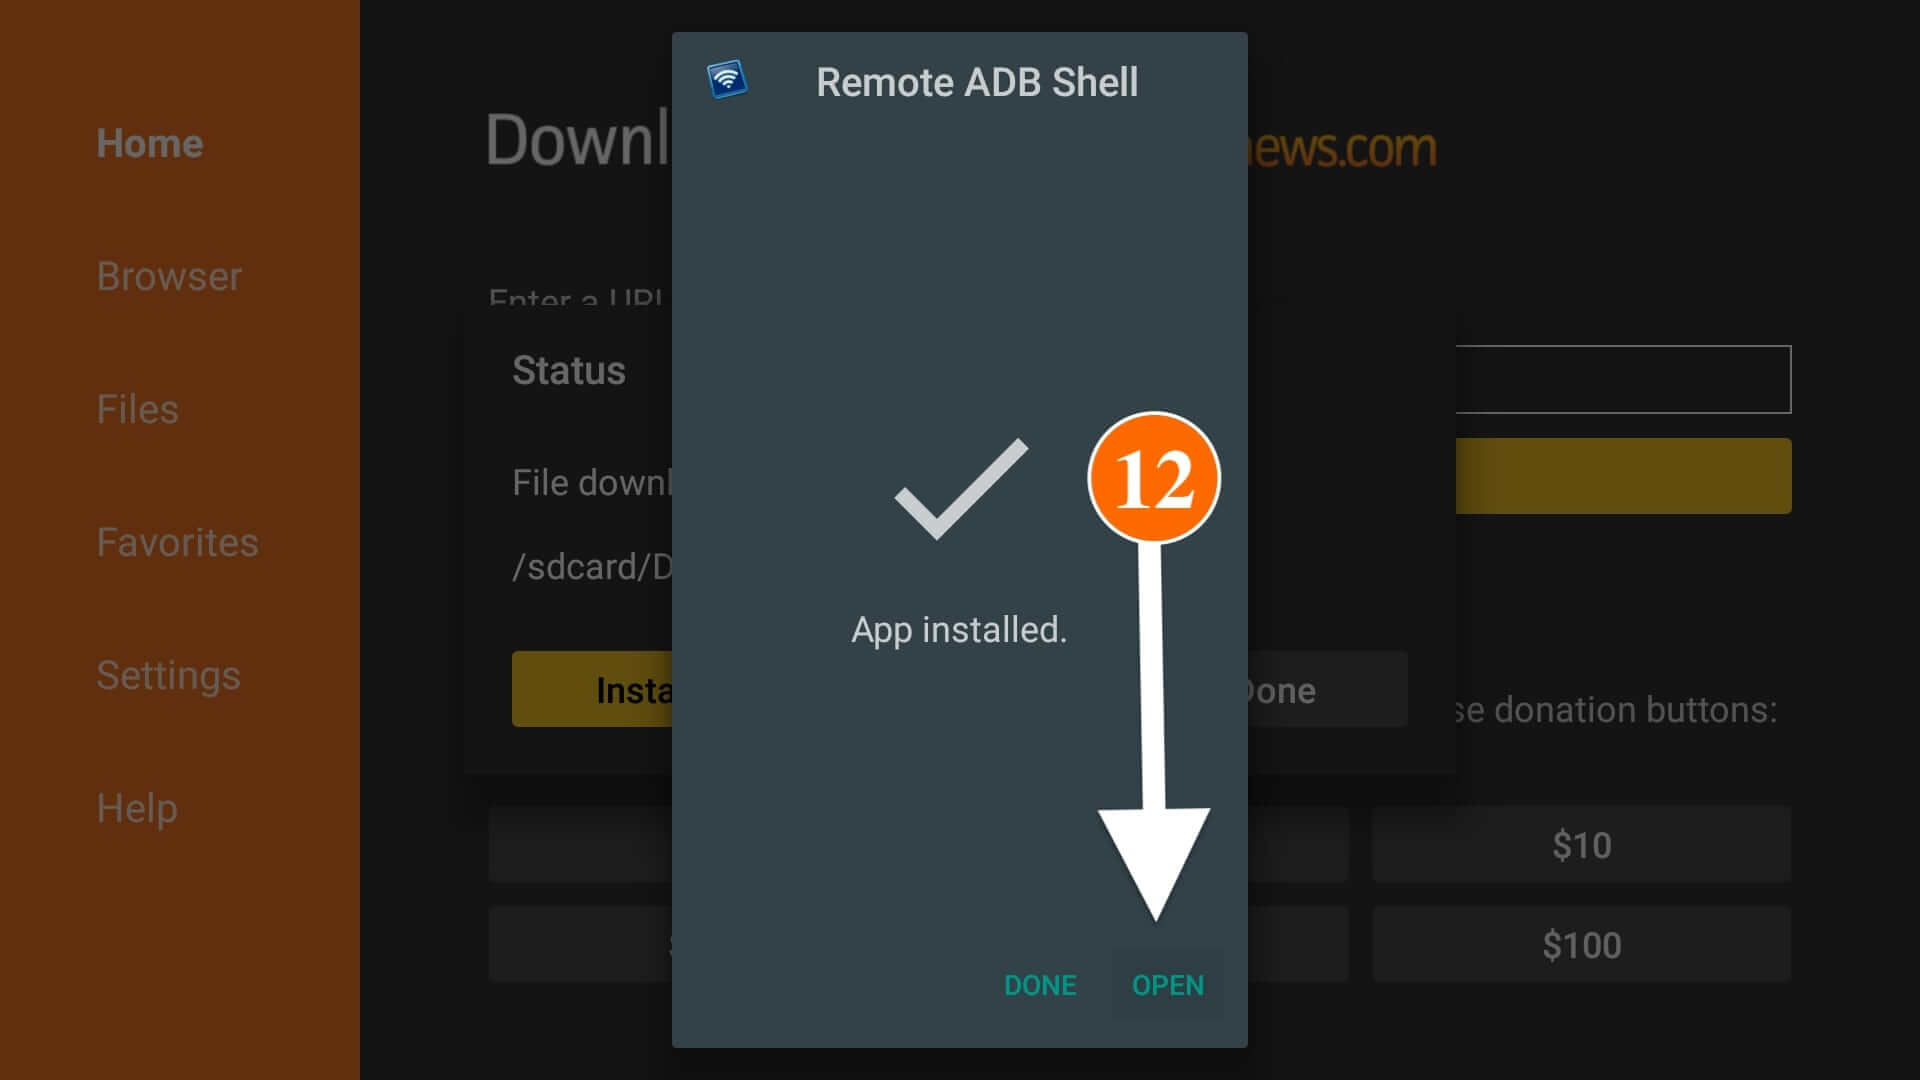
The installation will take only a few seconds to complete and after this just click the Open button to launch it.
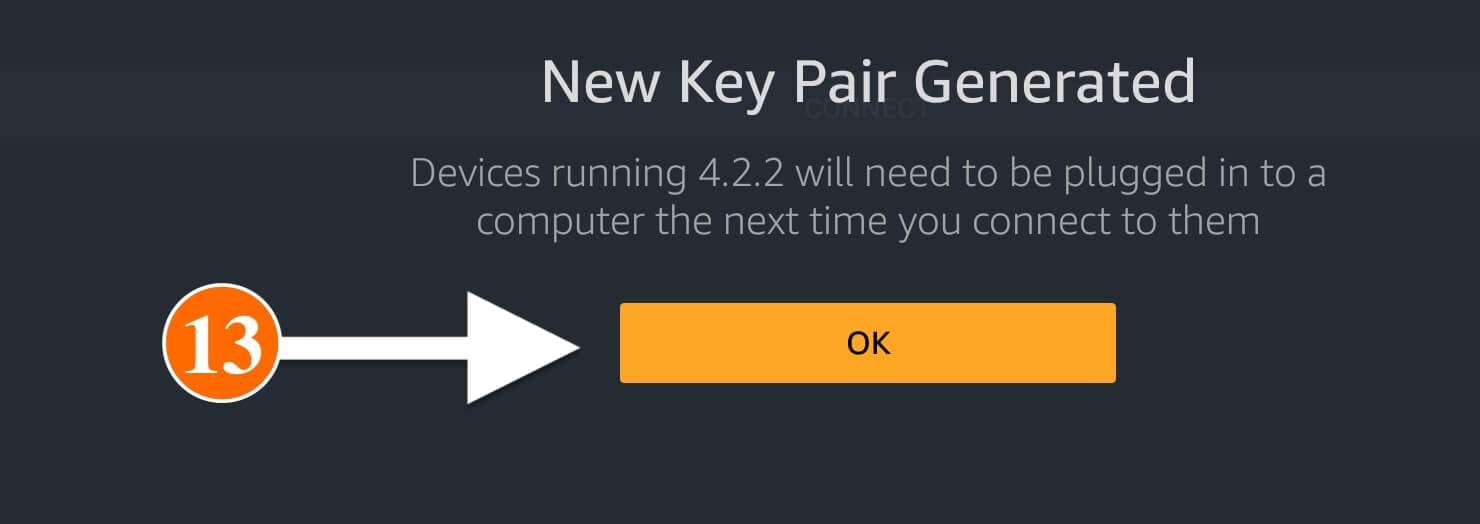
Once the app is launched New Pair Key Generated notification will appear then select Ok.
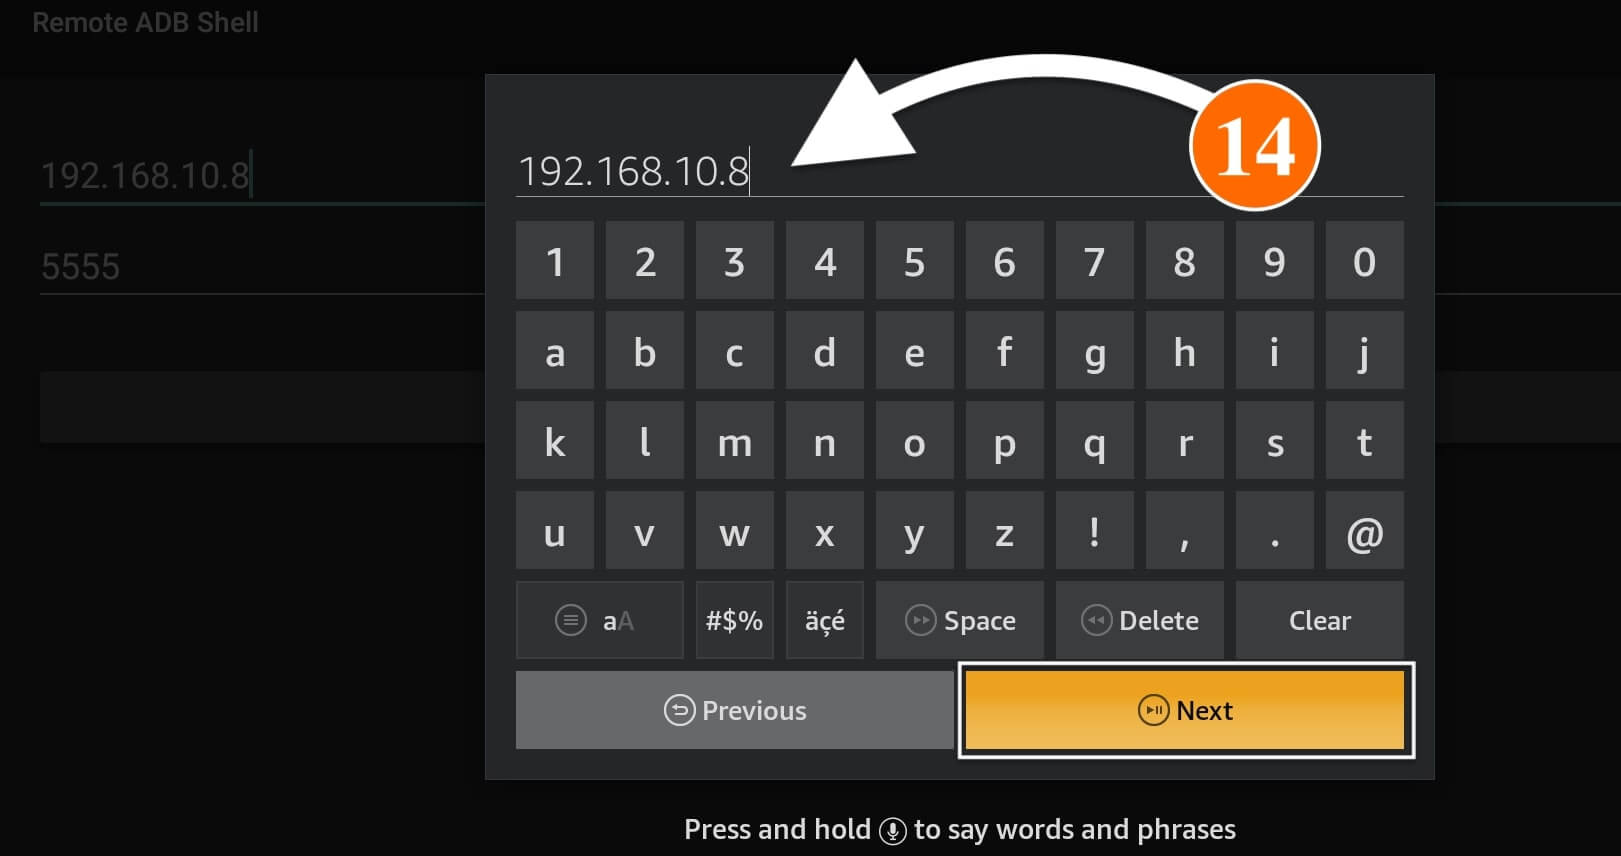
At this time you need to type the IP Address that you copied from the above section (From My Fire TV > About > Network > Note IP Address) and then click Next.
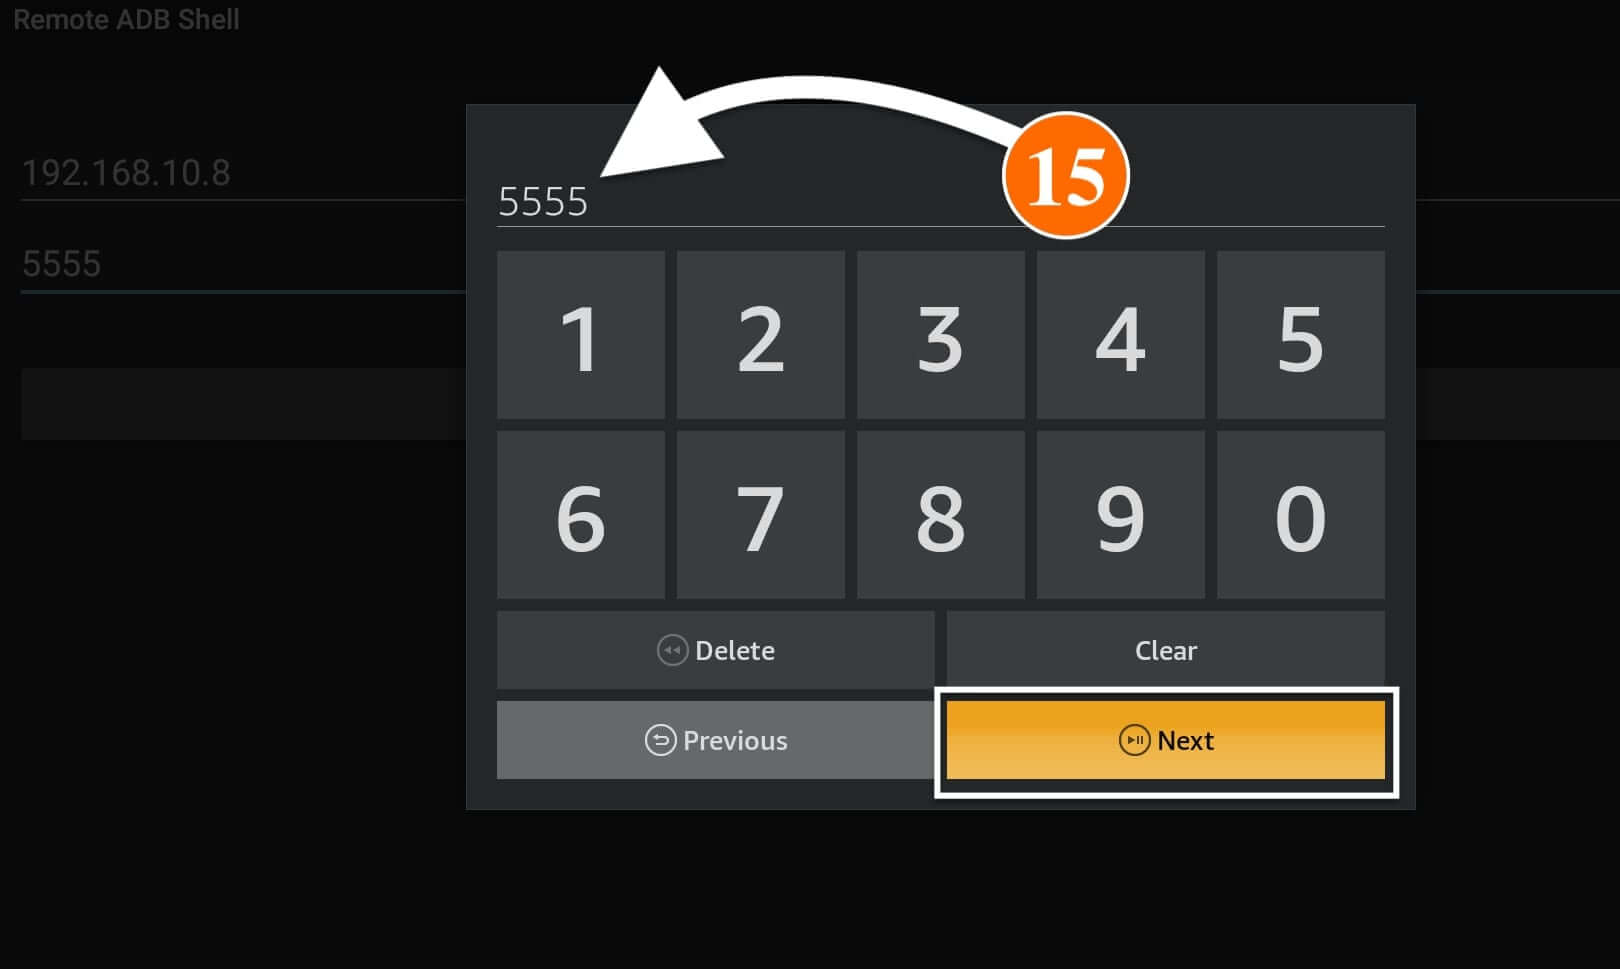
Now leave the box that includes 5555 and simply select Next to continue.
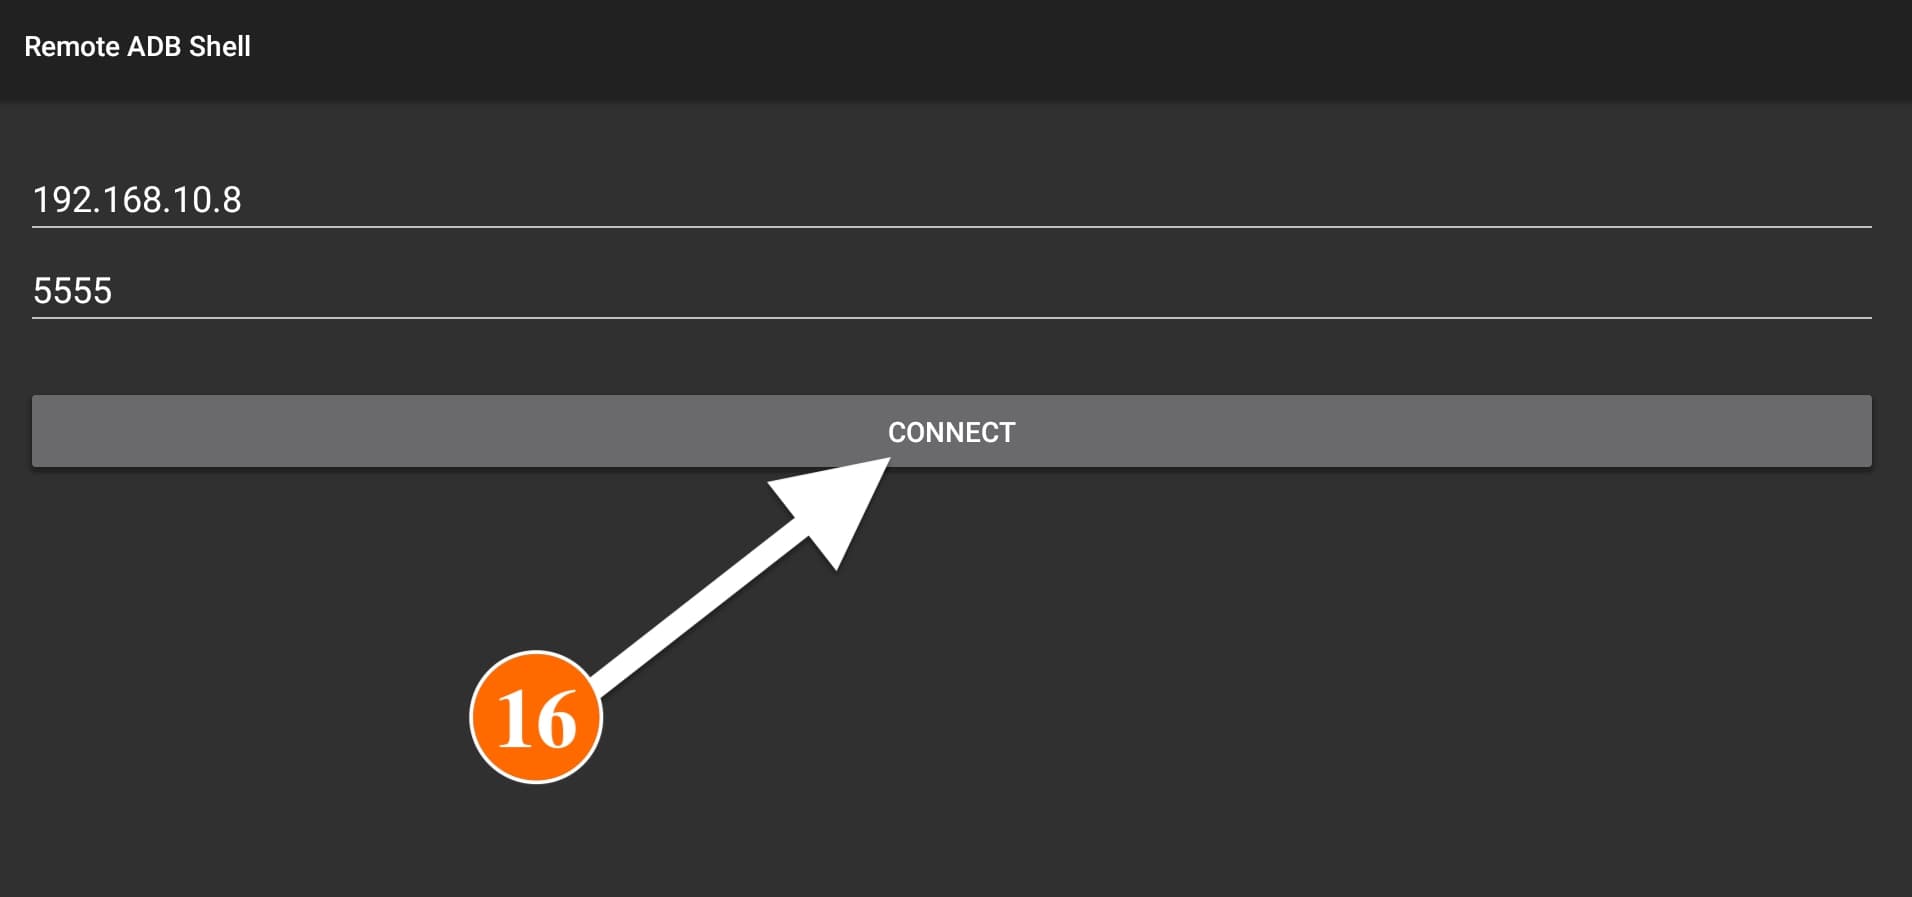
After this, you will see the two boxes with IP and the port now confirm if the IP is the same after this click on the Connect button that appears below.
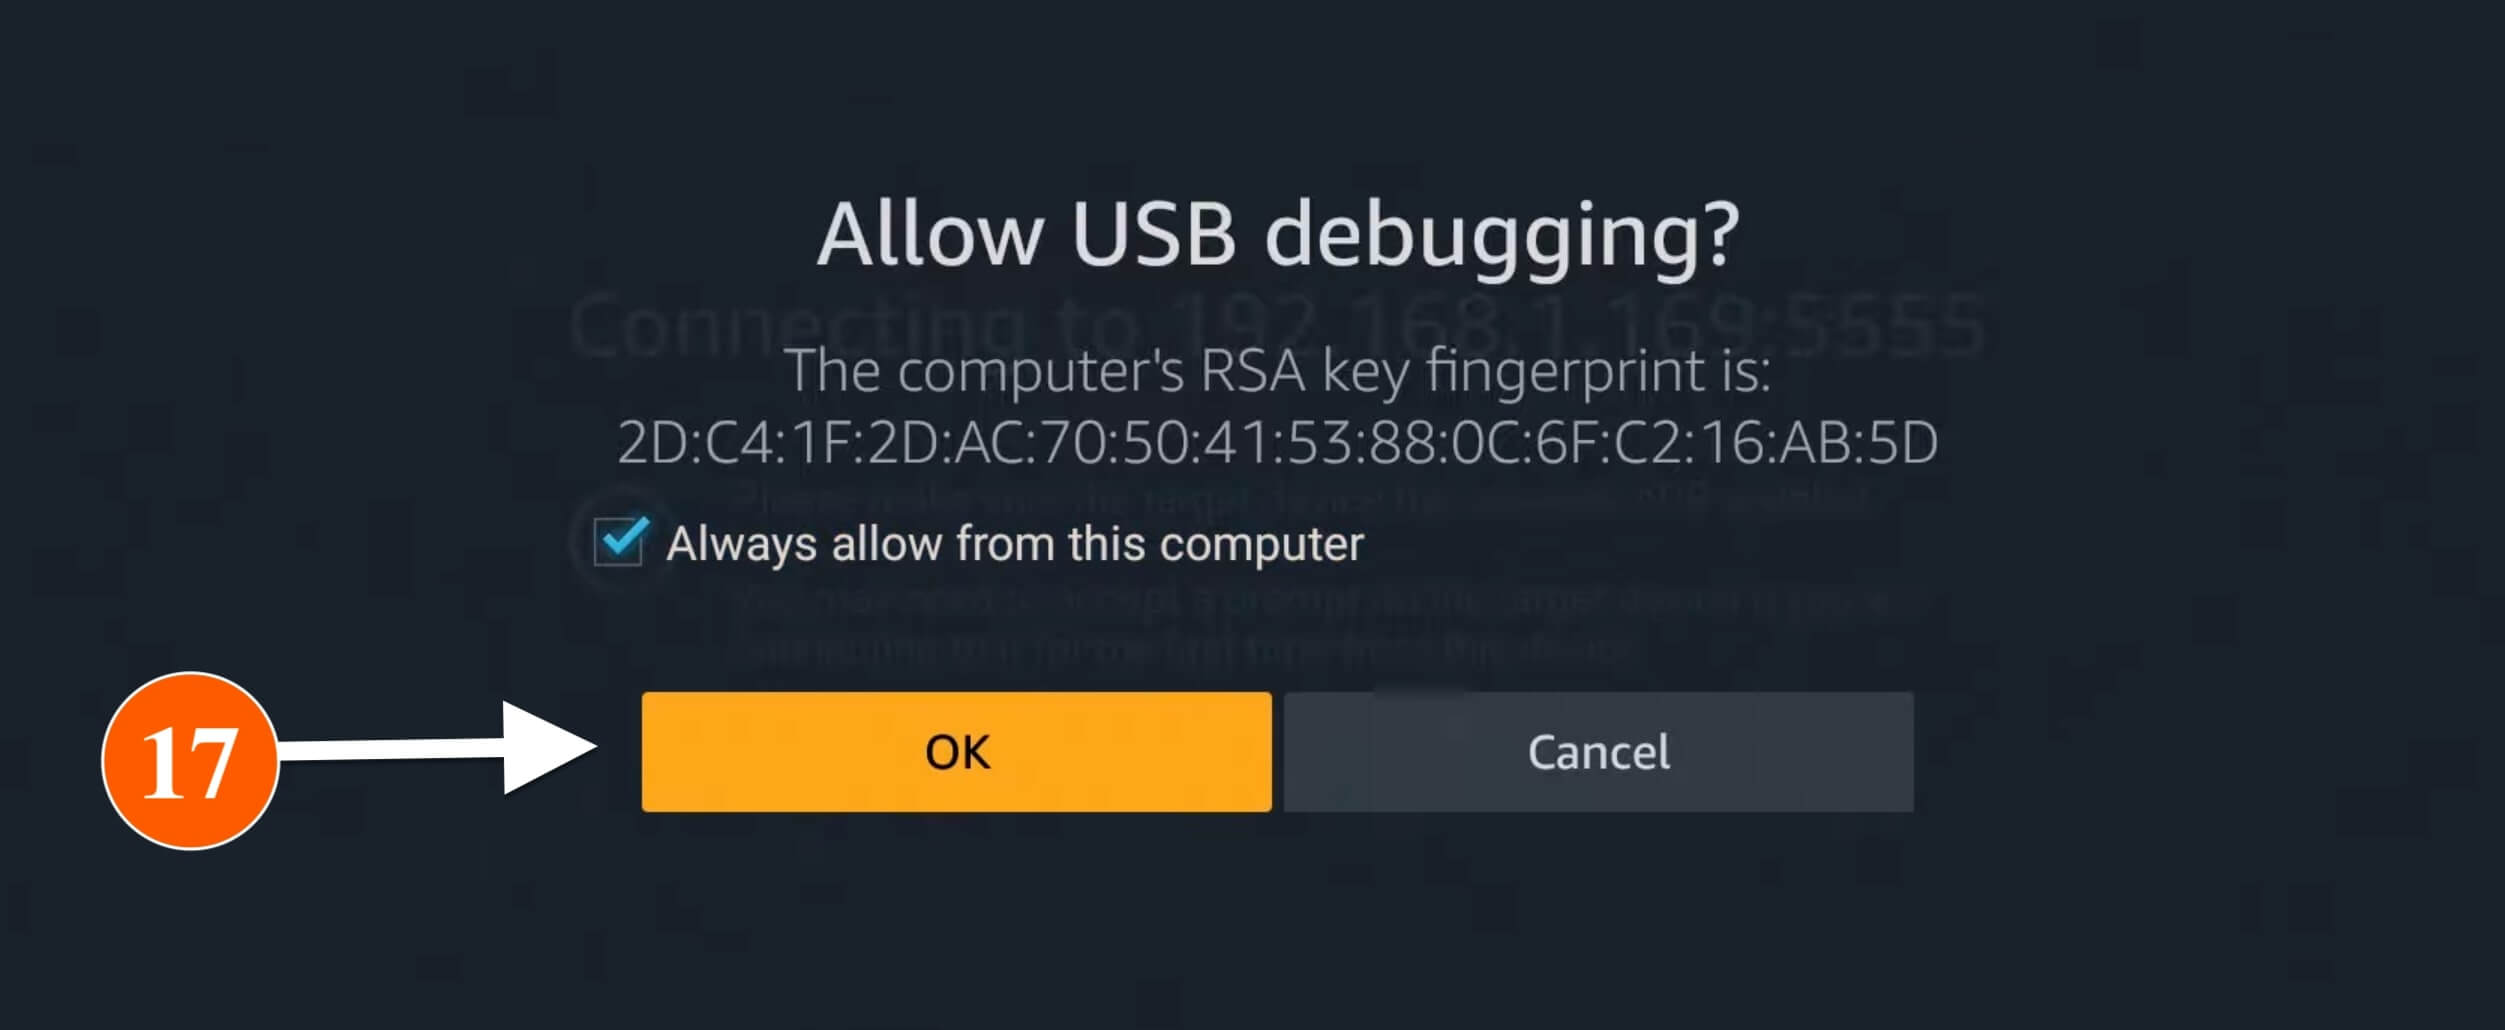
Here you will be asked to, Allow USB Debugging, now check to Allow trust this computer and then select Ok to allow it.
Now you will see the Command Prompt on the screen and then hover to the box and press the Select button to open the keyboard there.
19 Once the keyboard appears you simply need to type this command sm list-disks and select Run.
20 After this it shows the Disk name attached to the device and it is most probably 8,0 but this could be different for you so check what you got near the disk:
Ok, so after getting the disk name now comes the main part of this guide as you have to choose one command from two different commands which are:
sm partition disk:8,0 private > This command is used to format the whole Pendrive and convert it to internal storage which means it cannot be used outside FireTV.
sm partition disk:8,0 mixed 50 > While this command is used to format the whole USB and makes two partitions of it as 1 is used as an internal Storage while the other is used as an External Drive.
I would simply refer you to use the second command because with this you can easily transfer files between your computer to the Firestick. Although please keep in mind that to choose this it split the device into two portions and for this, I would suggest to you drive 64GB or above to get enough free storage.
21 Now depending on your chosen type the command uses the keyboard as I am using sm partition disk:8,0 mixed 50 as I want some external storage as well.
22 When you run the command it shows Unexpected Removal which means the Pendrive is removed which is normally so don’t do anything and wait for a while.
23 After this the Pendrive will be connected automatically you will see the notification there.
Since the device is Pendrive is now formatted and also attached as a drive we can now install and move the apps to the drive. With this, we will get a lot of free storage and will be able to install a lot more applications than before. It will also help you to download and install Add-on on Kodi, help you download large Kodi Builds and so on.
However, if you want to make sure the drive is working properly and check the free storage then don’t worry you can simply keep following this article.
1 So, for this launch the Remote ADB Shell app and then, use the keyboard type of -h and hit Run.
2 Now from here you can check everything related to the Storage like how much Free Storage you have left and the total partition as well.
In the above screenshot, you will notice two /dev/fuse terms there:
- The first term shows the internal storage of Firestick that came along with the device.
- While the second /dev/fuse refers to the Expanded Storage that we used through Pendrive.
- On the other hand, dev/block/dm-2 refers to the partition space left for installing apps.
Conclusion
With the help of the above guide, I simply provide my users with simple instructions on how to Expand Firestick Storage. The guide seems simple but it is complicated at the same time so make sure you have followed all the instructions carefully. It is because if you miss anything or typed the wrong command then you might end up damaging the device.
This is the reason why I provided screenshots along with each step so my visitors don’t face any sort of trouble with it. However in case you still are facing any problems then please let me know in the comment section below. I would try my best to help to solve that problem or answer the question that you are asking.
Despite this please don’t forget to share this amazing information with others so they can also increase the internal storage of their device. Furthermore, if you have followed all the steps there then let me know your experience here which will also help others to understand the guide is working.